How to Unclog a Kitchen Sink in 10 Steps
A clogged kitchen sink can bring your whole routine to a stop, especially when dirty water refuses to drain. You’re not alone—many people struggle with stubborn buildup, trapped food, and slow drains.
Learning how to unclog a kitchen sink can help you handle the problem quickly and avoid unnecessary plumbing costs. The following 10 steps walk you through simple methods, from basic cleaning to using a hand auger.
To unclog a kitchen sink in 10 steps, remove standing water, unplug nearby appliances, and clear debris from the drain. Scrub the strainer, pour in boiling water, then add dish soap and more hot water.
Seal the overflow and plunge firmly. If needed, use a hand auger, then remove and clean the drain trap. Reassemble it, flush the drain, and check for leaks.
Avoid chemical cleaners, and call a plumber for recurring clogs. The following steps explain each method.
Key Takeaways
- Remove standing water, clear visible debris, and clean the drain opening, strainer, and stopper.
- Add dish soap, pour hot water slowly, and wait 10–15 minutes to loosen grease.
- Seal the overflow, then use a cup plunger with firm, steady strokes.
- For stubborn clogs, remove the stopper and gently work a hand auger through the drain.
- Flush thoroughly, check connections for leaks, and call a plumber if clogs repeatedly return.
Remove Standing Water Safely

Before unclogging the sink, remove standing water with a cup or small bucket and pour it into a drain that’s working properly. Work slowly to prevent splashes, especially if the water looks cloudy or contains food residue.
Remove standing water slowly with a cup or bucket, pouring it into a working drain to prevent splashes.
Wear rubber gloves to protect your hands, and keep your face away from the basin while you transfer the water. For better Kitchen safety, move nearby appliances, unplug anything close to the sink, and wipe wet counters promptly.
Don’t mix standing water with bleach, drain cleaner, or other chemicals; unknown residues could create harmful fumes. If you suspect chemical exposure, stop and contact poison control for guidance.
Use reusable tools and pour the water carefully to support Eco friendly cleaning. Keep children and pets away from the work area until the floor and counter are dry.
Once the basin is mostly empty, set your cup or bucket aside, rinse it thoroughly, and wash your gloves before continuing with the next unclogging step.
Clear Debris From the Kitchen Sink Drain
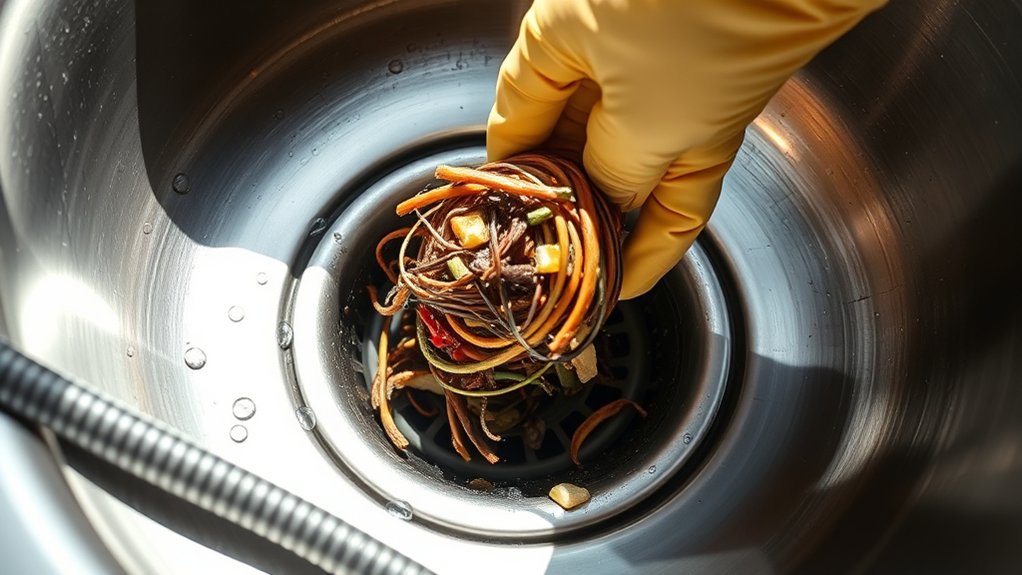
Remove any visible food, grease, or other debris from the drain opening. Then wipe the area clean so you can inspect it more easily. This may restore proper water flow before you try other methods.
Remove Visible Debris
Start by removing any visible food scraps, grease clumps, or other debris from the sink strainer and drain opening. Put on rubber gloves, then lift out the strainer if your sink has one.
Use a paper towel, spoon, or disposable tool to gather loose material rather than pushing it farther into the pipe. Place the debris in the trash, not down another drain.
If standing water covers the opening, scoop it into a bucket first so you can see what you’re handling. Work carefully around sharp scraps, broken glass, or metal pieces, and use tongs for anything risky.
This simple step supports good Kitchen organization and helps prevent future blockages through regular plumbing maintenance. Once you’ve removed the obvious buildup, set the debris aside for disposal and prepare for the next step.
Clean the Drain Opening
With the visible debris removed, scrub the drain opening and underside of the strainer with a stiff brush and warm, soapy water. Use an old toothbrush to reach the narrow rim, threads, and grooves where grease and food particles collect.
Lift out the drain stopper, if present, and clean it separately before wiping the surrounding flange. Rinse each part with hot water, then inspect the opening for remaining buildup.
If you see hardened residue, loosen it gently with a plastic scraper. Don’t use a sharp tool that could damage the seal.
Wipe the area dry with a clean cloth, checking that water flows freely through the opening. Also inspect the Sink vent beneath the cabinet for leaks or loose connections before reassembling the stopper and strainer securely.
Flush the Drain With Boiling Water
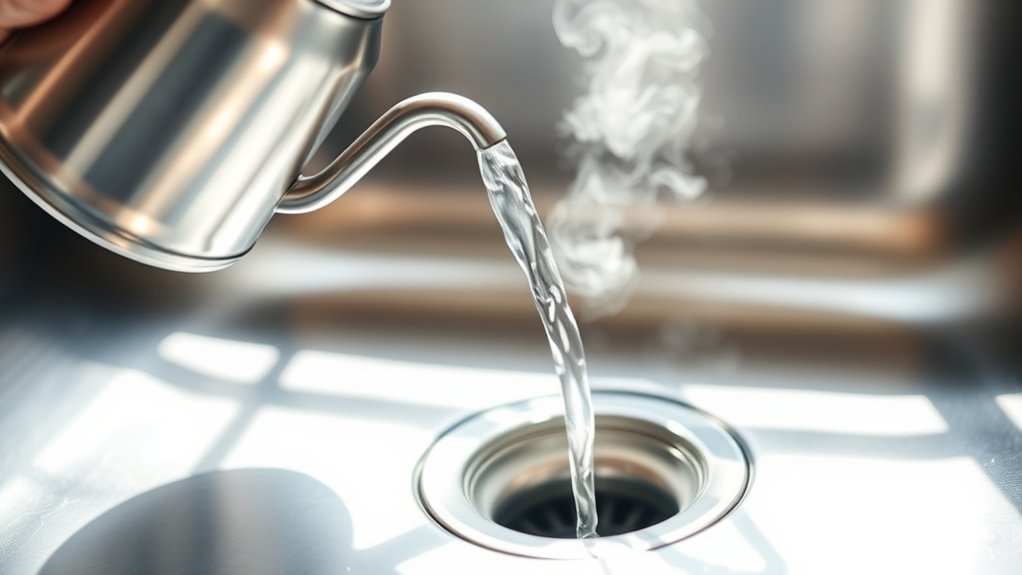
Once you’ve removed standing water, slowly pour a kettle of boiling water directly into the drain to dissolve grease and loosen minor clogs. Pour steadily rather than all at once, and keep your hands and face away from rising steam.
Slowly pour boiling water into the drain to dissolve grease and loosen minor clogs, keeping away from rising steam.
Let the hot water work for several minutes, then check whether the sink drains more freely.
Picture the process:
- A clean kettle filled to the safe limit
- A steady stream disappearing into the drain
- Steam rising briefly above the opening
- Water swirling faster as the blockage loosens
- A fresh drain with less odor
Repeat the flush once if the water remains slow, but stop if the sink backs up or the blockage doesn’t improve.
Boiling water works best on minor buildup, not solid objects or deep obstructions. If you have plastic pipes, use very hot water instead of a full boil to reduce stress and possible pipe corrosion.
Never combine this method with chemical drain cleaners, which can create dangerous fumes or splashes.
Loosen Grease With Dish Soap
If grease is slowing the drain, squirt a few tablespoons of dish soap into the opening and follow it with very hot water. Let the mixture sit for 10 to 15 minutes, giving the soap time to break down oily residue inside the pipe. Then run more hot water for several minutes to carry loosened grease away.
For stubborn buildup, repeat this process once or twice. You can also apply dish soap directly to the drain opening before adding hot water, ensuring it coats the greasy area.
This method works best when you address small blockages early, before grease combines with food particles and hardens.
Dish soap effectiveness depends on using enough soap, sufficient heat, and adequate contact time. These grease-loosening techniques can help maintain a clear drain and reduce recurring odors.
Don’t use boiling water if your plumbing manufacturer warns against it. Protect your hands from splashes with heat-resistant gloves.
Plunge the Kitchen Sink
Clear standing water from the sink, then place a cup plunger over the drain so it forms a tight seal. If your sink has two basins, block the second drain with a wet cloth.
Add enough water to cover the plunger’s rim, if needed. Keep the handle upright and start with gentle pushes to remove trapped air.
Then use firm, steady strokes without breaking the seal. This plunger technique helps shift the blockage through the pipe.
- Cover the overflow opening with a damp cloth.
- Center the cup directly over the drain.
- Push down smoothly, then pull up sharply.
- Maintain proper plunging pressure without forcing it.
- Watch for water to drain freely.
After 15 to 20 strokes, lift the plunger and check the flow. Repeat several cycles if water still moves slowly.
Once the drain clears, run hot tap water for a few minutes to flush loosened debris. Stop if you hear unusual sounds or notice a leak.
Try Baking Soda and Vinegar Carefully
Measure the baking soda and vinegar carefully so the drain doesn’t overflow. Pour them in as directed, let the mixture sit for a few minutes, and then flush the sink with hot water.
Measure Ingredients Carefully
Use about ½ cup of baking soda followed by 1 cup of white vinegar, pouring each directly into the drain. Your ingredient accuracy matters because too much of either ingredient can create excess fizz without improving the result.
Use clean, dry Measuring cups to portion both ingredients precisely. Don’t guess from the container or pack baking soda tightly; level it gently for a consistent amount.
Keep your face and hands away from the drain as the mixture bubbles. Gather everything before you begin:
- A dry ½-cup measuring cup
- A liquid 1-cup measuring cup
- Fresh baking soda
- White vinegar
- A spoon for leveling
Pour slowly and steadily so the ingredients enter the drain rather than splash onto the sink. Follow the measured amounts exactly, and don’t add extra ingredients while the mixture reacts.
Flush With Hot Water
After the baking soda and vinegar finish fizzing, flush the drain with hot water to wash away loosened residue. Heat several cups of water, but don’t use boiling water if your pipes are PVC; very hot tap water works more safely.
Pour it slowly into the drain in two or three stages, allowing each portion to work through the buildup. Run the faucet afterward and check whether water drains normally.
If the sink remains slow, repeat the treatment once rather than adding more vinegar or baking soda. These eco friendly solutions can help with light clogs, but they won’t replace mechanical methods for stubborn blockages.
As alternative drainage methods, try a plunger or a plumber’s snake. Stop if water backs up, and avoid chemical cleaners that could react with leftover vinegar.
Snake the Kitchen Sink Drain
If plunging doesn’t clear the blockage, feed a hand auger into the drain to break through or retrieve the clog. Remove the stopper, then guide the cable slowly into the opening.
If plunging fails, use a hand auger to carefully break through or retrieve the clog.
Turn the handle clockwise while applying gentle pressure. When you meet resistance, keep rotating to break up the obstruction or hook it for removal.
Pull the cable out occasionally and wipe away debris before advancing again.
Picture the process:
- A coiled cable entering the dark drain
- Your gloved hand turning the auger handle
- Resistance signaling the clog’s location
- Debris clinging to the cable tip
- Clear water swirling after the blockage releases
Run hot water briefly to test the flow, but don’t force the auger if it jams. You could damage the pipe or push the clog deeper.
If the cable won’t pass, stop and call a plumber. Include drain inspection in your plumbing maintenance routine so you can spot buildup early and prevent recurring blockages.
Avoid chemical cleaners, which can damage pipes and injure you during later repairs.
Clean the Drain Trap
To clean the drain trap, gather a bucket, an adjustable wrench, and a cleaning brush.
Place the bucket beneath the trap, then carefully remove it. Inspect the trap for clogs or damage.
Clean it thoroughly, reinstall it securely, and check for leaks.
Gather Necessary Tools
Before cleaning the drain trap, gather an adjustable wrench, a bucket, rubber gloves, a wire brush, and a few old towels. You’ll also want a flashlight and a small container for loose hardware. Place everything within reach beneath the sink so you won’t need to leave a wet work area.
- Adjustable wrench for loosening slip nuts
- Bucket for catching standing water
- Rubber gloves for plumbing safety
- Wire brush for scrubbing residue
- Old towels for protecting the cabinet
Check each tool before you begin. Confirm the wrench adjusts smoothly, the brush has firm bristles, and the gloves have no tears.
Good tool maintenance helps prevent slips, leaks, and unnecessary damage. Keep the cabinet floor clear, improve lighting with the flashlight, and remove nearby cleaners or stored items. Don’t use excessive force with any tool.
Remove and Inspect Trap
When the sink is empty, place the bucket beneath the trap and loosen the slip nuts with your adjustable wrench. Support the curved pipe as you remove each nut, then lower the trap carefully. Let trapped water and debris drain into the bucket. If a nut resists, don’t force it; adjust your grip or apply penetrating oil sparingly.
Examine the trap’s interior for grease, food particles, mineral buildup, cracks, and corrosion. Use a flashlight for a clearer view, and check the washers and threaded connections for damage. This pipe inspection can reveal deeper blockages or leaks that require replacement or professional help. Note the trap’s orientation before separating its pieces. Careful trap maintenance prevents recurring clogs and helps you identify worn components before they cause water damage beneath the sink.
Clean and Reinstall Trap
How do you clean the drain trap effectively? Place a bucket beneath the trap to catch water and debris. Put on gloves, then use a brush or old toothbrush to scrub the trap’s interior.
Rinse it thoroughly with warm water, removing grease and food particles. Check the washers for damage and replace them if they’re cracked or flattened.
- Keep the bucket centered under the connection.
- Scrub buildup from every curve.
- Rinse until water flows clear.
- Seat each washer evenly.
- Tighten fittings without forcing them.
Reconnect the trap to the Drain pipe by hand, ensuring the threads align. Use Plumbing tools, such as slip-joint pliers, only for a gentle final turn.
Don’t overtighten, or you could damage the fittings. Run water slowly, inspect every joint for leaks, and tighten slightly if necessary. Clean the area and remove the bucket.
Flush the Drain and Check for Leaks
Once the water drains freely, run hot water for a minute to flush away loosened debris. Add a small amount of dish soap, then rinse again with cold water. This simple drain maintenance step helps clear grease and leaves the pipes fresh.
Place a dry bowl beneath the trap and connections. Watch closely while water flows, checking for drips, damp threads, or moisture along cabinet surfaces. Careful leak detection now can protect your cabinets and prevent a small problem from becoming costly damage.
| Check | Why it matters |
|---|---|
| Run water slowly | Reveals fresh leaks |
| Inspect each joint | Confirms tight seals |
| Dry the pipes | Makes drips visible |
If you spot moisture, turn off the faucet, tighten the connection gently by hand, and test again. Don’t overtighten plastic fittings, since they can crack.
Wipe everything dry, then check once more after several minutes. A dry cabinet and steady flow show that your sink is ready for normal use.
Call a Plumber for Persistent Clogs
If the clog returns after plunging, cleaning the trap, or flushing the drain, call a licensed plumber. A recurring blockage may sit deep inside the branch line, involve tree roots, or signal a damaged pipe.
Don’t keep pouring harsh chemicals down the sink; they can injure you and corrode plumbing. A professional can inspect the line with a camera, remove stubborn buildup, and recommend a lasting repair.
Watch for these warning signs:
- Water backs up into the sink or dishwasher.
- Several household drains empty slowly.
- You hear gurgling behind the walls.
- The drain releases a sewage-like odor.
- Leaks appear beneath the cabinet.
Contact emergency plumbing services if wastewater overflows, a pipe bursts, or you can’t shut off the supply. Otherwise, schedule a routine visit before the problem worsens.
Ask your plumber about drain maintenance, including periodic inspections, proper strainer use, and safe cleaning methods. Keep food scraps, grease, coffee grounds, and fibrous produce out of the drain to help prevent another clog.
Frequently Asked Questions
Can Chemical Drain Cleaners Damage Kitchen Sink Pipes or Plumbing Fixtures?
Yes, chemical drain cleaners can damage your kitchen sink’s pipes and plumbing fixtures. Chemical cleaners may cause pipe corrosion, especially in older metal or weakened plastic pipes.
They can also harm seals, gaskets, finishes, and garbage-disposal components. Don’t mix products, because dangerous fumes or reactions may result.
Instead, try a plunger or drain snake first. If the clog persists, contact a plumber who can diagnose and clear it safely without unnecessary damage.
How Can I Prevent Future Clogs Caused by Food Scraps and Grease?
You can keep your drain’s pathways clear by preventing food waste and grease buildup from entering them. Scrape plates into the trash or compost before rinsing, and use a fine-mesh strainer to catch stray particles.
Wipe greasy pans with a paper towel before washing them. Don’t pour oil, butter, or fat down the drain; collect it in a container and discard it properly.
Run hot water afterward, and clean the strainer regularly.
Why Does My Kitchen Sink Smell Bad Even After Clearing the Clog?
Your sink may still smell because trapped food, grease, or bacteria remain in the drain, P-trap, garbage disposal, or overflow opening. These odor sources can persist even after water starts flowing normally.
Flush the drain with hot water, scrub the stopper and disposal, and clean the overflow port. For odor prevention, use a drain strainer, avoid pouring grease inside, and rinse the drain regularly.
If the odor continues, check for a dry trap or plumbing leak.
Can a Garbage Disposal Cause Recurring Kitchen Sink Blockages?
Yes, your Garbage disposal can cause recurring blockages when food scraps, grease, or fibrous peels gather like leaves in a narrow stream. You’ll notice slow draining, standing water, or unpleasant odors returning soon after cleaning.
Run cold water while operating the disposal, avoid grease and stringy foods, and clean the splash guard regularly. If recurring blockages continue, inspect the trap and drain line, because a deeper obstruction may be trapping debris.
When Should I Replace a Damaged or Corroded Kitchen Sink Drainpipe?
Replace a damaged or corroded kitchen sink drainpipe when you see leaks, pinholes, deep rust, cracks, sagging joints, or recurring blockages that cleaning doesn’t resolve. Don’t wait if wastewater reaches cabinets or walls, because moisture can cause structural damage and mold.
Compare drainpipe materials, such as PVC, ABS, copper, or stainless steel, and choose a durable option. Improve corrosion prevention by avoiding harsh chemicals, tightening connections properly, and fixing leaks promptly.
Conclusion
With these steps, you can send even the most stubborn kitchen sink clog packing. Remove debris, flush with boiling water, add dish soap, plunge, snake, or clean the trap as needed.
Then run water and check every connection for leaks. If nothing works, don’t keep battling a drain that seems determined to defeat you. Call a plumber before a small blockage becomes a full-scale kitchen disaster.
A quick repair can restore smooth drainage and your peace of mind. These steps can help you unclog a kitchen sink and get your drain working properly again.