How to Decorate a Kitchen Island
Choosing how to decorate a kitchen island can feel surprisingly difficult. You want it to look stylish and inviting without sacrificing workspace, storage, or easy movement—and you’re not alone. Many people struggle to balance function and personality in this central part of the kitchen.
To decorate a kitchen island, first define how you’ll use it for prep, dining, or storage. Keep walkways clear, then coordinate colors, materials, and hardware with your kitchen’s style. Add comfortable stools suited to the island’s height and hang pendants 30–36 inches above the surface.
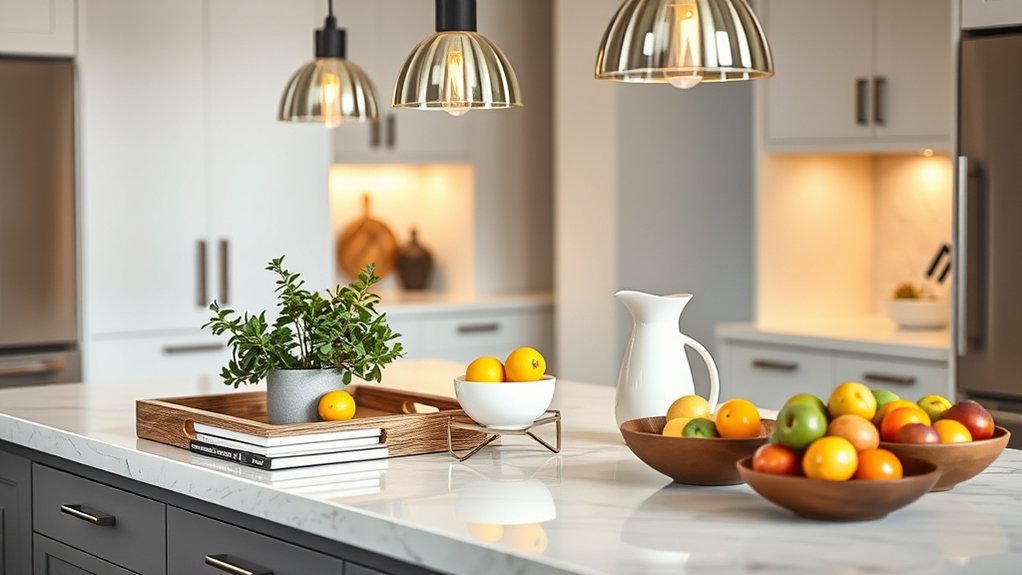
Group a few useful accents, such as a tray, cutting board, vase, or fruit bowl. Add seasonal texture without creating clutter. More practical ideas can help you refine every detail.
Key Takeaways
- Use a tray to group a few practical decorations, such as a vase, cutting board, fruit bowl, or decorative canisters.
- Keep arrangements low and uncluttered so they preserve workspace, visibility, and easy conversation across the island.
- Coordinate colors, materials, and finishes with your cabinetry, flooring, hardware, and overall kitchen style.
- Add visual interest by combining varied heights, textures, natural elements, and one attractive focal piece.
- Refresh decorations seasonally while keeping pathways, seating, appliances, and heat-sensitive items safe and accessible.
Decide How Your Island Will Work

Before you decorate, decide what you want your kitchen island to do. You might need extra space for chopping, a comfortable spot for casual meals, or storage for cookware and small appliances.
Define your priorities first, then measure the available area to guarantee the island won’t obstruct doors, walkways, or work zones. Leave enough clearance for opening cabinets and moving safely around every side.
Consider how many people will use the island and whether you’ll need seating, outlets, lighting, or a sink. Your choices affect both function and cost, so include budget considerations before selecting features.
Compare material choices based on durability, maintenance, and intended use. A surface that handles heavy preparation may suit you better than one designed mainly for serving.
Plan drawers, shelves, and cabinets around the items you’ll store. When you match the island’s layout to your daily routines, decorating becomes easier because every detail supports how you actually use the space.
Match the Island to Your Kitchen Style
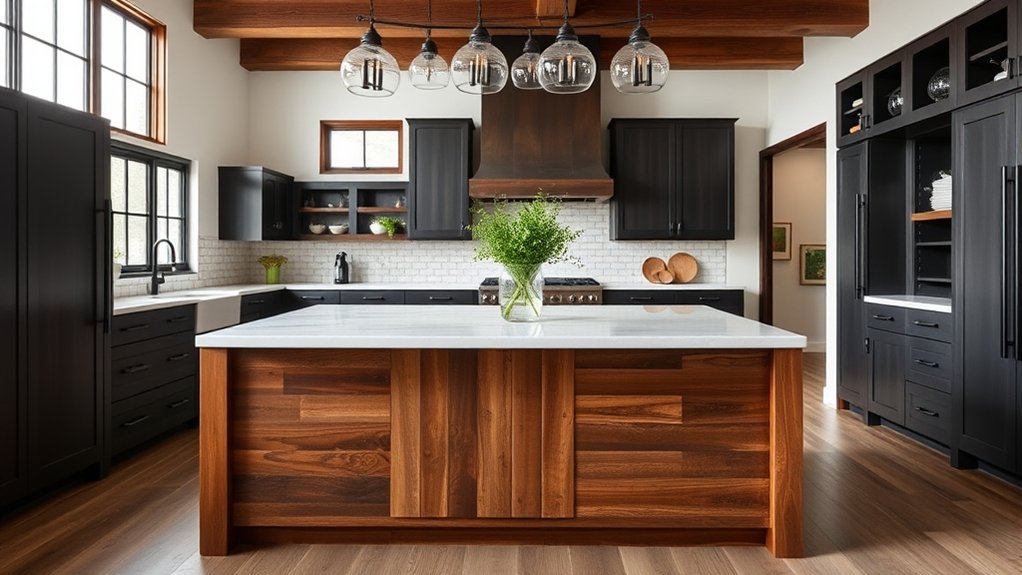
Choose an island style that complements your kitchen’s existing cabinets, flooring, and finishes. If your space feels traditional, select turned legs, raised-panel details, or a furniture-inspired finish.
For a modern kitchen, choose clean lines, flat panels, and a restrained color palette. Farmhouse kitchens pair well with painted wood, beadboard, or a reclaimed-wood surface.
Industrial rooms benefit from metal details and durable, textured materials. You don’t need an exact match; instead, repeat one or two existing elements.
Consider your cabinet color, countertop material, hardware finish, or flooring tone. A contrasting island can add personality, but keep its undertones compatible with the rest of the room.
Use custom storage fronts that echo your cabinetry, and choose decorative accents that reinforce the style without creating visual clutter. Consider stools, pendant finishes, and countertop accessories as part of the design.
Each choice should feel intentional and connected to your kitchen’s overall character.
Create a Functional Island Layout
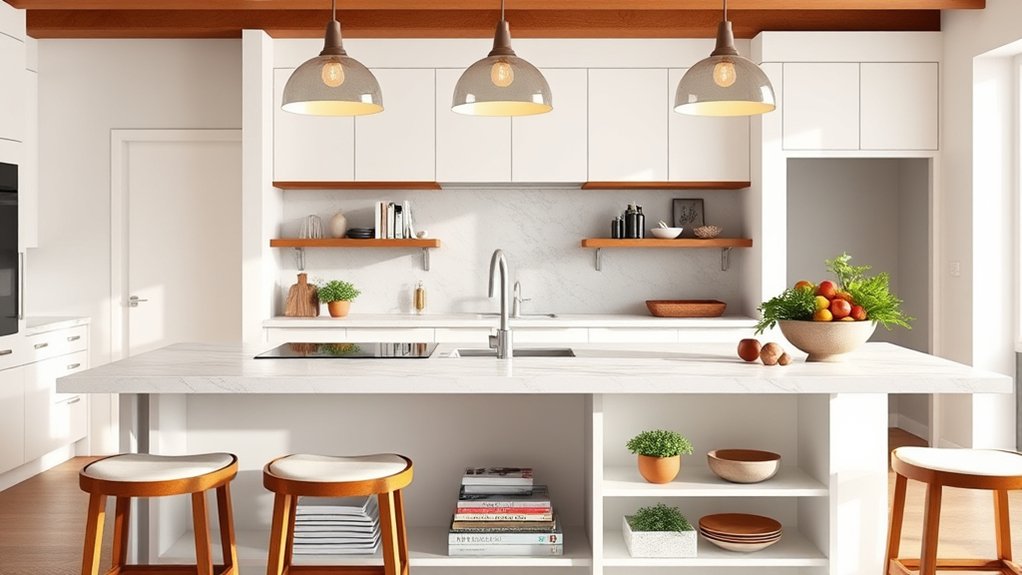
A functional island layout starts with how you use the space each day. If you prep meals often, position the island near your refrigerator, sink, and range to create an efficient work triangle.
Leave enough clearance around every side so you can open doors, move comfortably, and cook without blocking traffic. For casual dining, add seating where it won’t interfere with prep zones or appliance access.
Choose a countertop depth that supports your tasks without overwhelming the room, and keep frequently used tools within easy reach. Use drawers for utensils, pullouts for pans, and deep cabinets for small appliances as practical storage solutions.
Organize one side for cooking and another for serving to keep activities flowing. Maintain visual balance through color coordination with your cabinetry, flooring, or backsplash.
Before finalizing the arrangement, map door swings and walkway widths with painter’s tape. This simple test helps you spot problems before installation and adjust the design confidently.
Hang Pendant Lights at the Right Height
Measure the clearance above your island so you won’t bump your head or obstruct your workspace. Then choose pendant sizes that suit the island’s length, and space them evenly for balanced lighting.
Measure Island Clearance
Before you install pendant lights, check the island’s dimensions and the surrounding walkways so the fixtures won’t crowd the workspace.
Measure from the countertop to the ceiling, then mark a comfortable hanging point that preserves clear sightlines and keeps the light from blocking conversation.
Leave enough headroom for anyone who cooks, serves, or walks around the island. Check clearance on every side, including paths to appliances, seating, and doors.
Your island material can affect how you mark and protect the countertop during installation, so use painter’s tape rather than scratching the surface.
Consider storage options, too. Overhead cabinets, shelves, or a hood may limit where you can place cords and canopies.
After measuring, test the planned height with a paper or cardboard mock-up before drilling. Adjust until movement feels easy.
Choose Proper Pendant Size
Choose pendant sizes that suit the island’s length without overwhelming the workspace. Consider pendant proportions before you shop: one large fixture can anchor a compact island, while two or three smaller fixtures may suit a longer surface.
As a practical guide, leave roughly 12 to 24 inches between pendants, depending on their diameter and your island’s dimensions. Aim for lighting scale that feels substantial but doesn’t block sightlines or crowd the countertop.
Suspend each pendant so its bottom sits about 30 to 36 inches above the island surface, allowing comfortable conversation and clear views across the room. If you have tall ceilings, resist raising the fixtures too high; maintain the same island-focused relationship.
Choose adjustable cords or rods, so you can fine-tune the height after installation and account for bulb size.
Balance Light Placement
Once you’ve selected pendant sizes that suit your island, balance their placement by hanging them at the right height. Position the bottom of each shade about 30 to 36 inches above the countertop.
This distance keeps your view open, prevents bumped heads, and provides focused light for chopping, serving, or dining. If your ceiling is unusually high, raise the fixtures slightly while maintaining comfortable task lighting.
Center a single pendant over the island, or space multiple pendants evenly along its length. Keep equal gaps between the shades and the island’s edges to create intentional lighting placement.
Before securing the hardware, sit at the island and check whether the fixtures block your sightline. Choose warm bulbs to add ambient illumination without making the kitchen feel harsh or overly bright.
Adjustable cords simplify fine-tuning.
Choose Seating by Counter Height
Choose seating that matches your island’s height for comfortable meals and easy conversation. Standard counter stools work well with most kitchen islands, while bar-height stools are better for taller surfaces. Before you shop, measure your island so you can find the right fit.
Standard Counter Stools
Standard counter stools typically suit kitchen islands that stand about 36 inches high, giving you roughly 9 to 12 inches of space between the seat and countertop. This gap lets you sit comfortably without bumping your knees or hunching over meals.
Choose a seat height near 24 to 26 inches, then test the fit before buying several stools. Stool comfort improves with a supportive seat, a footrest, and enough room to move.
- Measure your island’s height before shopping.
- Leave about 24 inches of counter width per person.
- Select easy-clean upholstery for everyday use.
For color coordination, match your stools to cabinet hardware, pendant finishes, or nearby textiles rather than copying every surface.
Backless designs tuck away neatly, while low backs offer more support without overwhelming the island. Keep the silhouette proportional, and confirm each stool slides fully beneath the counter when unused.
This keeps your island functional, polished, and inviting.
Bar-Height Seating
If your kitchen island rises to about 42 inches, bar-height seating will fit better than standard counter stools. Choose stools with seats roughly 28 to 30 inches high, leaving enough space for your knees beneath the countertop.
Before buying, measure from the floor to the island’s underside, since thick countertops, aprons, or decorative trim can reduce legroom.
Consider comfort alongside appearance. A footrest gives you support, while a backrest helps you settle in during long breakfasts or conversations.
Swivel seats make it easier to turn toward guests, but they need enough clearance to rotate without hitting nearby cabinets.
For daily use, select durable upholstery or easy-clean materials, especially if children eat at the island. Space each stool about 24 to 30 inches apart so you can sit, stand, and move comfortably without crowding.
Style the Countertop Without Losing Space
Keep the island’s countertop useful by grouping a few decorative pieces on a tray or in a shallow bowl. Leave plenty of open surface for meal prep and serving.
Choose countertop accessories that earn their space, such as a small vase, salt cellar, or attractive cutting board. Keep the arrangement low so you can see across the kitchen and move items easily.
Use decorative storage to hide everyday clutter without crowding your work zone. A lidded ceramic container can hold tea bags, while a compact canister keeps utensils within reach.
Limit your palette to two or three complementary materials for a polished look.
- Select pieces that support daily kitchen routines.
- Leave clear space beside appliances and prep areas.
- Remove anything you don’t use regularly.
Refresh the display seasonally, but keep each change simple. When guests arrive, you’ll have room to serve snacks, set drinks, or clear the surface quickly without rearranging a crowded collection.
Group Island Decor With a Tray
A tray gives your island decor a defined home while keeping the countertop ready for work. Choose a size that fits comfortably without crowding your prep area, then use it to gather a few practical, attractive pieces.
A well-sized tray gathers everyday decor, keeping your island polished, practical, and ready for whatever the day brings.
A low rectangular tray suits a long island, while a round tray softens a compact one. For effective tray styling, vary the height and shape of your objects.
You might pair a small vase with a lidded container and a short stack of cookbooks. Keep the arrangement balanced, but don’t make it so precious that you avoid using the island.
Leave enough room to lift the tray easily when you need extra workspace. Use centerpiece arrangements to establish a clear focal point, not to fill every inch.
Repeat one shape or finish among the pieces to create visual connection. If your island doubles as a dining spot, choose a tray with handles so you can move the decor before serving meals or setting out food.
Add Color, Texture, and Natural Accents
Color, texture, and natural accents can make a kitchen island feel warm and inviting without adding clutter. Choose a color palette that complements your cabinets while introducing one thoughtful accent, such as a ceramic bowl, linen runner, or painted vase. Keep the arrangement practical, leaving enough counter space for food preparation and serving.
- Add a small bowl of fruit for useful color and an easy focal point.
- Layer a woven basket or wood board beside smooth stone or metal for texture contrast.
- Display one leafy plant in a simple pot to bring organic shape and freshness.
Mixing finishes keeps the island from looking flat, but limit your materials to two or three so the display feels intentional. Select accents with varied heights, then group them near one side rather than spreading them across the entire surface.
You’ll create visual interest while preserving clean lines, comfortable movement, and the island’s everyday function. Rotate pieces only when your existing arrangement needs a refreshed balance or practical adjustment.
Refresh Your Island Decor by Season
Refresh your island with fresh floral accents in spring for a cheerful look. When summer arrives, add coastal touches to create a light, breezy feel. As the seasons change, bring in warm textures for autumn and winter. These simple updates keep your kitchen inviting all year long.
Spring Floral Accents
Welcome spring to your kitchen island with fresh flowers that add color, texture, and a lively focal point. Choose a low vase so you can still prep, serve, and converse comfortably. Tulips, daffodils, hyacinths, and flowering branches create cheerful height without overwhelming your workspace.
Coordinate blooms with your kitchen’s seasonal color schemes, pairing soft yellows, blush pinks, or fresh greens with existing finishes.
- Select sturdy flowers that can handle daily kitchen activity.
- Repeat one bloom color in napkins, towels, or nearby artwork.
- Trim stems and change water every few days to preserve freshness.
For an effortless arrangement, gather flowers loosely and let a few stems arc naturally over the vase. Add a small bowl of lemons or a potted herb for useful texture, but keep the display focused.
When petals fade, replace them promptly so your island continues to feel bright, welcoming, and unmistakably springlike.
Summer Coastal Touches
As spring blooms fade, bring a breezy summer mood to your kitchen island with coastal touches. Swap heavy decor for beach inspired accessories that keep your workspace feeling light and inviting.
Choose a woven tray for serving, then add a blue glass vase filled with airy greenery. Use seashell accents sparingly in a small bowl or beside a cutting board, so your island stays practical.
| Coastal element | Island placement |
|---|---|
| Woven tray | Center for serving |
| Blue glass vase | Back corner |
| Seashell bowl | Beside the fruit |
| Linen runner | Lengthwise underneath |
Select sandy neutrals, ocean blues, and crisp whites to create a relaxed palette. Display lemons or limes in a ceramic bowl for a fresh, sunny note.
Keep decorations low, leaving room for meal preparation, conversation, and casual summer gatherings. Rotate pieces easily as your style evolves.
Autumn And Winter Layers
When autumn arrives, layer your kitchen island with warm textures and seasonal color. Swap summer linens for a rust-colored runner, wool placemats, or a chunky knit basket.
Add layered textures with a wooden board, ceramic crock, and stoneware bowls to create depth without clutter. For winter, introduce deeper tones, evergreen sprigs, and soft candlelight that make the island feel welcoming.
Choose seasonal accessories that reflect your home’s personality while keeping daily tasks practical:
- Use miniature pumpkins, pinecones, or apples in a low bowl for an easy centerpiece.
- Pair brass, copper, or matte-black accents with natural wood for inviting contrast.
- Keep one clear section available for serving, prepping, and gathering.
Rotate pieces as the weather changes, and store summer items neatly. You’ll refresh the island without overcrowding it, creating a cozy focal point your family will enjoy throughout both seasons.
Avoid Common Kitchen Island Decorating Mistakes
A well-decorated kitchen island can quickly feel cluttered if you add too many accessories or ignore how the space functions. Before styling yours, keep daily activities in mind.
Leave enough counter space for chopping, serving, and homework, and maintain a clear path around stools and appliances. Don’t let decorative trays, oversized vases, or hanging lights block sightlines or conversation.
Prioritize open counter space and clear pathways so your kitchen island supports cooking, conversation, and everyday activities.
Choose a few useful pieces instead of filling every surface. Creative storage, such as baskets, drawers, or a built-in shelf, can hide frequently used items while keeping essentials accessible.
Group small objects on one tray so you can move them easily when preparing meals. Use statement accessories sparingly; one striking bowl, lamp, or vase usually has more impact than several competing accents.
Avoid matching everything too perfectly, but coordinate colors and materials with the surrounding kitchen. Finally, secure fragile decor, protect surfaces from heat, and reassess the arrangement regularly as your needs change.
Frequently Asked Questions
How Much Does It Cost to Decorate a Kitchen Island?
You’ll typically spend $50–$300 to decorate a kitchen island, depending on your style and materials. You can keep costs near $50 with budget-friendly accessories, such as a bowl, tray, vase, or countertop organizer.
A $100–$200 budget allows upgraded lighting, stools, and coordinated containers. For seasonal decor ideas, plan an additional $20–$75 each season.
Custom stools, pendant lights, or built-in features can raise your total above $500.
Which Materials Are Easiest to Clean and Maintain on a Kitchen Island?
A clean surface is a clear path: choose materials that simplify your routine. Quartz offers excellent Material durability, resists stains, and needs only mild soap and water. Granite also cleans easily when sealed regularly, while stainless steel handles heat and spills with minimal effort.
For Maintenance ease, avoid porous marble, unsealed wood, and textured tile that trap grime. You’ll spend less time scrubbing and more time enjoying your island’s dependable, polished finish every day.
Can a Kitchen Island Be Decorated Safely in a Home With Young Children?
Yes, you can decorate a kitchen island safely with young children by choosing childproof decor and addressing safety concerns first. Secure every centerpiece, appliance, and container so nothing tips or falls.
Avoid sharp edges, breakable objects, candles, toxic plants, and trailing cords. Choose rounded accessories, washable fabrics, and non-slip trays.
Keep stools pushed in, lock drawers, and leave cooking surfaces clear. You’ll create an attractive island without sacrificing your child’s safety.
How Do You Decorate a Small Kitchen Island Without Making It Feel Cramped?
Keep compact, coordinated centerpieces carefully curated to decorate your small kitchen island without creating clutter. Choose one slim vase, a shallow bowl, or a small tray for decorative accessories, leaving generous workspace around it.
Use light color schemes, such as white, pale blue, or soft gray, to make the island feel more open. Select items with varied heights but minimal visual weight, and store extras elsewhere.
Keep seating tucked neatly underneath when you’re not using it.
Can Kitchen Island Decor Be Changed Without Damaging the Countertop?
Yes, you can change kitchen island decor without damaging the countertop. Use trays, placemats, or felt-bottomed organizers to protect the surface from scratches, stains, and moisture.
Choose lightweight, removable pieces instead of adhesives, suction cups, or rough ceramics. Rotate personalized accessories, such as a small vase or decorative bowl, whenever you like.
Add seasonal accents with care, and lift items rather than dragging them. Clean spills promptly to prevent lasting marks.
Conclusion
Decorating a kitchen island shouldn’t require a design degree or sacrificing its only useful surface to a vase army. Let your island work hard, look inviting, and reflect your style without becoming a museum exhibit.
Choose practical lighting, comfortable seating, purposeful trays, and accents you can actually move. Refresh it with the seasons, but don’t let every holiday demand a full renovation.
When beauty and function share the counter, your kitchen and your sanity will thank you. With these ideas, decorating a kitchen island can be both stylish and practical.