How to Hide a Washer and Dryer in the Kitchen in 10 Steps
Trying to fit laundry appliances into a busy kitchen can feel frustrating, especially when you want to save space without making the room look cluttered. You’re not alone—many homeowners struggle to hide a washer and dryer while keeping them accessible and easy to use.
To hide a washer and dryer in the kitchen, choose an accessible location and measure its width, height, and depth. Select compact or stackable models, then confirm electrical, water, drain, gas, and exterior venting requirements.
Plan service access, door swings, and airflow. Enclose the appliances behind matching, louvered cabinet doors, adding storage above or beside them.
Level the units, reduce vibration, and test ventilation, controls, and clearance before securing the cabinetry. The steps below will help you finish the installation safely.
Key Takeaways
- Measure the kitchen space and appliances, including door swings, hoses, vents, outlets, and required installation clearances.
- Choose compact or stackable washer-dryer models that fit household needs while preserving comfortable loading and unloading access.
- Plan compatible electrical, water, drainage, gas, and exterior dryer-vent connections with qualified professionals.
- Conceal appliances behind matching, moisture-resistant cabinet doors or louvered panels that allow airflow and full servicing access.
- Add storage above or beside the units, then level appliances, reduce vibration, and test ventilation, noise, temperature, and door operation.
Choose Where to Hide the Washer and Dryer
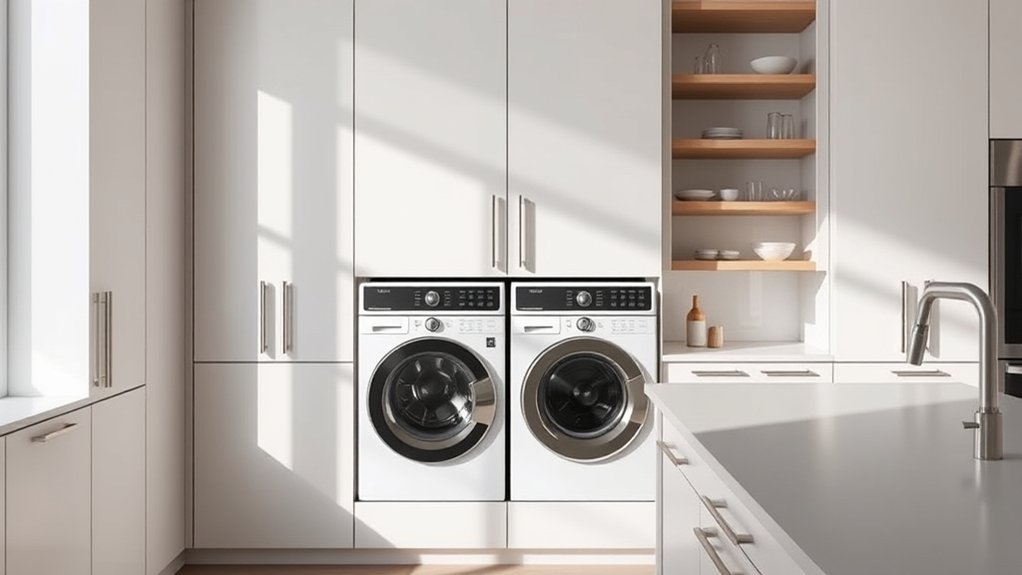
Start by choosing a location that keeps the washer and dryer accessible without disrupting your kitchen’s workflow. Look for an underused corner, a pantry wall, or space beside the refrigerator where everyday movement remains comfortable.
You can place the appliances behind cabinet doors to blend them with surrounding storage or use decorative paneling that matches your kitchen’s finishes.
If a permanent enclosure doesn’t suit your layout, consider sliding partitions. They conceal the machines when you’re entertaining but open quickly when you need to load laundry.
A hallway-side nook can also work, especially if it connects to the kitchen without occupying valuable preparation space.
Keep the laundry area near existing utility connections when possible, but prioritize convenient access and a tidy visual line.
Choose a spot that lets you transfer clothes easily, open doors fully, and maintain clear access to counters, cabinets, and cooking appliances.
Your hiding solution should feel intentional, not squeezed into leftover space.
Measure the Space Before You Plan

Before you start planning, measure the available space where you’ll place the washer and dryer. Check each appliance’s width, height, and depth to make sure they’ll fit comfortably. Also leave enough room for the doors to open, proper ventilation, hoses, and easy access.
Measure Available Width
Measure the available width before choosing a washer, dryer, or cabinet enclosure. Use a tape measure to record the wall-to-wall distance at floor level, counter height, and upper cabinet height.
Walls may bow, trim can reduce clearance, and nearby doors or drawers need room to open. Note obstacles such as baseboards, pipes, outlets, and countertop overhangs that affect usable width.
Measure from the finished surfaces, not unfinished framing, so your plan reflects the kitchen as it exists. Record the smallest measurement and leave practical clearance for installation, ventilation, and future servicing.
Compare adjacent gaps, too. A slightly wider location might support better space optimization without disrupting traffic.
Careful width planning also supports aesthetic integration. It helps your concealed laundry area align naturally with surrounding cabinetry and maintain a clean visual flow.
Check Appliance Dimensions
Check the washer and dryer’s full dimensions, including height, depth, door swing, hoses, and power connections, against the smallest measurements you recorded. Confirm that the appliance height, depth, and width match your planned cabinet opening.
Note whether the controls, vents, and detergent drawers remain reachable after installation. Locate the power outlet and water connections before choosing a layout, so you won’t need to redesign the kitchen later.
| Check | Why it matters |
|---|---|
| Height | Prevents a cramped fit |
| Depth | Protects cabinet alignment |
| Door swing | Keeps loading practical |
| Power outlet | Supports safe connection |
Measure each unit separately, even when the models appear identical. Record the manufacturer-required installation measurements, then compare them with your notes.
A precise check now can spare you stressful returns, expensive carpentry, and the heartbreak of discovering that your beautifully hidden laundry setup won’t fit.
Make every measurement easy to verify before you commit.
Account For Clearance
Leave clearance around the washer and dryer for ventilation, hoses, power cords, door swings, and routine maintenance. Before you design cabinetry, measure the available width, depth, and height, then compare those figures with each appliance’s installation requirements.
Add space behind the units for water lines, drain connections, dryer ducts, and plugs; don’t force hoses into sharp bends. Check whether doors, drawers, and nearby cabinet panels can open fully without blocking access.
You’ll also need room to pull the machines forward for appliance maintenance and repairs. Plan an accessible shutoff valve and outlet location to support electrical safety, and keep vents unobstructed.
Mark the full footprint on the floor with tape, including any required gaps. This simple test helps you spot conflicts before construction begins and keeps your hidden laundry area practical.
Choose Compact or Stackable Appliances
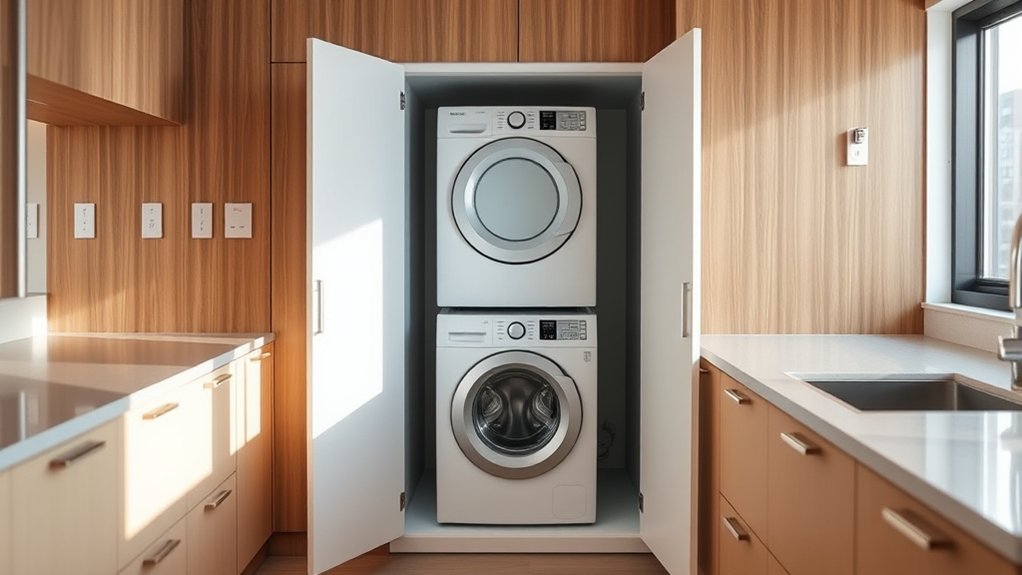
When kitchen space is tight, choose a compact washer and dryer or a stackable set to free up valuable floor area. Measure the appliance footprint, including door swing, before you buy. A compact pair can fit beneath a counter, while a stackable design uses vertical space and leaves room for drawers, shelving, or food preparation.
Choose models with quiet operation if your kitchen connects to living areas, and compare capacity with your household’s laundry needs. Smaller machines may require more frequent loads, so don’t sacrifice practicality for a slimmer profile.
Choose quiet, practical appliances with enough capacity for your household, even if a slimmer profile means sacrificing convenience.
Look for Energy efficiency ratings and cycles that match how you wash, since lower consumption can reduce long-term costs. For aesthetic integration, select finishes that complement your cabinets or plan a concealed enclosure with matching panels.
Keep controls accessible, and choose a configuration you can comfortably load and unload. A streamlined appliance choice makes the laundry zone feel intentional rather than crowded.
Confirm Utilities and Ventilation
Before installation, confirm that the kitchen has the required water lines, drain access, electrical supply, and gas connection if applicable. Have a licensed professional evaluate utility connections before you position either appliance.
Verify that the circuit matches the manufacturer’s requirements, includes proper grounding, and won’t overload other kitchen equipment. Check the shutoff valves, hose condition, drain height, and pipe capacity to help prevent leaks or backups.
If you’re using a gas dryer, arrange for a qualified technician to inspect the line and connections.
Next, plan appropriate airflow. Electric dryers still produce heat and moisture, while gas models also release combustion gases.
Connect the dryer to an approved exterior duct, not a cabinet, wall cavity, or indoor space. Keep the duct short, smooth, and free of lint buildup.
Confirm that ventilation systems can handle the added humidity and that the room receives adequate makeup air. Follow local codes and appliance instructions, and obtain permits when required.
Don’t conceal vents behind sealed panels or block existing grilles.
Plan Service Access and Door Clearance
With utilities and ventilation addressed, plan how you’ll reach both appliances for maintenance and repairs. Measure the washer and dryer doors as they open, then add enough room for loading, unloading, and moving bulky items.
Check nearby drawers, counters, islands, and walkways so an open appliance door won’t block essential kitchen traffic.
Decide whether you’ll use hinged, sliding, or removable fronts, and match the door hinge placement to the appliance swing. Hinges shouldn’t collide with handles, walls, or adjacent doors.
Confirm the cabinet door height won’t interfere with detergent drawers, control panels, or a dryer vent connection. You’ll also need access to water shutoffs, the drain, electrical connections, and the lint filter without dismantling surrounding finishes.
Leave a practical route for pulling each appliance forward if a technician needs to service it. Mark clearances on the floor with tape before finalizing your layout, and test every opening at full swing.
This simple check can prevent costly access problems later.
Build a Cabinet Around the Appliances
Build the cabinet around the full dimensions of your washer and dryer, including hoses and the clearance they need. Choose ventilated doors to improve airflow and help prevent heat and moisture buildup. Also, make sure the design leaves the controls, connections, and service areas easy to reach.
Measure Appliance Dimensions
Measure the washer and dryer’s full height, width, and depth, including hoses, cords, vents, and door clearance. Then add a few inches for airflow and easy access.
Record each measurement twice so you don’t order incorrect cabinet panels or trim.
- Allow extra width for leveling and vibration.
- Leave rear space for plumbing and electrical connections.
- Confirm the floor can support both appliances.
Check the manufacturer’s installation guide for required clearances, especially if you’re stacking the units.
Measure from the finished floor and account for baseboards, countertops, and uneven walls. Plan removable panels or open interior access so you can reach filters, valves, and connections during appliance maintenance.
Accurate spacing also supports energy efficiency by preventing overheating and allowing the appliances to operate properly.
Sketch the cabinet footprint, label every dimension, and compare it with your kitchen layout before cutting materials or purchasing doors.
Install Ventilated Cabinet Doors
Once you’ve confirmed the appliance footprint and clearances, build the cabinet frame around the washer and dryer without blocking airflow or access.
Leave space above, behind, and beside each unit for servicing and heat release. Mount louvered or slatted doors to encourage circulation, and avoid sealing the appliances inside an airtight box.
Your ventilation system should move warm air away while keeping lint and moisture controlled.
| Feature | Practical choice | Benefit |
|---|---|---|
| Door style | Slatted panels | Continuous airflow |
| Frame gap | 1–2 inches | Easier servicing |
| Interior lining | Acoustic mat | Noise reduction |
Use sturdy hinges that open fully, then add magnetic catches to prevent rattling during spin cycles.
Secure the cabinet to wall studs, not the machines, so vibration won’t loosen joints.
Test both appliances with the doors closed, checking temperature, airflow, noise, and access before finishing the trim.
Hide Them Behind Matching Cabinet Doors
Matching cabinet doors are one of the cleanest ways to conceal a washer and dryer in the kitchen. Choose fronts that match your existing cabinetry, so the appliances blend into the room instead of drawing attention.
This approach improves Appliance aesthetics while preserving a coordinated, intentional design.
Before ordering doors, measure each appliance, including clearance for hoses, cords, ventilation, and door swing. Select durable cabinet materials that can handle humidity, vibration, and frequent cleaning.
You’ll also want sturdy hinges and handles that match the rest of your kitchen hardware.
- Match the door profile, finish, and color to nearby cabinets.
- Leave enough clearance for loading, unloading, and maintenance.
- Use removable panels or accessible hinges for future repairs.
Keep the doors aligned carefully, and test their movement before completing installation. If your machines vibrate, add appropriate leveling and sound-reducing measures inside the enclosure.
You’ll create a polished, furniture-like appearance without making laundry access inconvenient or restricting airflow around the appliances.
Add Storage Above and Beside Them
Add cabinets or open shelves above and beside the washer and dryer to turn unused space into practical storage. Use the upper cabinets for detergent, stain removers, spare linens, and cleaning supplies you don’t need every day.
Install adjustable shelves beside the machines to hold baskets, folded towels, or a pullout hamper. Choose doors that match your kitchen cabinetry, or add Decorative paneling to create a cohesive, built-in appearance.
Measure carefully before ordering storage. Leave enough clearance for appliance doors, hoses, and easy access to controls. A shallow cabinet can store narrow bottles without making the walkway feel cramped.
Consider Hidden compartments for small items such as clothespins, sewing supplies, or extra filters. Label opaque bins so you can find essentials quickly.
If you use open shelving, arrange attractive baskets and containers to keep the area orderly. Continue the same hardware, finish, and trim across the surrounding cabinets, so your laundry zone looks intentional rather than improvised.
Control Noise, Heat, and Vibration
Reduce noise, heat, and vibration by leaving proper clearance around the appliances and installing anti-vibration pads beneath them. Keep the washer and dryer level, then tighten their adjustable feet so movement doesn’t transfer through the cabinetry or floor.
> Leave adequate clearance, use anti-vibration pads, and level the appliances to minimize noise, heat, and movement.
Choose sturdy, moisture-resistant panels that won’t rattle, and add thin acoustic insulation to surrounding walls without blocking vents or service gaps.
Try these practical improvements:
- Apply soundproofing techniques, such as mass-loaded vinyl or acoustic panels, to nearby surfaces.
- Use vibration dampening pads under each appliance, especially on hard flooring.
- Install a quiet exhaust fan or vent grille to release heat and moisture safely.
Leave space above and around the machines for airflow, and don’t seal warm air inside the enclosure.
Run a test cycle while listening for rattles, scraping, or excessive movement. If you hear cabinet vibration, add felt strips at contact points and rebalance the load.
Never cover factory vents or restrict the dryer’s exhaust path.
Check Access and Finish the Cabinetry
Before you finish the cabinetry, confirm that you can fully open the washer and dryer doors, reach the controls, remove lint filters, and shut off the water and power. Leave enough clearance for hoses, cords, ventilation, and service work.
Test every door and drawer while the appliances run, checking that nothing rubs, blocks airflow, or vibrates.
Once access works, secure the cabinet frames and install panels that align with the surrounding kitchen. Use moisture-resistant materials near the washer, and seal exposed edges to prevent swelling.
If you’re adding doors, choose hardware that opens easily and stays clear of appliance doors. Match the finish to your existing cabinets, or use contrasting cabinet finishing to create a deliberate feature.
Add decorative accents, such as trim, pulls, or a countertop, only after confirming they won’t restrict maintenance. Finally, label shutoff valves and keep a removable panel or nearby access point for repairs.
Your hidden laundry area should look polished, but it must remain practical, serviceable, and safe.
Frequently Asked Questions
Can I Install a Washer and Dryer in a Kitchen Island?
Yes, you can install a washer and dryer in a kitchen island, but you’ll need careful planning. Choose compact, ventless models when possible, and confirm the island can support their weight and vibration.
Provide proper plumbing, drainage, electrical connections, and appliance ventilation to prevent overheating and moisture damage. Maintain service access through removable panels or doors.
Hidden appliance placement shouldn’t block walkways, storage, or nearby cabinets, and local codes may require professional installation.
What Flooring Materials Best Protect Against Leaks and Appliance Vibrations?
Choose porcelain tile, luxury vinyl, or sealed concrete to protect your kitchen floor from leaks and appliance vibrations. Porcelain tile resists water and handles heavy machines, while luxury vinyl offers resilience and easier replacement.
Add a waterproof underlayment and a sturdy, level base to reduce movement. Use soundproofing materials beneath the appliances to limit noise.
Install leak detection systems with automatic shutoff valves for faster protection against unexpected water damage and costly repairs.
Are Permits Required to Add Laundry Appliances to a Kitchen?
Permits can be the gatekeeper for adding laundry appliances to your kitchen. You’ll often need approval when installing new plumbing, electrical circuits, gas lines, or ventilation, though local rules vary.
Contact your building department before work begins, and ask whether building codes require specific drain connections, shutoffs, or floor protection.
Confirm ventilation requirements for a dryer, especially if you’re routing ductwork. Your appliance installer or contractor can help verify paperwork and inspections.
How Can I Prevent Laundry Odors From Spreading Throughout the Kitchen?
Prevent laundry odors from spreading by keeping the washer door open between cycles and removing damp clothes immediately. Use ventilation solutions, such as an exhaust fan or a vented dryer that exhausts outdoors, to improve airflow.
Clean the washer gasket, detergent drawer, lint trap, and drain filter regularly. Place odor absorbers, such as activated charcoal or baking soda, near the appliances.
Don’t overload the washer, and wash musty items promptly to prevent lingering smells.
What Should I Do if My Hidden Appliances Need Emergency Repairs?
If your hidden washer or dryer needs emergency repairs, shut off power and water immediately, then clear nearby items. Use labeled Appliance access panels to reach hoses, filters, and connections without dismantling cabinetry.
Don’t run leaking, sparking, or overheating machines. For essential Emergency repair tips, photograph connections, check your manual, and call a qualified technician.
Keep doors accessible and explain the layout so the technician can work safely and quickly.
Conclusion
By following these steps, you can hide a washer and dryer in the kitchen without sacrificing convenience or style. Measure carefully, confirm utilities, and leave enough room for ventilation, maintenance, and door clearance.
Matching cabinetry will help the appliances blend in, while smart storage keeps essentials nearby. Control vibration and noise so your kitchen remains comfortable.
With thoughtful planning, you can hide a washer and dryer in the kitchen like a quiet guest while keeping the space functional and polished.