How to Unclog a Kitchen Sink in 7 Steps
A clogged kitchen sink can bring your entire routine to a frustrating halt, especially when dirty water refuses to drain. You’re not alone—many homeowners struggle with stubborn blockages and want a quick, safe solution.
You can unclog a kitchen sink in seven steps. First, identify whether one drain or several fixtures are affected. Remove standing water and clean the stopper.
Next, plunge the drain firmly, then inspect the garbage disposal with power disconnected. If it’s still blocked, clean the P-trap and use a hand snake.
Flush with hot water, prevent future clogs by trapping grease, and call a plumber for leaks, sewage odors, or recurring backups. The steps below explain each task safely.
Key Takeaways
- Remove standing water, then clean the stopper and drain opening of visible food, grease, and debris.
- Seal the drain with a plunger and pump firmly 10–15 times before flushing with hot water.
- Turn off power, unplug the garbage disposal, and remove accessible debris with tongs; never use chemicals.
- If needed, place a bucket beneath the P-trap, remove it, clean it, inspect washers, and reinstall securely.
- Use a hand drain snake for deeper clogs; call a licensed plumber for recurring backups, leaks, odors, or multiple slow drains.
Check What’s Causing the Clog
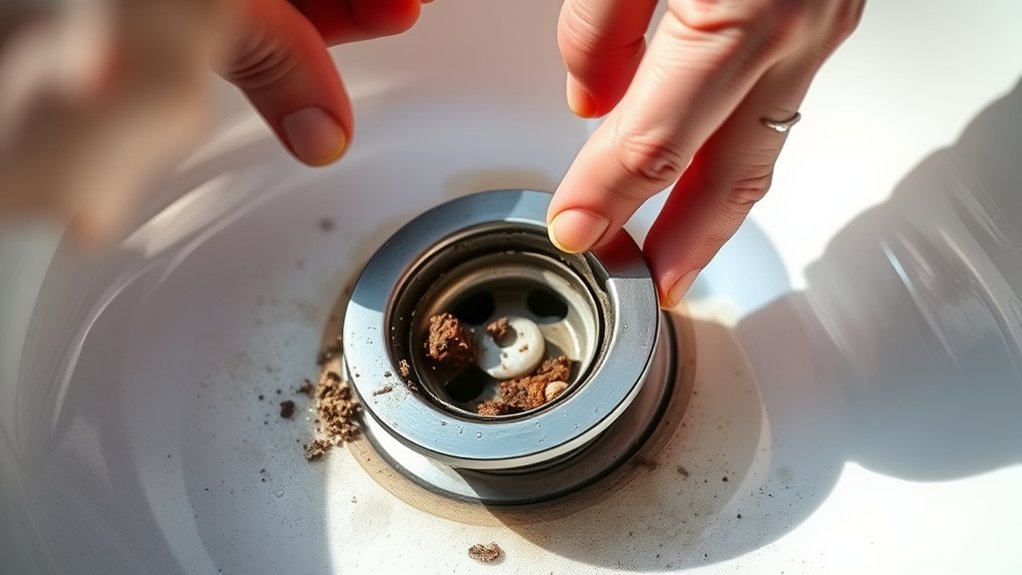
Before you reach for a plunger, check what’s causing the clog. Start by noticing how quickly the sink drains and whether water backs up elsewhere. A slow drain often points to grease, food particles, or soap buildup near the sink. Gurgling sounds may signal trapped air or a deeper blockage in the branch drain.
Notice drain speed, backups, and gurgling; these clues can reveal whether the clog is local or deeper in the branch drain.
Check whether your garbage disposal runs normally. If it hums, stops, or fails to drain, the clog may sit inside its chamber or connecting pipe. Don’t force the disposal if it’s jammed. Switch off power before inspecting it.
Look beneath the sink for leaks, bulging pipes, or rust-colored stains. Pipe corrosion can narrow the passage and cause recurring clogs, especially in older plumbing.
Also consider changes in water pressure. A sudden drop throughout your home may indicate a supply issue rather than a drain blockage.
If multiple fixtures drain slowly, suspect a larger line problem and call a licensed plumber for diagnosis.
Clear Standing Water and Remove the Stopper
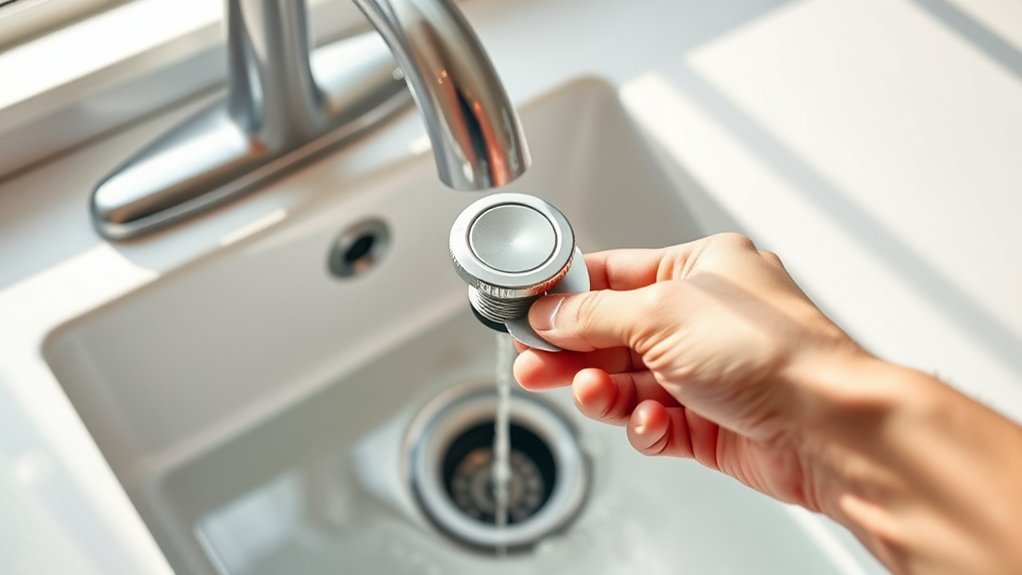
Once you’ve identified a likely sink-level clog, remove standing water so you can work safely and see the drain opening. Put on rubber gloves, place a bucket beside the cabinet, and scoop water into it with a cup. Wipe the basin dry with a rag, then inspect the drain opening for food scraps or visible debris.
If your sink has a removable stopper or strainer, take it out carefully. For a lift-and-turn stopper, rotate it counterclockwise and lift. For a push-and-pull style, pull upward while twisting. Set small parts in a dish so they won’t disappear down the drain.
- Brush residue from the stopper using an old toothbrush and warm, soapy water.
- Check the stopper’s gasket for cracks, buildup, or poor alignment.
- Wipe the drain rim before reinstalling anything.
Avoid pouring harsh chemicals into the open drain. This cleanup supports drain deodorizing and gives you a chance to practice faucet maintenance by wiping mineral deposits from the nearby fixture. Keep the bucket ready for any remaining water.
Plunge the Kitchen Sink Drain
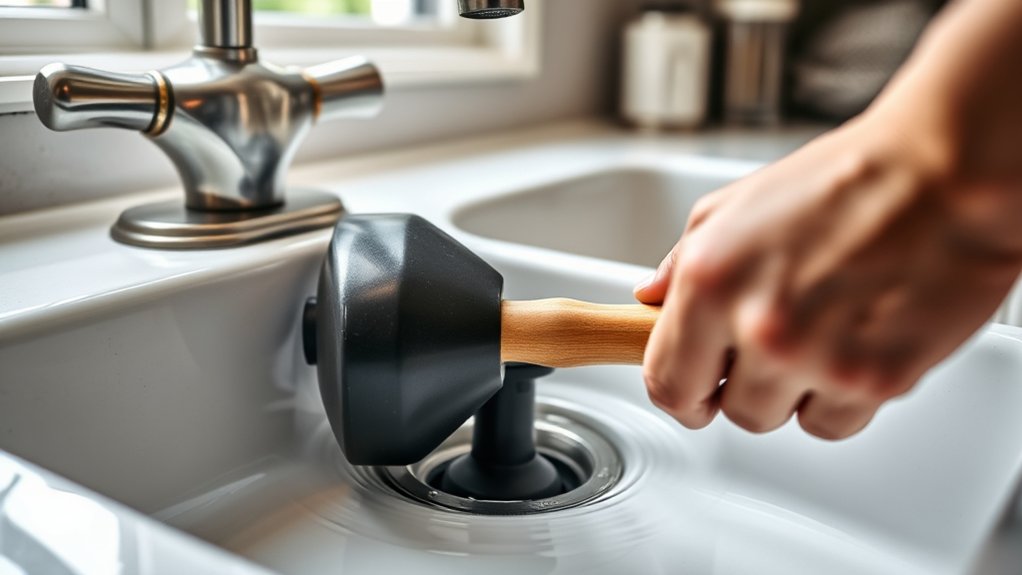
Place a sink plunger over the drain, making sure its cup fully covers the opening and forms a tight seal. Add enough water to cover the plunger’s rim if the basin is dry.
If your sink has two basins, seal the second drain with a wet cloth to direct force toward the clog. Hold the handle upright, then push down firmly and pull up sharply without breaking the seal.
Repeat this motion 10 to 15 times, using steady hydraulic pressure to loosen the blockage. Keep the plunger’s cup submerged so air won’t weaken each stroke.
If water begins draining, run hot tap water briefly to flush loosened residue. For stubborn clogs, pause and check whether the sink’s ventilation system allows air to move freely through the drain line.
Poor venting can reduce plunging effectiveness. Don’t use excessive force, which could loosen fittings or damage seals.
Remove the plunger slowly, then observe whether water drains normally.
Check the Garbage Disposal and Drain Opening
If plunging hasn’t restored normal drainage, inspect the garbage disposal and drain opening for a visible obstruction. Switch off the disposal, unplug it, or turn off its circuit breaker before looking inside. Never place your hand into the unit, even when it appears inactive. Use a flashlight and tongs to remove accessible food scraps, glass, or other debris.
Check these areas carefully:
- Lift out the splash guard and clean its underside, where grease and food particles often collect.
- Examine the drain opening for compacted scraps, then pull them out with pliers or tongs.
- If the disposal hums but doesn’t grind, stop using it and reset its overload protector.
Press the disposal’s reset button only after restoring power safely, then run cold water and briefly test the unit. If you hear grinding, smell burning, or see standing water remain, stop and call a professional.
Don’t pour chemical cleaner into the Garbage disposal, because it can damage components and create hazardous splashes.
Clean the P-Trap Under the Sink
When the sink still drains slowly, clean the P-trap—the curved pipe beneath the basin where debris often collects. Place a bucket beneath it, then put on gloves to protect your hands.
If slow drainage persists, clean the P-trap beneath the sink, using a bucket and gloves to contain debris and protect your hands.
Loosen the slip nuts at both ends with your fingers or adjustable pliers. Support the trap as you remove it so water and sludge don’t spill unexpectedly.
Study the P-trap design before taking it apart, noting each washer’s position and orientation. Empty the contents into the bucket, then rinse the trap thoroughly with warm water.
Use a bottle brush to remove stubborn grease, food particles, or buildup from its interior. Check the washers and threaded connections for cracks or wear, replacing damaged parts.
Consider material compatibility when choosing replacement washers or a new trap. Select parts rated for your plumbing system.
Reinstall the trap, ensuring every washer sits correctly. Tighten the slip nuts firmly by hand, then check for leaks while running water.
Snake the Kitchen Sink Drain
For a stubborn clog beyond the P-trap, feed a hand auger into the drain to break up or retrieve the blockage. Remove the drain stopper or strainer, then insert the cable slowly.
Turn the handle clockwise while applying gentle pressure, letting the auger follow the pipe’s curve. When you feel resistance, keep rotating to pierce or hook the obstruction.
- Advance the cable 12 to 18 inches, then retract it slightly to loosen debris.
- Pull the auger out gradually, wiping the cable as you go.
- Run hot water briefly to flush loosened material and test drainage.
Wear gloves and place a bucket beneath the opening to catch dirty water. Don’t force the auger, since excessive pressure can damage fittings or scratch the sink.
Rinse and dry the tool after use to support safe, effective Drain cleaning. Regular Pipe maintenance, including occasional strainer cleaning, helps your hand auger work smoothly when buildup develops inside the line.
Prevent Clogs and Spot Serious Problems
You can prevent many clogs by using a sink strainer to catch food scraps and by avoiding grease buildup. Also, watch for slow drainage, foul odors, or recurring backups, as these signs may point to a more serious plumbing problem. If basic cleaning doesn’t help, it’s best to call a professional.
Use Sink Strainers
A sink strainer catches food scraps, grease, and other debris before they enter the drain and cause a clog. Choose a fine-mesh model that fits securely over your drain opening.
Empty it into the trash after washing dishes, then rinse the basket and scrub away residue regularly. This simple habit protects your pipes and helps you notice drainage changes early.
- Check the strainer for rust, cracks, or loose edges.
- Replace damaged baskets before debris slips through.
- Keep a spare with basic plumbing tools for quick replacement.
A clean, well-fitted strainer also supports your Kitchen aesthetics by keeping the basin tidy and preventing visible food particles.
If water still drains slowly with the basket clean, investigate the problem promptly. Persistent gurgling, odors, or standing water may signal a deeper blockage that requires a plunger, drain snake, or professional inspection.
Avoid Grease Buildup
Even with a clean sink strainer, grease can slip through and harden inside your pipes. Practice smart grease disposal by letting cooking fat cool, pouring it into a sealed container, and throwing it away.
Don’t rinse oily pans under hot water; heat only moves grease farther through your plumbing, where it can solidify later. Wipe pans with a paper towel before washing them, and use a small amount of dish soap to break down remaining residue.
Run hot tap water briefly afterward, but don’t rely on it to dissolve large amounts of fat. These habits support clog prevention and keep wastewater flowing freely.
You can also collect bacon drippings or oil in a dedicated jar, then empty it when full. Never combine grease with food scraps in your drain.
Recognize Serious Issues
Notice how quickly your sink backs up and whether water drains from other fixtures. If several drains slow simultaneously, you may have a blocked main line rather than a simple sink clog.
Gurgling sounds, sewage odors, recurring backups, or water rising when you run an appliance also signal trouble. Don’t keep plunging if dirty water returns or a pipe leaks; you could worsen hidden damage.
Watch for these warning signs:
- Water backs up into the sink, dishwasher, or floor drain.
- You find damp cabinets, stained walls, or pooling beneath pipes.
- Chemical cleaners fail, or the clog returns within days.
Turn off nearby water sources and avoid harsh chemicals. Contact a licensed plumber for Professional help, especially when flooding threatens your cabinets or flooring.
Seek Emergency repairs for burst pipes, sewage overflow, or unsafe electrical contact.
Frequently Asked Questions
How Much Does Professional Kitchen Sink Unclogging Typically Cost?
Professional kitchen sink unclogging typically costs $100–$300, though complex blockages or main-line issues can exceed $500. You’ll usually pay more for emergency, weekend, or after-hours service.
Before calling, try DIY remedies such as plunging or cleaning the trap, unless standing water or leaks suggest deeper trouble. Plumbers can identify common causes, including grease, food debris, soap buildup, or pipe damage, then provide an upfront estimate before starting work.
Can Chemical Drain Cleaners Damage Kitchen Sink Pipes?
Yes, chemical drain cleaners can damage your kitchen sink pipes. Think of your plumbing as a small kingdom: harsh chemicals may defeat a clog but slowly weaken the castle walls.
Strong formulas can cause pipe corrosion, especially in older metal, plastic, or poorly joined pipes. Practice chemical safety by following labels, wearing protection, and never mixing products.
Try a plunger or drain snake first, and call a professional if the blockage persists or leaks appear.
How Long Should You Wait Before Calling a Plumber?
Call a plumber if your sink remains clogged after one or two hours of safe DIY remedies, such as plunging or using a drain snake. Don’t wait if water backs up repeatedly, foul odors persist, pipes leak, or chemical cleaner has already entered the drain.
A professional can prevent damage and identify deeper blockages. Afterward, practice clog prevention by using a strainer, avoiding grease, and flushing drains with hot water regularly.
Are Clogged Kitchen Sinks Covered by Homeowners Insurance?
Usually, homeowners insurance doesn’t cover a clogged kitchen sink when routine buildup, grease, or poor maintenance causes it. Insurance coverage may apply if a sudden, accidental event causes related water damage, such as a pipe bursting and damaging cabinets or flooring.
Check your policy exclusions, which often remove gradual leaks, neglected maintenance, and sewer backups unless you purchased additional protection. Review your deductible and contact your insurer before authorizing expensive repairs or cleanup work.
Can a Clogged Sink Cause Unpleasant Odors Throughout the Kitchen?
Yes, a clogged sink can cause unpleasant odors throughout your kitchen. Coincidentally, you may notice the smell lingering just as food scraps begin collecting in stagnant water. Bacteria and trapped grease produce gases that encourage odor spread through the drain and nearby air.
You can remove standing water, clear debris, flush the drain with hot water, and clean the strainer. If odors persist, inspect the trap or call a plumber to prevent deeper blockage.
Conclusion
With the right steps, you can turn a stubborn kitchen sink from a backed-up puddle into a clear, quiet drain. Remove debris, plunge firmly, check the disposal, and clean the P-trap before reaching for a drain snake.
Once water swirls freely again, prevent future clogs by catching food scraps and avoiding grease. If foul odors, leaks, or recurring blockages remain, don’t ignore them. Call a professional before a small drip becomes a costly flood. With these kitchen sink unclogging tips, you can keep your drain flowing smoothly.