Organize Kitchen Drawers in 10 Easy Steps
Is your kitchen drawer overflowing with mismatched utensils, tangled gadgets, and tools you rarely use? You’re not alone—many people struggle to keep drawers neat and functional. These practical tips will help you organize kitchen drawers and create a system that lasts.
Organize kitchen drawers in 10 easy steps: Empty one drawer, wipe it clean, and discard broken, expired, or duplicate items. Sort what remains by function and frequency of use. Give each drawer a clear purpose, then measure its interior before buying dividers or trays.
Choose organizers that fit, use vertical space for small gadgets, and protect sharp tools. Label sections, return items consistently, clean spills promptly, and fix loose hardware or sticky tracks. Keep going for more practical ways to maintain the system.
Key Takeaways
- Empty one drawer completely, wipe it clean, and sort contents into keep, discard, and relocate groups.
- Assign each drawer a clear purpose, grouping utensils and tools by function, frequency of use, or cooking task.
- Measure drawer dimensions, including hardware, before choosing dividers, trays, bins, or adjustable organizers.
- Place frequently used items near preparation areas, while storing occasional gadgets and duplicates in less accessible locations.
- Protect sharp tools, keep drawers dry, and inspect monthly for clutter, alignment problems, odors, or pest issues.
Empty and Declutter Your Kitchen Drawers
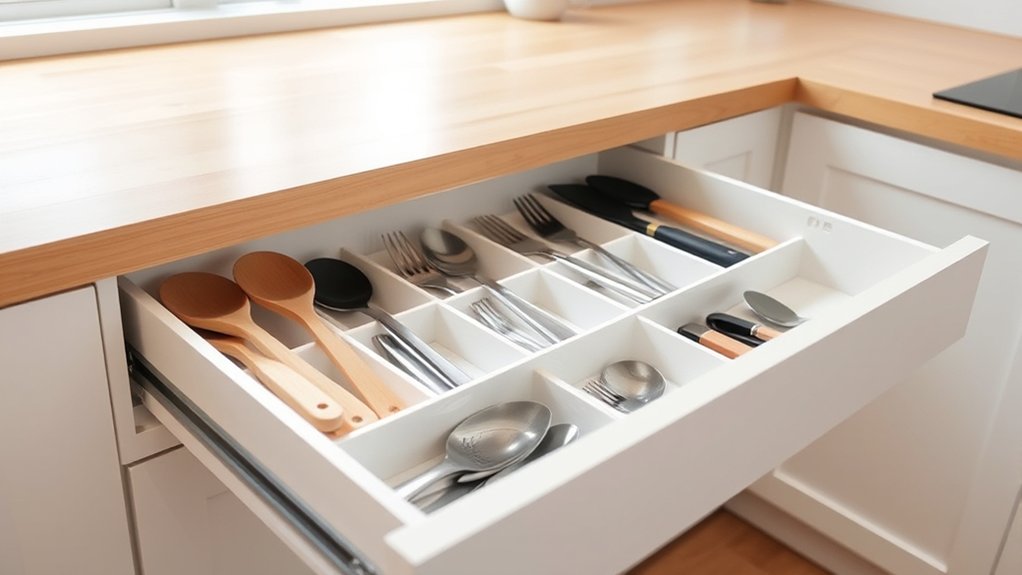
Start by emptying one kitchen drawer completely onto a clean surface. Wipe the drawer’s interior with a damp cloth, then let it dry before replacing anything.
As you inspect each item, create three groups: keep, discard, and relocate. Throw away broken gadgets, expired supplies, and duplicate items you don’t need.
Set aside objects that belong elsewhere, but don’t organize them by use yet. Measure the drawer if you’re considering creative storage solutions, such as removable dividers or shallow bins.
Set aside misplaced items for later, and measure the drawer before choosing dividers or shallow bins.
Choose only accessories that fit without crowding the space. Before returning items, check for crumbs, sticky residue, and damaged liners.
This simple cleaning routine supports consistent drawer maintenance and makes future decluttering easier. Leave some empty room so the drawer opens smoothly and stays manageable.
Repeat the process with each drawer, working steadily instead of emptying the entire kitchen at once. When you finish, recycle suitable materials and discard waste responsibly.
Sort Tools by How You Use Them
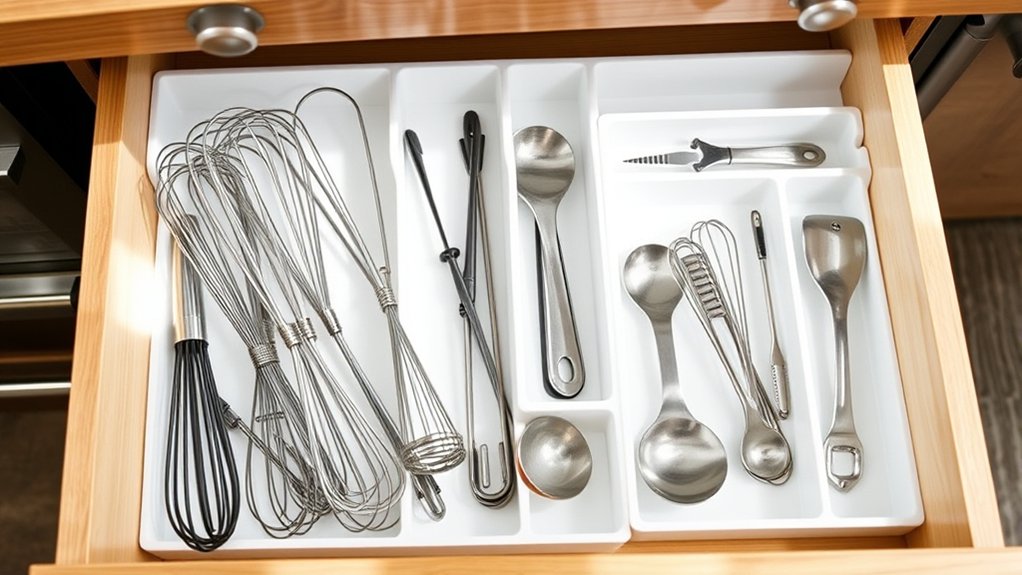
Group your tools by task—like baking, chopping, or serving—so you can find what you need quickly. Keep your favorite and most-used items within easy reach, and store tools you use occasionally farther back or in less accessible drawers.
Group By Task
Arrange kitchen tools by the tasks you perform most often rather than by shape or size. Create sections for meal prep, baking, serving, and cleanup, so each drawer supports a specific routine.
Put measuring spoons, peelers, and prep scissors together. Group spatulas, whisks, and pastry brushes elsewhere. Use dividers to prevent categories from blending, and label compartments if several tools look alike.
Consider pantry organization, too. Keep can openers, bag clips, and scoopers near the items they help manage, without mixing food storage accessories with cooking utensils.
- Meal prep: Peelers, graters, knives, and measuring tools
- Baking: Whisks, spatulas, scrapers, and brushes
- Serving: Tongs, ladles, and trivets
- Cleanup: Dish brushes, scrubbers, and sink stoppers
Review each group after cooking for a week. If a category feels awkward, rearrange its contents to match your actual workflow.
Keep Favorites Accessible
Keep the tools you reach for most in the easiest-to-access drawer or front section. Place your favorite utensils, such as a chef’s knife, spatula, and measuring spoons, where you can grab them without searching.
Arrange frequently used items near the front, while reserving back spaces for tools you use less often. Group each item by your cooking habits, not just its type.
If you bake daily, keep measuring cups and a whisk together; if you prepare vegetables often, store peelers and tongs nearby.
Avoid overfilling the drawer, because crowded compartments slow you down and hide essentials. Use dividers to give every tool a consistent home.
After a week, notice what you still reach for and adjust the layout until it feels natural.
Give Each Drawer a Clear Job
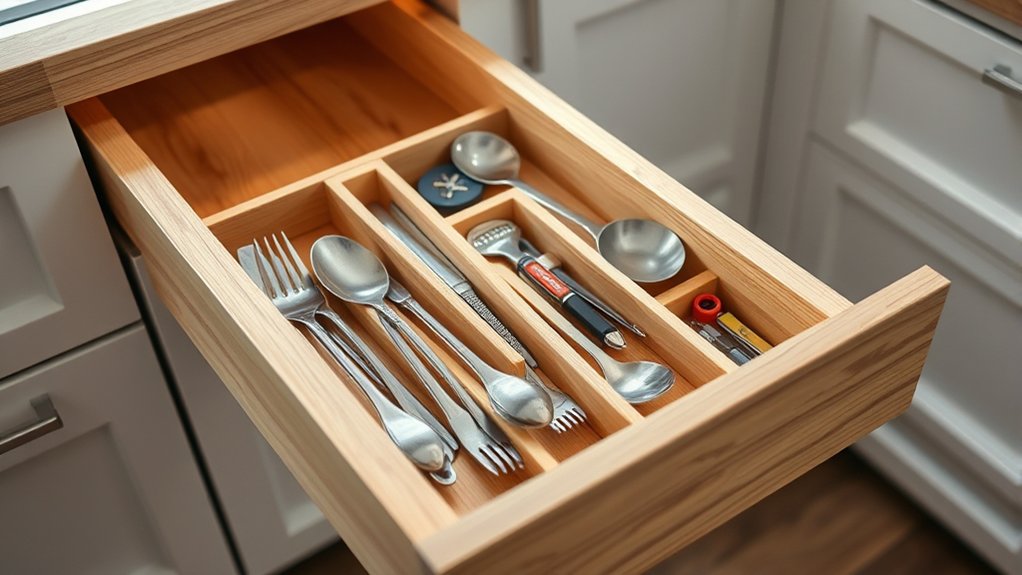
Give each drawer one clear job so you know exactly where everything belongs. Assign categories based on how you cook and what you reach for most. Keep similar tools together, and avoid mixing unrelated items that make searching frustrating.
Assign each drawer a clear purpose, grouping similar tools together so everything stays easy to find.
These organizational principles create a simple routine you can maintain.
- Place everyday utensils in one drawer near your main prep area.
- Group measuring tools, peelers, and graters in another.
- Reserve a drawer for cooking tools, such as spatulas and tongs.
- Use a separate space for linens, wraps, or food-storage accessories.
Think about each drawer’s purpose before you return anything. If an item doesn’t match the assigned category, move it to a better home instead of forcing it inside.
Keep categories broad enough to remain practical, but specific enough to prevent clutter. Add drawer labels when family members share the kitchen, using short names they’ll understand quickly.
Clear labels reinforce your system and make cleanup easier. Review the arrangement after a week, then adjust categories that don’t fit your habits.
Measure Drawers Before Buying Organizers
Before you shop, measure each drawer’s width, depth, and height. Be sure to account for hardware—such as slides or hinges—that could limit the usable space. Write down your measurements so you can choose organizers that fit properly.
Measure Width, Depth, And Height
Accurate measurements help you choose organizers that fit instead of wasting space or forcing drawers to stick. Grab a measuring tape and record each dimension carefully.
Measure the inside width from side to side, then measure the usable depth from front to back. Finally, measure the interior height from the drawer bottom to the lowest point above it.
- Measure in inches or centimeters, and use one system consistently.
- Take measurements at several points to catch uneven sides.
- Write the smallest width, depth, and height you find.
- Check organizer dimensions against your notes before purchasing.
Good measurement accuracy prevents cramped compartments and wasted gaps. Keep your notes or photograph them so you can compare products while shopping.
If an organizer nearly matches your numbers, choose a slightly smaller option to allow comfortable movement and easy removal.
Account For Drawer Hardware
Your measurements should include more than the drawer’s open space. Check how the drawer hardware affects usable room before you choose an organizer.
Slides, brackets, hinges, and adjustment mechanisms may narrow the sides, reduce depth, or limit how high an insert can rise. Open and close the drawer while inspecting these parts.
Look beneath the drawer for rails or supports that could block a tray. Note any areas where hardware protrudes into the compartment, especially near corners and the back panel.
You’ll also want enough clearance for smooth movement. An organizer that presses against a slide can cause sticking or damage.
Leave space around moving components, and don’t force an insert into place. Consider hardware maintenance, since accessible slides make cleaning, tightening, and future repairs easier.
Record Measurements Before Shopping
Once you’ve accounted for the hardware, measure each drawer before shopping for organizers. Open it fully, then measure the interior length, width, and depth, not the outside dimensions.
Note any sloped sides, rounded corners, dividers, or rails that could limit usable space. Write every number in one place so your shopping list stays accurate.
Use these measurement tips to choose organizers that fit comfortably:
- Measure twice to catch mistakes.
- Record dimensions in inches or centimeters consistently.
- Check the drawer’s narrowest point.
- Leave slight clearance for smooth opening.
Compare your notes with each product’s interior and exterior dimensions. Don’t rely only on labels such as “standard” or “large,” because drawer sizes vary widely.
If you’ll stack trays or add a knife block, measure the remaining height carefully. Keep your notes or a quick photo on your phone while shopping so you can verify fit before buying.
Choose Organizers That Fit Your Drawers
Choose organizers that match your drawer’s dimensions so they stay stable and make every inch useful. Use your recorded length, width, and depth to compare trays, bins, dividers, and expandable inserts.
Leave enough clearance for the drawer to open smoothly, but avoid large gaps that waste space.
Consider drawer customization when standard sizes don’t work. Adjustable dividers, modular trays, and stackable containers let you create a layout that follows unusual corners or changing storage needs.
Check each product’s dimensions, including handles, hinges, and raised edges, before you buy.
Compare organizer materials for durability and maintenance. Bamboo offers a warm appearance, plastic resists spills and cleans quickly, and metal provides sturdy support.
Choose smooth, rounded surfaces that won’t snag cloths or scratch the drawer. Non-slip feet or a fitted liner can keep pieces from sliding whenever you open or close the drawer.
Select designs that use vertical space without blocking visibility or movement. Test the fit before filling anything.
Arrange Everyday Utensils by Function
Group similar utensils together so you can find what you need quickly. Keep the tools you use every day in the most accessible sections, and label each drawer area to make staying organized easier.
Group Similar Utensils
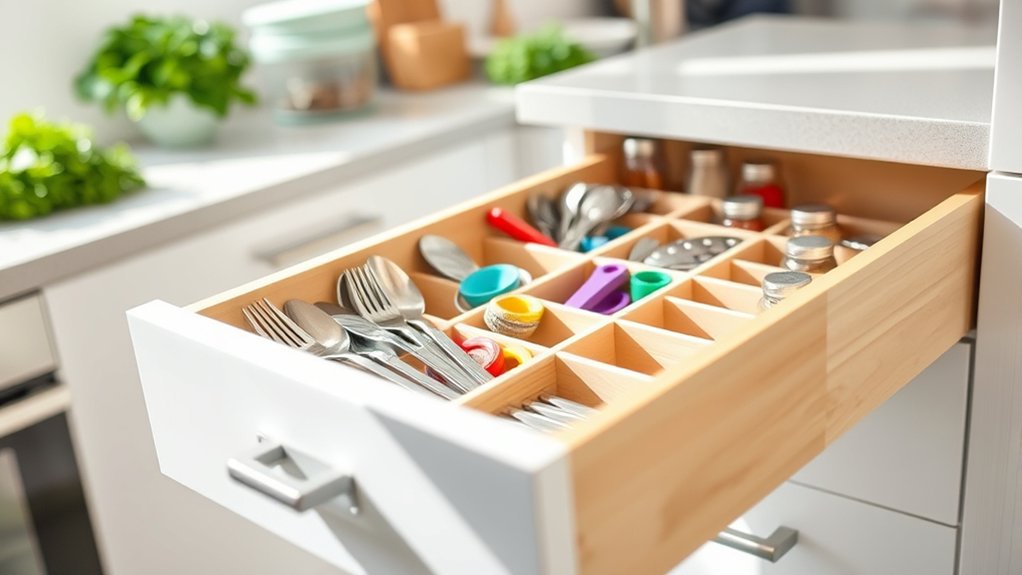
Group everyday utensils by function so you can find what you need quickly. Create clear utensil categories for tools that serve similar purposes, keeping each group together in its own drawer section. This approach makes cooking smoother and prevents mixed-up, cluttered spaces.
- Place forks, spoons, and knives in separate compartments.
- Keep measuring spoons and cups together for quick access.
- Store peelers, graters, and zesters in one narrow section.
- Gather spatulas, tongs, and serving spoons by shape or use.
Choose drawer dividers that fit your space, then adjust their positions until each category has room. These storage solutions keep handles aligned and make every tool easy to spot.
Label sections if other household members use the kitchen. Return each utensil to its assigned group after washing, so your organization stays consistent and your drawers remain orderly.
Prioritize Daily Tools
Once similar utensils have their own sections, give the easiest-to-reach spots to the tools you use every day. Place your favorite spatula, chef’s knife, peeler, measuring spoons, and can opener near the front, where you can grab them without searching.
Arrange these everyday tools by function: keep cooking utensils together, group prep tools nearby, and position measuring items in another convenient area. Put occasional-use gadgets toward the back or in a less accessible drawer.
This setup supports better Time management because you’ll spend less time hunting for essentials while preparing meals. Choose storage solutions that fit your routine, such as shallow dividers or adjustable inserts that keep each tool visible and secure.
Keep heavier items low and frequently handled tools within comfortable reach, so your workflow stays smooth.
Label Drawer Sections
Clear labels turn each drawer section into an easy-to-follow system, so you’ll know exactly where to return everyday utensils. Group tools by function, then mark each space with a short, readable name.
You’ll save time when cooking and make cleanup easier for everyone.
- Keep forks, spoons, and knives together.
- Place measuring tools near prep utensils.
- Store peelers, graters, and zesters in one section.
- Reserve a space for serving tools.
Use Custom drawer inserts to create stable compartments that match your collection. Add color coded labels if you want to identify categories at a glance, but choose shades with strong contrast.
Measure each drawer before buying inserts, and leave enough room for comfortable access. Review the layout after a week, then move items that don’t feel convenient.
Replace unclear labels with specific terms, such as “measuring spoons” instead of “small tools.”
Store Kitchen Gadgets Without Wasting Space
Make every inch count by storing kitchen gadgets according to how often you use them and how much space they require. Keep daily tools, such as peelers, measuring spoons, and can openers, in the most accessible drawer sections.
Place occasional gadgets, including zesters or specialty slicers, farther back or in a less convenient drawer. Nest smaller items inside larger ones when their shapes allow it, and group attachments with the appliance they fit.
Use slim dividers to prevent pieces from shifting, but avoid overcrowding each compartment. Creative storage solutions, such as adjustable inserts and removable bins, help you customize space for oddly shaped tools.
Before storing a gadget, remove unnecessary packaging and discard duplicates you never use. Innovative gadget placement also means laying flat tools together and positioning bulky handles toward open corners.
Review the drawer every few months, returning frequently used items to easy-to-reach spots and donating gadgets that no longer serve your cooking routine.
Use Vertical Space for Small Items
Small items can take up valuable drawer space when they lie flat, so store them upright whenever possible. Use narrow cups, divided trays, or adjustable inserts to create vertical storage for tools and supplies.
Store small items upright in narrow cups, divided trays, or adjustable inserts to maximize drawer space and keep essentials visible.
This setup keeps each piece visible and easy to lift without disturbing nearby items. Choose containers that fit your drawer’s height, leaving enough clearance for smooth opening and closing.
For effective small item organization, group similar pieces by purpose and give each group a dedicated section:
- Stand measuring spoons in a slim cup.
- Place clips and ties in small compartments.
- Store peelers and thermometers upright.
- Keep pastry tips in a divided tray.
You can also add a tension rod across a deeper drawer to hold lightweight items vertically. Reserve tall sections for frequently used tools, while shorter compartments suit tiny accessories.
Arrange everything so handles face upward, making selection quick and preventing items from getting buried. Check the fit before filling the drawer, and adjust dividers until every item stays upright during daily use.
Label Drawers and Keep Them Tidy
Once each drawer has a purpose, add a simple label to its front or divider so everyone knows where items belong. Choose clear words such as “Measuring Tools,” “Snacks,” or “Wraps,” and use large, readable lettering. Creative labeling can add personality without reducing clarity: try matching icons, chalkboard stickers, or color-coded tags for different household members.
Place labels where you can see them while standing at the counter. If a drawer sits in a dim corner, add discreet drawer lighting, such as a slim motion-activated strip, so you can read labels and find items quickly. Keep categories specific enough to guide you, but broad enough to avoid cluttered labels.
Return each item to its assigned space after use, and schedule a quick weekly reset. Remove duplicates, wipe crumbs, and straighten dividers before disorder spreads.
When you buy something new, decide its home immediately. Update a label whenever the drawer’s contents change, so your system stays intuitive and easy to maintain.
Fix Common Kitchen Drawer Problems
Even a well-labeled drawer can develop problems, from sticking tracks and overcrowded compartments to crumbs and misplaced items. Start by emptying it completely, then inspect the slides for loose screws, bent parts, or trapped debris. Tighten hardware and replace damaged tracks instead of forcing the drawer open.
Use these quick fixes:
- Remove duplicate utensils and relocate rarely used tools.
- Wipe crumbs with a handheld vacuum or damp cloth.
- Wash organizers with warm, soapy water and dry them fully.
- Add dividers to stop items from shifting and jamming.
For better Kitchen drawer hygiene, clean spills immediately and check corners where grease collects. These drawer cleaning tips help prevent odors, pests, and sticky surfaces.
If a drawer still won’t glide, check whether it’s overloaded or unevenly positioned. Redistribute weight, adjust the screws, and test the movement.
Keep sharp tools in protective holders, and don’t store wet items inside. A monthly inspection keeps small problems from becoming expensive repairs and makes your organized kitchen easier to use.
Frequently Asked Questions
How Often Should Kitchen Drawers Be Reorganized?
You should reorganize your kitchen drawers every three to six months, or whenever items become difficult to find. A quick monthly check helps you remove clutter, return misplaced tools, and adjust Drawer dividers as your needs change.
Use Lazy susans for awkward corners and review them during each seasonal reset. Reorganize sooner after moving, replacing appliances, or changing cooking habits.
Regular five-minute touch-ups keep drawers functional, tidy, and easier to use daily.
What Materials Are Best for Easy-To-Clean Kitchen Drawer Organizers?
Choose plastic, bamboo, or stainless steel for easy-to-clean kitchen drawer organizers. Plastic acts like a workhorse: it’s lightweight, affordable, and wipes clean quickly, though you should choose BPA-free, dishwasher-safe options.
Stainless steel offers excellent cleaning ease, resists stains, and lasts for years. Bamboo looks warm and stylish, but it needs occasional oiling and careful drying.
Whichever drawer material you select, avoid porous fabrics that trap crumbs, moisture, and odors.
How Can Children Safely Access Appropriate Kitchen Drawers?
Create designated zones by placing safe items—plastic containers, wooden utensils, and snack cups—in low drawers your child can reach. Keep knives, peelers, medications, cleaners, and breakable cookware in higher drawers or behind child proof locks.
Use sturdy, smoothly operating organizers that prevent tipping, and check drawers regularly for loose parts. Teach your child which drawers they may open, supervise younger children, and adjust access as their abilities change.
Should Kitchen Drawers Be Lined to Prevent Scratches and Stains?
Yes, line kitchen drawers when you want a protective shield between stored items and finished surfaces. Drawer liners act like quiet armor, catching crumbs, spills, and grit before they damage wood or laminate.
Choose nonslip, washable material for effective scratch prevention, and trim it to fit without bunching. You don’t need liners everywhere; prioritize utensil, cookware, and cleaning-supply drawers.
Replace them when they curl, tear, stain, or retain odors.
How Do You Remove Odors From Kitchen Drawers?
Remove odors from kitchen drawers by emptying them and wiping every surface with warm, soapy water. Dry them thoroughly, then sprinkle baking soda inside and leave it overnight. Vacuum or wipe it away the next day.
For ongoing air freshening, place a small sachet of dried herbs, coffee grounds, or activated charcoal inside. These odor absorbers work best when you replace them regularly.
Don’t store damp cloths or spilled foods, which can create lingering smells.
Conclusion
With these simple steps, you’ll turn chaotic kitchen drawers into efficient, easy-to-use spaces. Declutter first, assign every drawer a clear purpose, and choose organizers that fit instead of forcing them to work.
Store gadgets wisely, use vertical space, and label when helpful. When each item has a home, cleanup becomes almost effortless—like following a well-marked recipe.
Keep checking your drawers regularly, and you’ll maintain an organized kitchen that saves time and makes cooking more enjoyable every day. These tips make organizing kitchen drawers simple and practical.