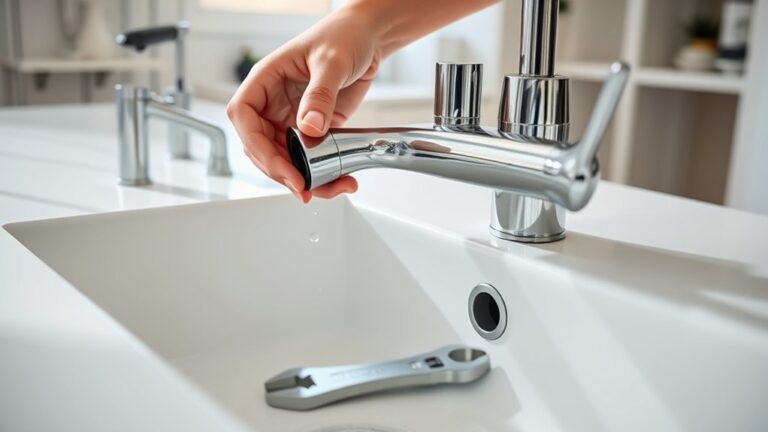
How to Tighten a Kitchen Faucet in 7 Steps
A loose kitchen faucet can wobble, leak, and make everyday tasks frustrating. You’re not alone—many people struggle to tighten one properly, especially when the mounting nut is hard to reach beneath the sink.
This guide explains how to tighten a kitchen faucet safely and effectively.
To tighten a kitchen faucet in seven steps, check the base for movement, clear the cabinet, and shut off both water valves. Find the mounting nut beneath the sink, then tighten it gradually with a basin wrench.
Center the faucet and secure any additional hardware evenly. Restore water slowly and check every connection for leaks.
If the nut, washer, or gasket is damaged, replace it before retightening. Keep going for detailed tips that help prevent future leaks.
Key Takeaways
- Check the faucet base for looseness, then clear the cabinet and shut off both hot and cold water valves.
- Locate the mounting nut beneath the sink, distinguishing it from supply-line connectors.
- Center the faucet and tighten the mounting nut gradually with a basin wrench or suitable tool.
- Restore water slowly and inspect the faucet base, supply lines, and connections for leaks.
- Replace cracked, corroded, stripped, or flattened hardware, washers, and gaskets before reassembling.
Check the Loose Kitchen Faucet Base
Before tightening anything, check whether the faucet base is actually loose. Place one hand around the faucet body and gently rock it from side to side. Watch the base where it meets the sink.
If the entire fixture moves, the mounting hardware may need attention. If only the spout or handle shifts, you may have a separate component problem.
Look beneath the sink, if accessible, and identify the mounting nut, bracket, or screws used during Faucet installation. Don’t assume the visible movement comes from that hardware. A cracked base, worn gasket, or loose handle can create similar symptoms.
Use a flashlight to inspect the connection and note corrosion, water marks, or missing parts.
Gather suitable Plumbing tools, such as an adjustable wrench, basin wrench, or screwdriver, after confirming the source. Test the faucet again by turning the handle and swivel spout gently.
A clear diagnosis helps you tighten the correct part without damaging the fixture or sink.
Clear the Cabinet and Shut Off Water
Remove everything from beneath the sink so you can reach the faucet’s mounting hardware comfortably. Take out bottles, bins, sponges, and tools, then place them on a towel or countertop.
Check for leaks or standing water as you work, and wipe the cabinet floor dry. Group your cleaning supplies together so you can return them efficiently later.
Check for leaks, dry the cabinet floor, and group cleaning supplies for efficient replacement.
This temporary clearing also gives you a chance to improve cabinet organization and discard expired products.
Place a bucket or shallow pan beneath the supply lines to catch residual water. Find the hot and cold shutoff valves on the wall or cabinet floor, and turn each handle clockwise until it stops.
If you have lever-style valves, rotate each lever a quarter turn so it sits perpendicular to the pipe. Open the faucet briefly to release pressure and confirm that water no longer flows.
Keep a flashlight nearby, and protect stored items from drips while you prepare for the next step.
Find the Faucet Mounting Nut
Reach under the sink and find the hardware holding the faucet in place. The mounting nut is usually attached to the faucet shank, just beneath the countertop. Take note of its shape and size so you can choose the right tool.
Locate Under-Sink Hardware
Under the sink, locate the faucet’s mounting nut where the water lines pass through the sink deck. Clear away bottles, sponges, and stored supplies so you can see the hardware.
Use a flashlight to trace the faucet water lines upward toward the sink deck. Look for sink mounting brackets, threaded studs, washers, or a large nut beneath the faucet base.
Don’t loosen anything yet. Simply map each component and note tight spaces that may limit tool movement.
Place a towel below the area to catch drips and protect the cabinet.
| What you notice | What it means | Your response |
|---|---|---|
| Wet surface | A leak may exist | Dry and observe |
| Corrosion | Hardware may resist | Prepare carefully |
| Limited access | Tools may not fit | Clear more space |
Check both sides of the cabinet before proceeding.
Identify Mounting Nut
Once you’ve cleared the cabinet, identify the mounting nut where the faucet’s threaded shank passes through the sink deck. Reach behind the basin and trace the faucet shank downward until you find the hardware securing it.
The nut may sit directly against the sink, beneath a metal washer, or inside a plastic bracket. Compare the visible hardware with common mounting nut types, including hex nuts, wing nuts, and large hand-tightened plastic nuts.
Your faucet mounting methods may also include a U-shaped clamp, a threaded collar, or a mounting plate shared by several shanks. Use a flashlight and wipe away grime so you can see the nut’s shape and edges.
Don’t confuse supply-line connectors with the mounting nut. Connectors attach hoses, while this hardware holds the faucet firmly in place.
Tighten the Kitchen Faucet Mount
First, access the mounting hardware beneath the sink. Then, use a wrench to tighten the mounting nuts until the faucet feels secure. Be careful not to overtighten them.
Access Mounting Hardware
To access the mounting hardware, clear out the cabinet beneath the sink and use a flashlight to locate the faucet’s mounting nut or bracket. Place a towel on the cabinet floor to catch drips and protect your back as you work.
Identify the parts before reaching for a tool:
- Look for the threaded shank directly below the faucet.
- Check for a metal or plastic mounting plate against the sink.
- Note the supply lines, clips, and nearby plumbing connections.
Use a mirror or your phone’s camera if visibility is limited. Remove stored items that block your shoulders, and keep a basin nearby for any residual water.
Don’t force parts or disconnect hoses unnecessarily. The faucet aesthetic and design considerations may affect access, since some models hide hardware beneath decorative covers or use unusual bracket shapes.
Tighten Mounting Nuts
Reach the mounting nut beneath the faucet and tighten it clockwise with a basin wrench or the tool recommended by the manufacturer. Hold the faucet above the sink while you turn the nut, or ask someone to keep it aligned.
Tighten gradually, switching between mounting nuts if your faucet design uses more than one. Check the faucet from above after each few turns to ensure it remains centered and firmly seated against the countertop.
Don’t overtighten, because excessive force can damage the threads, mounting hardware, or sink surface. Follow the manufacturer instructions for the correct tightening method and torque, especially if the faucet includes a mounting plate, bracket, or quick-connect assembly.
Stop when the faucet no longer shifts, then wipe away debris and test its stability by gently moving the spout.
Center the Faucet and Secure It
Center the faucet over the sink’s mounting hole, then hold it firmly in place while you tighten the mounting hardware from beneath the countertop. Keep the spout facing straight toward the sink, and check its position from above before fully tightening the nuts.
A properly centered faucet improves usability and gives your countertop a balanced appearance.
- Align the base: Set the faucet evenly around the mounting hole, with no visible gaps or twisting.
- Check the direction: Point the spout toward the basin’s center so water will reach the intended area.
- Secure the hardware: Tighten each mounting nut gradually and alternate sides to maintain even pressure.
Ask someone to hold the faucet steady if it shifts while you work. Use a basin wrench or the manufacturer’s recommended tool when access is tight.
Don’t overtighten, since excessive force can damage the mounting surface, threads, or faucet material. Once secure, wipe away fingerprints and confirm the fixture’s aesthetic appeal from every angle.
This careful alignment keeps the faucet stable during everyday use.
Turn On Water and Check for Leaks
Slowly turn on the water supply valves, then open the faucet and let water run briefly. Increase water pressure gradually while you watch every connection beneath the sink. Use a dry paper towel for leak detection; even a tiny drip leaves a visible mark.
Check the supply valves, hose connections, and faucet base. Run both hot and cold sides, then move the handle through its normal range.
| Checkpoint | What you’ll notice | Your response |
|---|---|---|
| Valves | Steady flow | Continue |
| Hose joints | Dampness or drips | Close valves |
| Faucet base | Water ring | Dry and observe |
| Cabinet floor | New wet spot | Stop testing |
After testing, close the faucet and inspect again. Wipe all areas completely, then wait several minutes before checking the paper towel.
If everything stays dry, reopen the faucet and confirm normal flow. Listen for hissing, knocking, or unusual vibration, which can signal an unstable connection.
Don’t ignore slow moisture. Shut off the water before proceeding.
Replace Damaged Hardware or Gaskets
If testing revealed a leak, shut off both supply valves and replace the damaged washer, gasket, nut, or mounting hardware before reassembling the faucet. Place a bucket beneath the connections to catch trapped water.
Remove the handle, spout, or mounting plate as needed, keeping screws and clips organized.
During hardware inspection, examine each part for cracks, corrosion, stripped threads, distortion, or compression damage. Match every replacement with the original size and faucet model.
Don’t reuse a flattened gasket or rusted nut. It may leak again even when tightened.
- Clean mineral buildup from the mating surfaces with a soft cloth.
- Install the new washer or gasket squarely, without twisting or stretching it.
- Tighten the mounting hardware evenly, then reconnect supply lines securely.
Apply seal replacement parts only where the manufacturer specifies. Excess sealant can obstruct passages or contaminate water.
Restore the water supply slowly and check every joint. If moisture appears, shut the valves off and correct the alignment before continuing.
Frequently Asked Questions
Can I Tighten a Kitchen Faucet Without Turning off the Water Supply?
Yes, you can tighten a kitchen faucet without turning off the water supply, but you’ll need to work carefully. Reduce water pressure by closing the faucet, then place a towel beneath the sink to catch drips.
Tighten the mounting nuts or screws underneath using a basin wrench. Avoid loosening supply-line connections, since faucet leaks could worsen quickly.
For safety, shut off the valves first if you need to disconnect anything or replace worn parts.
What Tools Work Best for Tightening a Faucet With Limited Cabinet Access?
Like a key fitting a lock, choose compact tools for tight cabinet spaces. A basin wrench works best because its swiveling jaw reaches faucet mounting nuts from below.
Add a short adjustable wrench, ratchet with a shallow socket, and a flashlight or headlamp for visibility. For DIY repairs, prioritize tool selection based on clearance, not size alone.
A flexible extension or small inspection mirror can help you locate and tighten hidden hardware safely.
How Often Should I Inspect My Kitchen Faucet for Looseness?
Inspect your kitchen faucet for looseness every three to six months, and check it immediately if you notice wobbling, drips, or unusual movement. You’ll catch developing problems early by examining the base, supply connections, and sprayer hose.
Tighten loose hardware carefully, but don’t overtighten it. Regular checks support leak prevention, protect your cabinets from water damage, and address aesthetic concerns before gaps, stains, or corrosion become noticeable.
Can a Loose Faucet Cause Damage to the Countertop Over Time?
Yes, a loose faucet can quietly invite countertop damage over time. Water slips beneath the base, and that small leak can become a slow-motion wrecking ball, soaking wood, swelling laminate, staining stone, or weakening seals.
You’ll also notice reduced faucet stability, which lets movement worsen the problem. Check underneath regularly, tighten the mounting hardware, and replace worn gaskets.
If moisture or discoloration appears, dry the area and repair it promptly before costs climb.
When Should I Hire a Plumber Instead of Tightening the Faucet Myself?
Hire a plumber if tightening the faucet doesn’t stop movement, leaks continue, or water reaches the countertop or cabinet. You should also call one when you can’t access the mounting hardware, identify corroded or damaged parts, or feel unsure about shutting off the water safely.
Simple DIY repairs may save money, but forcing fittings can worsen damage and increase plumbing costs. Get professional help for persistent leaks, low pressure, or hidden water damage.
Conclusion
With these seven steps, you can give your kitchen faucet a firm new footing without calling in reinforcements. Once the base is snug, the faucet is centered, and the water flows without a telltale drip, your sink should feel refreshed and ready for duty.
If worn hardware or gaskets have quietly surrendered, replace them before they create a larger puddle. Take a final look beneath the cabinet, then enjoy a kitchen faucet that stands tall and steady.