How to Clean a Kitchen Step by Step
A messy kitchen can quickly feel overwhelming, especially when you’re unsure where to start. You’re not alone—many people struggle to keep every surface, appliance, and floor clean. This step-by-step guide to how to clean a kitchen makes the process simpler and more manageable.
To clean your kitchen step by step, gather safe supplies and clear counters, floors, and expired food. Take out the trash, wash dishes, and scrub the sink.
Dust light fixtures and cabinet tops, then clean appliances inside and out. Disinfect counters and prep areas, scrub the stovetop and range hood, and wipe cabinet surfaces.
Finally, sweep and mop from the edges inward. Keep the space fresh with a simple daily routine, and uncover practical details that make each task easier.
Key Takeaways
- Gather supplies, open windows if needed, and clear dishes, appliances, food, clutter, and trash from all surfaces.
- Wash dishes or run the dishwasher, clean the sink, and organize food while discarding expired items.
- Wipe counters, cabinets, backsplash, appliances, and high-touch areas with suitable cleaners, following disinfectant contact-time instructions.
- Clean the stovetop, range hood, and removable parts, then sweep and mop floors from the edges inward.
- Dry surfaces, replace items neatly, take out trash, and inspect the kitchen for remaining spills or buildup.
Gather Safe Kitchen Cleaning Supplies

Before you start cleaning, gather safe, effective supplies: microfiber cloths, a scrub brush, sponges, dish soap, baking soda, white vinegar, and an all-purpose cleaner. Choose products labeled for kitchen surfaces, and read each label before use.
Keep separate cloths for counters, appliances, and floors so you don’t spread grease or bacteria. For food safety, reserve one sponge or brush for dishes and another for surfaces around raw meat.
Use separate cleaning tools for each area, and dedicate one sponge or brush to surfaces exposed to raw meat.
Check that your supplies are clean, dry, and in good condition before every use. Wear reusable gloves if you have sensitive skin, and open a window when product odors feel strong.
Never mix bleach with vinegar, ammonia, or other cleaners, because dangerous fumes can form. Store solutions securely, away from food, heat, children, and pets.
Finally, organize everything in one accessible caddy. You’ll work faster when your tools are ready, and you can maintain consistent cleaning schedules without searching for supplies during each kitchen-cleaning session.
Clear Clutter and Take Out Trash

Start by clearing counters, tables, and the floor of appliances, dishes, mail, and other loose items, then put each object where it belongs. Return unopened food to cabinets, group similar ingredients, and use Organizing pantry strategies to keep shelves orderly.
Check expiration dates as you go, and set aside anything spoiled or empty for disposal. Line your trash bin before you begin, so you won’t need to handle a leaking bag later.
Break down cardboard boxes to save space, and flatten clean paper packaging. Follow local Recycling tips: separate accepted materials, rinse containers when required, and keep food-soiled items out of the recycling.
Place compostable scraps in your designated compost bin, if available. Tie the trash bag securely and take it outside before odors develop.
Wipe up crumbs or spills left behind by removed items, but save detailed surface cleaning for the next step. Finish by returning only useful, frequently used items to accessible spots, leaving your work areas open and easier to clean.
Wash Dishes and Scrub the Sink
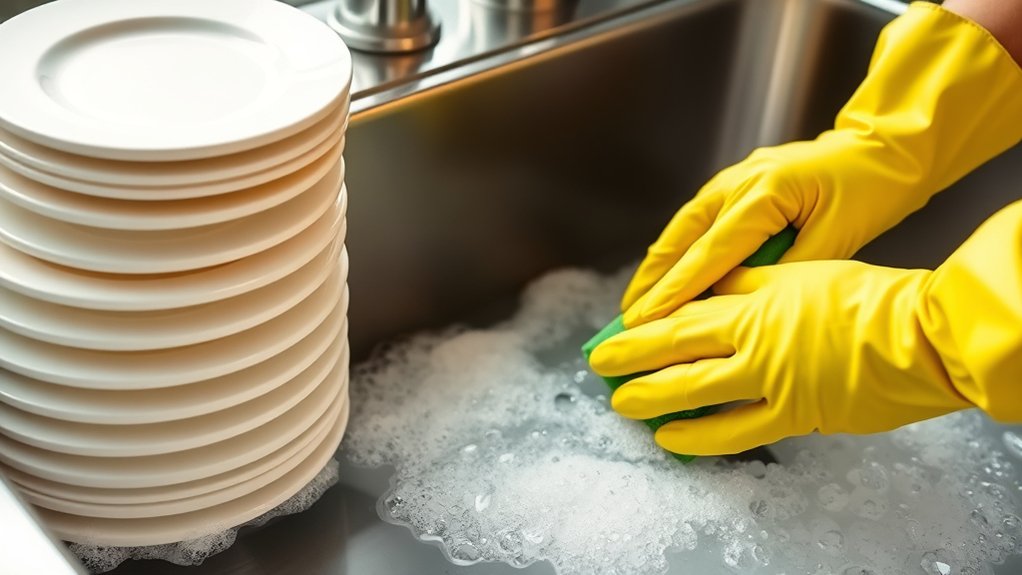
Gather and sort your dishes, setting delicate items and utensils aside. Wash and rinse each dish thoroughly. Once the dishes are done, scrub and sanitize the sink.
Gather and Sort Dishes
Clear the counters and table, then sort the dishes by type and scrape leftover food into the trash or compost. Gather plates, bowls, cups, glasses, utensils, cookware, and serving pieces from around the kitchen.
Check the dining area, stovetop, microwave, and living spaces for strays. Keep sharp knives separate, and place fragile glassware where it won’t break.
Group items according to your usual dish storage system, so you can return them efficiently later. If you share a home, follow everyone’s dining etiquette by keeping personal or specialty items together and respecting designated shelves.
Set aside heavily soiled cookware and items needing special care, but don’t start washing yet. Empty food containers, discard disposable packaging, and remove napkins or other trash.
Once everything’s sorted, stack stable pieces neatly beside the sink and leave room to work.
Wash and Rinse Dishes
Once the dishes are sorted, wash them in order from least to most soiled: glasses and cups, plates and bowls, utensils, then cookware. Fill the basin with hot water, add dish soap, and use a clean sponge or brush to scrub every surface.
Pay special attention to rims, handles, and stuck-on food. Rinse each item under running water until no suds remain.
For baked-on residue, soak the cookware briefly before scrubbing, but don’t overload the basin. Place clean items in a rack for dish drying, positioning cups and bowls so water drains completely.
Dry remaining moisture with a fresh towel if needed, then return everything to its designated dish storage area. Wash or replace the sponge regularly, and change cloudy water before it leaves dishes greasy or streaked.
Scrub and Sanitize Sink
After you’ve put the clean dishes away, scrub the sink to remove food particles, grease, and soap residue. Rinse the basin, then sprinkle baking soda over damp surfaces.
Scrub with a nonabrasive sponge, paying attention to corners, the drain, and the area around the faucet. Rinse thoroughly and wipe everything dry to prevent water spots.
For sanitation, spray an appropriate disinfectant and follow the product’s contact-time directions before rinsing, if required. Don’t mix bleach with vinegar or other cleaners, because dangerous fumes can form.
Include the faucet cleaning in your routine: Wipe handles, the spout, and the aerator with soapy water, then disinfect and dry them.
Regular sink maintenance prevents odors, buildup, and bacteria. Finish by cleaning the drain strainer and replacing it securely.
Your sink should look clean, smell fresh, and feel ready for the next meal.
Dust Light Fixtures and Cabinet Tops
Gather a microfiber cloth, a duster, and a gentle cleaner before you begin. Carefully wipe down the light fixtures, then dust the tops of the cabinets. This helps remove hidden grime and leaves your kitchen looking cleaner.
Gather Dusting Supplies
Before dusting, gather a microfiber cloth, a telescoping duster, a step stool, and a vacuum with a brush attachment. Choose clean, dry dusting cloths that won’t leave lint on cabinet tops or nearby surfaces.
A feather duster can loosen particles from high corners, trim, and fixture exteriors without forcing you to climb repeatedly. Check that your step stool stands level on the floor.
Keep the vacuum’s brush attachment within reach for collected debris. You’ll also need a small bin or bag for disposable filters, heavily soiled cloths, and loose dust.
Wear a mask if dust bothers your allergies. Move fragile items, secure dangling cords, and turn off nearby fans before you begin.
Keep your supplies together on a tray so you can work efficiently and avoid unnecessary trips.
Clean Light Fixtures
Start with the light fixtures and cabinet tops, working from the highest surfaces downward so dust doesn’t settle on areas you’ve already cleaned.
Turn off the lights and let bulbs cool completely before you begin. Place a stable step stool beneath any hard-to-reach fixture, and keep both hands free when possible.
Use a microfiber duster or soft, dry cloth to lift dust from shades, bulbs, ceiling fans, and exposed hardware.
Don’t spray cleaner directly onto lighting fixtures. Moisture can damage electrical parts.
Instead, lightly dampen your cloth for washable glass or metal, then dry each surface thoroughly.
Check manufacturer instructions before removing covers or cleaning delicate finishes.
Regular fixture maintenance keeps your kitchen brighter and helps you spot loose parts, burned-out bulbs, or buildup that needs careful attention.
Dust Cabinet Tops
Once the light fixtures are dust-free, move to the cabinet tops, where grease and dust often collect unnoticed. Remove Decorative accents, plants, and other items, then wipe each piece with a damp microfiber cloth. Set these items aside while you clean, and check them for grime before returning them.
Use a dry microfiber duster or vacuum brush to lift loose dust from cabinet tops. For sticky residue, mix warm water with a few drops of dish soap. Dampen a cloth, wring it well, and wipe the surface without soaking the cabinets.
Follow with a clean, dry cloth to prevent moisture damage and streaks. As you replace items, consider cabinet organization. Keep rarely used pieces together, avoid overcrowding, and leave space for easier future cleaning.
Don’t forget corners, edges, and the tops of nearby appliances.
Clean Appliances Inside and Out
Clean appliances inside and out to remove grease, crumbs, spills, and odors that can harbor bacteria. Unplug each appliance first, then wipe exterior surfaces with a damp, soapy cloth. Dry them immediately to prevent streaks and moisture damage.
For safe Interior cleaning, remove shelves, trays, and racks, wash them separately, and follow the manufacturer’s instructions. Never immerse electrical parts or spray liquid into controls.
| Appliance | Interior cleaning | Exterior care |
|---|---|---|
| Refrigerator | Wipe shelves and drawers | Clean handles and doors |
| Oven | Remove crumbs and racks | Wipe the control panel |
| Microwave | Steam-clean splatters | Polish the door and handle |
| Dishwasher | Clear the filter | Wipe the gasket |
Check seals, filters, vents, and cords while you clean. Replace damaged parts or arrange professional service when necessary.
Regular Appliance maintenance keeps equipment efficient and extends its life. Finish by returning dry components, plugging appliances back in, and washing your hands.
Clean spills promptly so odors and residue don’t build up between deep cleanings.
Remove Grease From Cabinets and Backsplashes
With your appliances clean, turn to the cabinets and backsplashes, where cooking grease often settles into a sticky film. Start cabinet cleaning by removing handles, knobs, and items from nearby shelves.
Mix warm water with a few drops of dish soap, then test the solution on a hidden spot. Dip a soft microfiber cloth into it, wring it out well, and wipe cabinet doors from top to bottom.
Test soapy water first, then wipe cabinet doors gently with a well-wrung microfiber cloth from top to bottom.
Use a soft toothbrush around hinges, corners, and trim, where grime collects. For stubborn buildup, let the soapy cloth sit on the area for a minute before wiping. Don’t scrub aggressively, especially on painted or wood surfaces.
Rinse with a clean, barely damp cloth, then dry immediately to prevent moisture damage. Continue your grease removal routine on the backsplash, working in small sections.
Use a nonabrasive sponge for tile, but avoid harsh chemicals that could dull finishes or damage grout. Finish by polishing dry surfaces with a clean cloth.
Disinfect Counters and Prep Areas
Choose a disinfectant that’s safe for your counter’s material and effective against common kitchen germs. First, clear the area and wipe away any crumbs or spills. Then, apply the product as directed.
Be sure to sanitize high-touch spots too, including handles, switches, and faucet controls.
Choose the Right Disinfectant
Before disinfecting counters and prep areas, check the label to confirm the product is safe for your surface and effective against kitchen germs. Choose a formula designed for food-contact surfaces, and follow its directions for dilution, contact time, and rinsing requirements.
Chemical disinfectants, including products containing quaternary ammonium compounds or hydrogen peroxide, offer reliable germ control when you use them correctly. Natural alternatives, such as diluted vinegar, may help with odors and light cleaning, but they don’t reliably disinfect against all harmful pathogens.
Avoid mixing products, especially bleach with ammonia or acids, because dangerous fumes can form. Consider your countertop material, too: stone, wood, and laminate may require different products.
Keep the disinfectant in its original labeled container, and store it safely away from children, pets, food, and heat.
Clear and Wipe Surfaces
Start by removing appliances, dishes, and food from the counters and prep areas. Shake crumbs into the trash, then wipe away loose debris with a dry cloth. Use your chosen disinfectant as directed, applying enough to keep the surface visibly wet for its required contact time.
Wipe from the cleanest area toward dirtier sections, rinsing or replacing the cloth as it becomes soiled. For stubborn marks, use a cleaner suited to the material and practice gentle Surface stain removal. Avoid abrasive pads that can scratch finishes.
Pay attention to corners, seams, and backsplash edges where residue collects. Once the counters are clean and dry, return only essential items. Thoughtful Countertop organization makes future cleaning faster and keeps your food-prep space ready for safe, efficient use.
Sanitize High-Touch Areas
After clearing the counters and prep areas, disinfect high-touch spots such as cabinet handles, faucet levers, appliance buttons, and drawer pulls. Use a kitchen-safe disinfectant, follow its label, and keep the surface visibly wet for the required contact time. Don’t mix cleaners, and wash your hands afterward.
| Area | Quick action |
|---|---|
| Handles | Spray and wipe |
| Faucet | Clean lever and base |
| Buttons | Apply cleaner to cloth |
| Counters | Cover edges and seams |
For effective Touchpoint sanitization, start with the cleanest areas and finish with the dirtiest. Pay attention to high touch surfaces near the sink, stove, and trash bin.
If you prepare food directly on a counter, use a product approved for food-contact surfaces, then rinse as directed. Let everything air-dry before replacing utensils, appliances, or ingredients.
Repeat daily or whenever spills and raw-food contact occur.
Scrub the Stovetop and Range Hood
Once the stovetop has cooled, remove the grates, burner caps, and knobs, then wipe away loose crumbs and grease. Soak removable parts in warm, soapy water while you apply a degreaser to the surface.
Let it sit briefly, then scrub with a nonabrasive sponge, paying attention to spills around burners and controls. Wipe with a damp cloth, rinse away residue, and dry everything completely before replacing the parts.
For glass cooktops, use a cleaner designed for the surface and a scraper held at a low angle. Avoid harsh pads that can cause scratches.
Next, focus on the range hood. Remove its filter and check the manufacturer’s instructions before washing it in hot, soapy water or placing it in the dishwasher.
Wipe the hood, fan cover, and nearby wall with degreaser, then dry them thoroughly. Regular stovetop maintenance and range hood cleaning prevent hardened grease and help your kitchen stay fresh.
Sweep and Mop the Kitchen Floor
With the stovetop and range hood clean, turn your attention to the floor, where crumbs and grease may have collected. Remove chairs, mats, and small items so you can reach every corner.
Sweep slowly, starting at the room’s edges and working toward the center. Use a brush or vacuum attachment to gather debris along baseboards and beneath appliances.
Don’t skip the spaces around cabinet toe kicks, where crumbs often hide.
Next, choose a cleaner suitable for your flooring. Mix it according to the label, because excess solution can leave a dull film.
Mop in manageable sections, rinsing the mop frequently and changing dirty water as needed. For floor tiles, use a soft brush on stuck-on spots, then wipe away residue.
Pay special attention to grout cleaning, but avoid soaking porous surfaces. Finish by rinsing if the product requires it, and let the floor air-dry completely.
Keep everyone off it until it’s dry to prevent streaks and footprints.
Follow a Simple Daily Kitchen Routine
A simple daily kitchen routine keeps messes from becoming difficult jobs. Start each morning by unloading the dishwasher, wiping counters, and checking the sink.
During meal prep, clean spills immediately and return ingredients to their places instead of letting clutter build.
After cooking, scrape plates, soak stubborn pans, and wash or load dishes. Wipe the stovetop, countertops, and table while crumbs remain easy to remove.
Sweep the floor, especially beneath the dining area, and empty the trash if it smells or looks full.
Before bed, inspect ingredient storage areas. Seal open packages, discard expired food, and organize the refrigerator so you can find items quickly tomorrow.
Run the dishwasher overnight if it’s full, and leave the sink clear.
Keep a few supplies nearby, such as microfiber cloths, dish soap, and disinfectant. You won’t need a long cleaning session when you handle small tasks consistently.
Adjust your routine around your cooking schedule, but complete these essentials every day.
Frequently Asked Questions
Can I Use Vinegar to Clean Every Kitchen Surface?
No, you can’t use vinegar on every kitchen surface. Its acidity may damage marble, granite, limestone, natural stone, unsealed grout, waxed wood, and some metal finishes.
Check each manufacturer’s guidance first. For safer cleaning, dilute vinegar with water for glass, ceramic tile, stainless steel, and sealed countertops, then rinse and dry.
Consider your surface materials carefully, and use a pH-neutral cleaner when vinegar isn’t appropriate. Never mix vinegar with bleach.
How Often Should Kitchen Sponges and Dishcloths Be Replaced?
Treat your sponge like a tiny germ sponge: when it starts smelling sour, crumbling, or staying slimy, it’s time to replace it—usually every one to two weeks, or sooner with heavy use. For better Sponges durability, rinse it thoroughly, wring it out, and let it dry between uses.
Your Dishcloth maintenance routine should include daily washing and complete drying. Replace cloths when they develop odors, stains, fraying, or persistent dampness.
Are Homemade Kitchen Cleaning Solutions Safe Around Children and Pets?
Yes, homemade kitchen cleaning solutions can be safe around children and pets when you use Natural ingredients carefully. Never mix vinegar with bleach, ammonia, or other cleaners, and label every bottle clearly.
Keep solutions locked away, even if they seem harmless. Ventilate rooms during use, rinse food-contact surfaces, and wash your hands afterward.
For chemical safety, follow reliable recipes, avoid essential oils around animals, and choose plain soap when you’re unsure.
How Can I Remove Persistent Odors From My Kitchen?
Persistent kitchen odors require prompt, targeted action. Fresh air fights foulness: improve Air circulation by opening windows, running exhaust fans, and cleaning greasy filters.
Remove spoiled food, wash trash bins, and scrub residue from appliances, walls, and floors. Place Odor absorbers, such as baking soda, activated charcoal, or coffee grounds, near the source.
Simmer citrus peels briefly, but never leave heat unattended. If smells persist, inspect drains, leaks, and hidden mold.
When Should I Hire a Professional Kitchen Cleaning Service?
Hire a professional kitchen cleaning service when grime, grease, mold, or persistent odors resist your regular efforts. You should also seek help after renovations, pest infestations, water damage, or long periods without deep cleaning.
Professionals can safely clean kitchen appliances, sanitize hard-to-reach areas, and remove buildup that threatens hygiene. Consider scheduling service if your cleaning schedule keeps slipping, you lack time, or you’re managing a commercial kitchen with strict sanitation requirements.
Conclusion
A clean kitchen doesn’t happen by magic. Gather supplies, clear clutter, wash dishes, dust, clean appliances, disinfect counters, scrub the stovetop, and mop the floor.
Follow these steps, and you’ll spend less time searching for lost utensils and apologizing to your sink. Finish with a simple daily routine because preventing messes is far easier than heroically defeating them later.
Your kitchen won’t clean itself, but these kitchen cleaning steps might finally help it stop judging you.