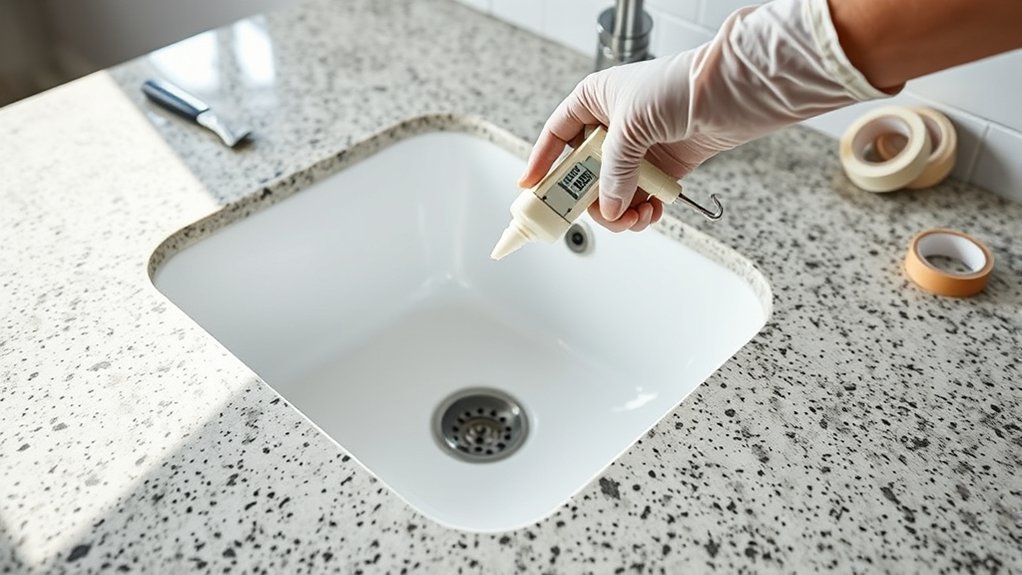
How to Seal a Kitchen Sink to the Countertop in 7 Steps
A loose or leaky kitchen sink can quickly turn into a frustrating countertop problem, but you’re not alone—many homeowners struggle to create a clean, watertight seal. Learning how to seal a kitchen sink to the countertop can help prevent water damage and keep your sink securely in place.
Gather silicone caulk, a caulk gun, a scraper, mild soap, rubbing alcohol, rags, and gloves. Remove the old sealant carefully, then clean the countertop opening and let it dry completely.
Test-fit the sink and check its alignment. Apply a continuous silicone bead beneath the rim, lower the sink straight into place, and tighten mounting hardware evenly.
Smooth the seal, wipe away excess, and let it cure according to the label before using the sink. The detailed steps below will help you finish neatly.
Key Takeaways
- Gather 100% kitchen-and-bath silicone, a caulk gun, utility knife, scraper, rubbing alcohol, rags, gloves, and painter’s tape.
- Remove old caulk carefully, then clean the seam with mild soapy water and let all surfaces dry completely.
- Dry-fit the sink, checking that it sits level, aligns evenly, and has no gaps or plumbing interference.
- Apply a continuous silicone bead beneath the sink rim, lower it straight into place, and tighten mounting hardware evenly.
- Smooth excess sealant, inspect for gaps, and allow the manufacturer-recommended curing time before using the sink.
Gather Silicone Caulk and Cleaning Supplies

Before you begin, gather 100% silicone kitchen-and-bath caulk, a caulk gun, a utility knife or scraper, a sponge, mild dish soap, rubbing alcohol, clean rags, and painter’s tape. Choose a silicone sealant labeled for kitchens, bathrooms, and continuous exposure to moisture.
Gather 100% silicone kitchen-and-bath caulk and essential cleaning tools before sealing, choosing a moisture-resistant product compatible with your sink and countertop.
Clear, white, or a color matching your countertop can work, but check the label for compatibility with your sink and counter materials. Inspect the tube’s expiration date, and avoid caulk that’s dried, cracked, or separated inside.
Confirm that your caulk gun fits the cartridge and operates smoothly. Keep your Sealant storage area cool, dry, and protected from direct sunlight so unopened or partially used caulk stays usable.
Arrange your Cleaning supplies within easy reach before you start. Use fresh rags rather than lint-shedding cloth, and check that your painter’s tape adheres without leaving residue.
Wearing disposable gloves can protect your hands from silicone and cleaning products during preparation.
Remove the Old Sealant
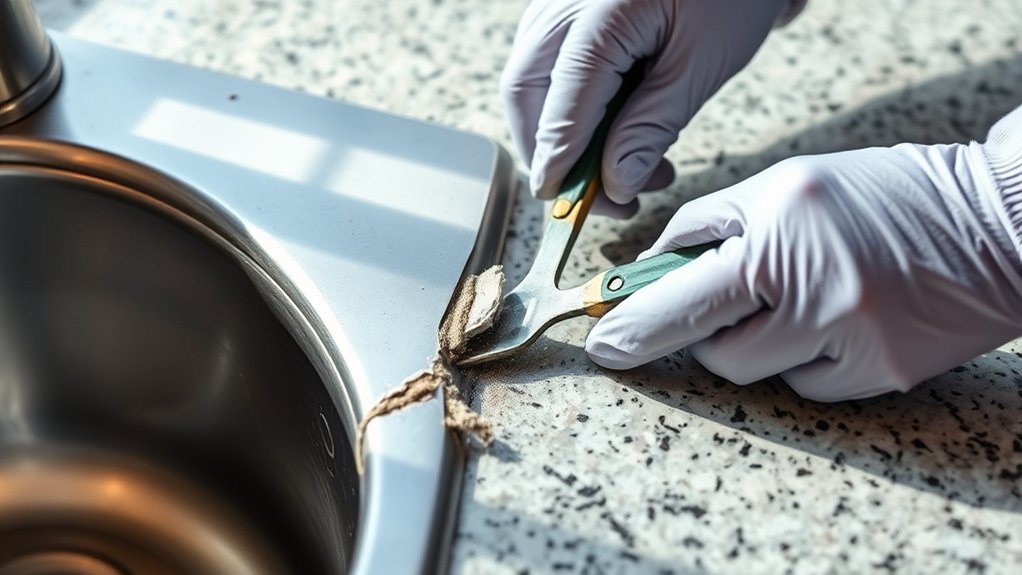
Cut through the old caulk with a utility knife, then carefully scrape away the remaining residue. Take your time so you don’t scratch the sink or countertop before applying fresh caulk.
Cut Through Old Caulk
Start by cutting through the old caulk where the sink meets the countertop, using a sharp utility knife. Hold the blade nearly flat, and follow the entire seam with controlled, shallow strokes.
Cut both the countertop and sink edges so the seal separates cleanly. Wear gloves, keep your other hand behind the blade, and replace dull blades promptly.
For effective caulk removal, choose your tool based on the sealant’s condition:
| Sealant condition | Best tool | Cutting approach |
|---|---|---|
| Soft silicone | Utility knife | Shallow, steady strokes |
| Hardened silicone | Fresh blade | Repeat both edges |
| Thick bead | Narrow knife | Work in short sections |
| Tight corner | Precision knife | Angle carefully |
Use sealant comparison guidance to identify whether the old bead is silicone, acrylic, or another product.
Don’t pry against the counter or sink, which could cause chips or scratches. Stop once the bead has been fully cut free, and leave residue removal for the next step.
Scrape Away Residue
Once the old bead is cut, scrape away the remaining sealant with a plastic putty knife or a dedicated caulk-removal tool. Hold the blade nearly flat to avoid scratching the countertop or sink rim. Work slowly around corners, where hardened caulk often remains.
For effective residue removal, pick out stubborn bits with a plastic scraper rather than a metal blade. If the sealant smears, soften it with a manufacturer-approved remover, following the label’s instructions and keeping it off delicate surfaces.
Wipe loosened material into a disposable cloth, and don’t push debris into the joint. Inspect the entire edge under bright light. Remove every visible film, then vacuum or wipe away crumbs.
Careful contamination prevention matters because dust, grease, and old caulk can keep the new sealant from bonding properly. Let the area dry completely before cleaning and resealing.
Clean and Dry the Countertop Opening

With the old sink removed, scrape away any remaining sealant from the countertop opening. Then scrub the surface to remove dirt, grease, and residue. Finally, dry the opening completely so the new sealant adheres properly.
Remove Old Sealant
Remove the old sealant with a plastic scraper or putty knife, working carefully around the sink and countertop to avoid scratches. Hold the tool at a shallow angle, and loosen stubborn beads gradually instead of forcing the edge beneath the surface.
For narrow gaps, use a plastic pick or an old credit card to lift remaining pieces. Pull away detached sealant with your fingers or tweezers, then place debris in a trash bag so it doesn’t return to the opening.
Check the rim and countertop edge for hidden fragments, especially at corners and seams. Complete this step before researching sealant compatibility, since leftover material can weaken adhesion.
Careful DIY sealing starts with a completely cleared joint. Don’t gouge laminate, stone, or finished wood while removing the old sealant.
Scrub the Surface
Scrub the exposed joint with warm, soapy water and a nonabrasive pad to remove grease, dust, and sealant residue. Work carefully around the sink’s rim, using short, controlled strokes that lift buildup without scratching the countertop.
For effective surface preparation, choose cleaning techniques suited to the material. Use a soft brush to loosen debris from corners and seams, then wipe away the loosened grime with a clean cloth.
If stubborn residue remains, apply a manufacturer-approved cleaner sparingly, and follow its label directions. Don’t use steel wool, abrasive powders, or harsh solvents, which can damage finishes or leave contaminants behind.
Inspect the opening closely as you clean, paying attention to grease films and tiny particles along the joint. Remove every visible trace before moving to the next step.
Dry the Opening
Once the opening is clean, dry it thoroughly with a lint-free cloth, then let the area air-dry completely. Moisture can weaken adhesion and create gaps beneath the sink rim, so don’t rush this step.
Wipe corners and seams carefully, where water often remains hidden. Inspect the surface under bright light, and remove dust, fibers, or cleaner residue before applying sealant.
Keep your sealing tools dry and within reach, but don’t place them inside the opening.
| Check | What to look for | Action |
|---|---|---|
| Surface | No damp spots | Wait longer |
| Edges | Dry, residue-free seams | Wipe again |
| Color matching | Sealant shade suits countertop | Confirm before sealing |
Run a clean finger along the edge only after the area dries. If you feel grit or moisture, clean and dry it again.
A completely dry opening helps your sealant bond evenly and supports a neat finish.
Test-Fit the Sink Before Sealing
Before applying sealant, lower the sink into the cutout to confirm it fits properly. Support the basin as you position it, then check that its rim rests evenly on the countertop without rocking, gaps, or overhanging edges.
Dry-fit the sink first, ensuring the rim sits evenly, the basin stays stable, and no gaps or overhanging edges remain.
Verify sink compatibility with the opening, cabinet, faucet layout, and plumbing connections beneath it. You’ll also want to confirm countertop compatibility: the material must support the sink’s weight, and the cutout must match the manufacturer’s required dimensions.
If the sink includes clips, brackets, or a mounting frame, install them loosely according to the instructions so you can check alignment. Look underneath to ensure the drain, disposal, supply lines, and clips won’t hit the cabinet walls or interfere with each other.
Measure any uneven gaps and correct the cutout before continuing. Lift the sink out carefully after the inspection, keeping the opening clean and dry.
Don’t proceed until the sink sits level and every connection remains accessible.
Apply Sealant Around the Sink Rim
With the sink removed, apply a continuous bead of kitchen-and-bath silicone sealant around the underside of its rim, keeping the bead slightly inside the edge so it won’t squeeze onto the countertop. Choose a waterproof product compatible with your sink and counter materials. Clean, dry, and dust-free surfaces help the sealant bond properly.
Use these sealant application techniques:
- Cut the nozzle at a 45-degree angle, making the opening slightly smaller than the desired bead.
- Apply steady pressure as you move around the rim, maintaining an even, unbroken line.
- Inspect the bead for gaps, thin spots, or excessive buildup, then smooth it carefully with a damp, gloved finger if necessary.
Avoid common sealing mistakes, such as applying sealant to damp surfaces, leaving breaks at corners, or placing the bead too close to the outer edge. Keep your work controlled and clean, and remove stray silicone before it skins over. Don’t disturb the fresh bead while finishing this step.
Set and Secure the Sink
Lower the sink straight into the countertop opening, aligning it carefully without dragging the rim through the fresh sealant. Check that the rim sits evenly on every side and that the sink’s clips or mounting brackets line up beneath the counter.
From below, tighten each fastener gradually, alternating sides to distribute pressure evenly. Stop when the sink feels firmly held; overtightening can warp the rim, damage the countertop, or squeeze out too much sealant.
If your sink uses clips, follow the manufacturer’s spacing and torque recommendations. Recheck the basin’s position from above before fully tightening the hardware.
Complete any Drain installation and Faucet connection according to their instructions, keeping the sink supported while you work underneath. Don’t place heavy items in the basin or connect plumbing that could strain the mounting points yet.
Confirm the sink remains level and stable, then remove tools and hardware from the cabinet area before proceeding to the next step.
Smooth the Seal and Let It Cure
Once the sink is secure, inspect the sealant bead around the rim and smooth it with a damp finger or suitable tool, pressing firmly enough to close gaps without pushing sealant away from the joint. Keep your touch light and steady so you create a continuous, even edge.
Check the sealant consistency as you work; it should look smooth, without breaks, ridges, or trapped bubbles.
- Wipe excess sealant from your finger or tool after each pass, using a clean, damp cloth.
- Remove smears from the countertop and sink surface immediately, before the sealant skins over.
- Inspect corners carefully, adding a small amount of sealant if you find a visible gap.
Follow the manufacturer’s curing time before using the sink or exposing the joint to water. Don’t place tools, dishes, or cleaning products on the rim during this period.
Adequate curing helps the seal form a flexible, waterproof bond. Once cured, trim only stray cured sealant with a sharp blade, taking care not to scratch the surfaces.
Frequently Asked Questions
How Often Should Kitchen Sink Sealant Be Replaced?
You should inspect your kitchen sink sealant every six months and replace it when you notice cracking, peeling, discoloration, gaps, or persistent moisture. Most sinks need resealing every three to five years, but heavy use, harsh cleaners, movement, and water damage can shorten that interval.
During regular sealant maintenance, remove deteriorated material completely, clean and dry the joint, then apply fresh waterproof sealant. Your sealing frequency should reflect the sink’s condition, not just a calendar date.
Can You Seal a Sink Without Removing the Faucet?
Yes, you can seal a sink without removing the faucet. First, clean and dry the joint thoroughly, then scrape away loose old caulk.
Protect the faucet base with painter’s tape, leaving the seam exposed. During sealant application, apply a continuous bead around the sink rim and smooth it with a damp finger or tool.
Although faucet removal isn’t required, removing it may improve access and help you create a neater, more durable seal.
What Causes Water to Seep Beneath a Sealed Kitchen Sink?
Water seeps beneath a sealed kitchen sink when the sealant cracks, shrinks, separates, or fails to bond with a damp, dirty surface. Movement from heavy use, loose mounting clips, countertop flexing, and standing water can also break the seal.
For effective leak prevention, dry the area, tighten the sink hardware, and remove deteriorated caulk before resealing. Include regular sealant inspections, especially around corners, faucet openings, and drain connections, to catch small gaps early.
Is Plumber’s Putty Suitable for Sealing Every Sink Type?
No—plumber’s putty isn’t a universal sink sealant; treating it that way makes your sink wear a tiny, leaky crown.
For reliable Material compatibility, check your sink and the manufacturer’s instructions first. Putty generally suits metal drains and some fixtures, but it can stain porous stone, damage certain plastics, or fail with composite materials.
For better Sealant longevity, use silicone or the recommended gasket when required. You’ll prevent seepage and costly repairs.
How Can You Repair a Cracked or Damaged Sink Rim?
Repair a cracked or damaged sink rim by cleaning and drying the area, then sanding away loose material. For a minor sink crack, apply waterproof, two-part epoxy or manufacturer-approved repair compound, pressing it firmly into the damage.
Let it cure fully before sanding it smooth. For extensive rim repair, replace the sink or consult a professional. Don’t rely on plumber’s putty for structural damage, and check for leaks afterward to confirm your repair holds.
Conclusion
Sealing a kitchen sink takes only a few careful steps, but each one helps prevent leaks and countertop damage. After removing old caulk, cleaning thoroughly, test-fitting the sink, and applying a continuous bead of silicone, you’ll create a dependable barrier.
For example, if water has been seeping beneath your sink, resealing it this way can stop the problem before it damages your cabinets. Smooth the joint, secure the sink, and let the seal cure fully before use. These steps will help you properly seal a kitchen sink to the countertop.