How to Restain Kitchen Cabinets in 5 Steps
Tired of outdated, worn-looking cabinets but not ready to replace them? You’re not alone—many homeowners struggle to refresh their kitchens without spending a fortune. Learning how to restain kitchen cabinets can give your space a fresh look with less time, mess, and expense.
To restain kitchen cabinets, choose a compatible stain and gather gloves, rags, sandpaper, and finish. Remove and label doors, drawers, and hardware, then clean and repair every surface.
Sand with the grain using 120–180-grit paper, and remove all dust. Apply thin, even stain coats, wiping away excess as you work.
Seal the cabinets with a compatible clear finish, let everything cure fully, then reinstall and adjust the hardware.
The steps below will help you avoid common mistakes.
Key Takeaways
- Choose a compatible stain and finish, then test samples on scrap wood under your kitchen’s natural and artificial lighting.
- Remove and label cabinet doors, drawers, shelves, and hardware before cleaning surfaces and completing necessary repairs.
- Sand cabinets along the wood grain with 120–180-grit sandpaper, then thoroughly remove dust with a vacuum and tack cloth.
- Apply thin, even stain coats, wiping away excess promptly and allowing each coat to dry before adding another.
- Seal stained surfaces with compatible clear finish, allow complete curing, then reinstall hardware, doors, and drawers.
Choose Your Stain and Gather Supplies
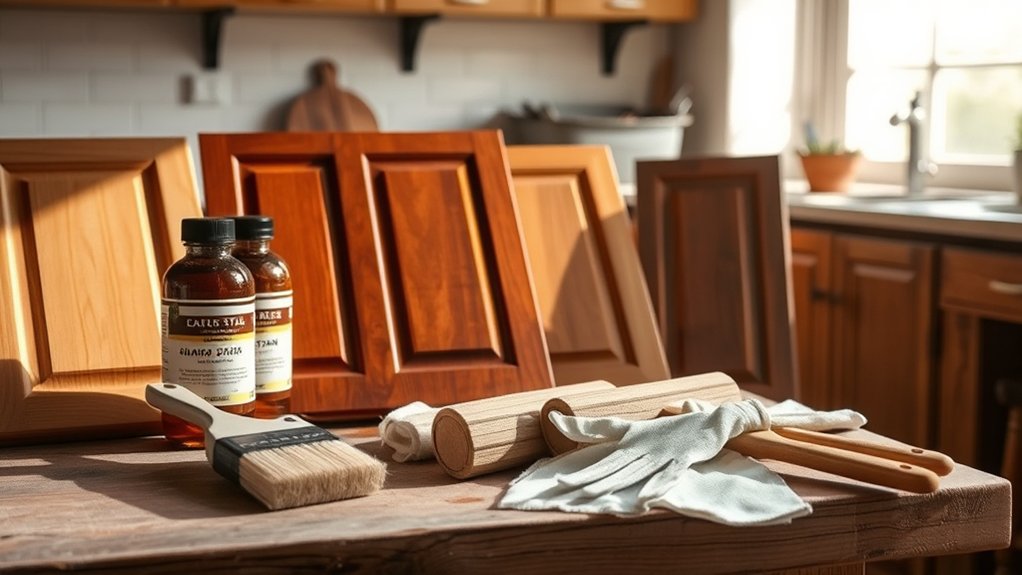
Before you begin, choose a stain that complements your kitchen’s style and works with your cabinet wood. Consider how existing floors, countertops, walls, and hardware influence your choice.
For accurate Color matching, compare samples in your kitchen’s natural and artificial light. Test colors on a spare wood piece or an inconspicuous area, since the same stain can look different across wood species and grain patterns.
Review available stain types, including oil-based, water-based, gel, and tinted finishes. Oil-based formulas usually deepen color and provide longer working time, while water-based options dry faster and produce fewer odors.
Gel stains offer more control on uneven or porous surfaces. Check the manufacturer’s recommendations for your cabinet material and desired finish.
Gather your supplies before you start: selected stain, compatible finish, stir sticks, clean rags, brushes or applicators, disposable gloves, drop cloths, painter’s tape, containers, and adequate ventilation equipment.
Keep labels and safety instructions nearby, and purchase enough product for consistent coverage.
Prepare Kitchen Cabinets for Restaining

With your stain and supplies ready, prepare the cabinets so the new color adheres evenly. Remove every door, drawer, and shelf, then label each piece with painter’s tape and a matching cabinet location. Photograph the layout first so reassembly won’t become a guessing game.
Take off the cabinet hardware, including hinges, pulls, and knobs. Place screws and other small parts in labeled bags, and set them aside. Protect countertops, appliances, floors, and nearby walls with drop cloths and plastic sheeting.
Open windows or run an exhaust fan to improve ventilation while you work. Clean each cabinet surface with a degreasing cleaner to remove cooking residue, wax, and grime. Wipe away the cleaner with a damp cloth, then let the wood dry completely.
Check for loose joints, damaged veneer, or missing fasteners, and make necessary repairs before continuing. If you’re planning lighting improvements, complete wiring or fixture changes now, before refinishing begins.
Sand Cabinets for a Smooth Finish

Sand every cabinet surface lightly with 120- to 150-grit sandpaper, following the wood grain to remove the old finish and smooth minor imperfections. Use a sanding block on flat areas and fold paper around detailed edges.
Don’t press hard; excessive pressure can create dips that show through the new finish. Wipe away dust with a vacuum and tack cloth, then inspect each panel under bright light.
Smooth preparation improves Cabinet durability and helps you compare stain color options accurately later.
| Area | Tool | Result |
|---|---|---|
| Doors | Sanding block | Even surface |
| Frames | Fine paper | Clean edges |
| Grooves | Folded paper | Defined details |
Run your fingertips across the wood to find rough spots, then sand those areas gently. Finish with 180-grit paper if the surface still feels coarse, but avoid polishing it so thoroughly that it can’t accept finish.
Protect your lungs with a mask, and keep ventilation moving while dust accumulates. Label doors and hardware as you remove them, ensuring every sanded piece returns to its original position.
Apply Thin, Even Coats of Stain
Once the cabinets are clean and smooth, brush or wipe on a thin coat of stain, following the wood grain. Work in manageable sections, keeping your applicator lightly loaded to prevent drips, streaks, and dark patches.
Use long, even strokes, then blend the edges while the stain remains wet. Don’t let excess stain pool in corners, around raised panels, or along cabinet edges. Wipe it away promptly with a clean, lint-free cloth.
Apply stain in long, even strokes, blending wet edges and wiping away excess before it pools in corners or along cabinet edges.
For reliable color matching, compare your chosen stain with existing trim or nearby wood under the kitchen’s actual lighting. Testing the stain on a sanded scrap or hidden cabinet area helps confirm the shade and absorption before covering visible surfaces.
If the color looks too light, let the first coat become touch-dry before adding another thin layer. Build color gradually rather than applying one heavy coat, which can turn muddy and obscure the grain.
Keep your workspace dust-free, and change cloths when they become saturated. Assess each section as you go to maintain a consistent finish.
Seal, Cure, and Reassemble Cabinets
After the final stain coat dries, protect the color with a compatible clear finish, such as polyurethane or a cabinet sealer. Choose satin or semigloss based on your desired sheen, and test it on an inconspicuous area first.
Apply thin, even coats with a quality brush or sprayer, lightly sanding between coats if the product directions allow. Don’t shake the finish, because bubbles can remain on the surface.
Keep doors and drawers flat in a clean, dust-free space while they cure. Although the finish may feel dry within hours, wait the recommended time before handling, and allow extra time before reinstalling anything.
Your stain color selection will look more consistent after the sealer cures fully. Reattach hinges, pulls, and knobs carefully, using a screwdriver instead of overtightening.
Clean each piece of Cabinet hardware before installation, and replace worn screws or damaged parts. Finally, adjust doors and drawers so they open smoothly without rubbing.
Frequently Asked Questions
How Much Does It Typically Cost to Restain Kitchen Cabinets Professionally?
You’ll typically pay $1,500 to $4,000 to have kitchen cabinets professionally restained, though prices vary by kitchen size, wood condition, finish, and location. Small projects may cost around $800, while large or detailed cabinetry can exceed $6,000.
For accurate cost estimation, request several quotes from reputable professional services. Confirm whether each estimate includes cleaning, sanding, repairs, staining, sealing, hardware removal, and cleanup, since these details can substantially affect your final total.
Can Laminate or Thermofoil Cabinets Be Restained Successfully?
You can restain laminate or thermofoil cabinets, but success depends on preparation, products, and expectations. Clean thoroughly, lightly abrade the surface, apply a bonding primer, and finish with durable cabinet paint rather than penetrating stain.
Laminate’s durability makes it resist absorption, while thermofoil adhesion can fail if heat or moisture has weakened the coating. You’ll get better results on sound, flat doors. Replace peeling, swollen, or damaged panels instead of refinishing them.
How Long Should Restained Cabinets Last Before Needing Another Update?
You can expect restained cabinets to last about five to ten years before needing another update, depending on preparation, product quality, daily use, sunlight, moisture, and cleaning habits.
Strong color durability comes from thorough surface preparation and a durable stain or paint topcoat. Finish longevity improves when you protect cabinet surfaces from harsh cleaners, standing water, heat, and impacts.
Inspect your cabinets yearly, then touch up worn areas promptly to prevent larger refinishing projects.
Should Cabinet Hardware Be Replaced or Reused After Restaining?
Replace cabinet hardware when it looks worn, clashes with your updated finish, or no longer functions smoothly; otherwise, reuse it after cleaning and polishing.
For example, if your brass pulls still work well but look dull, you can restore their shine and avoid unnecessary expense. Hardware replacement can modernize the room, while reusing quality pieces supports cabinet preservation.
Check screw spacing before buying new hardware, and save old hardware until installation finishes.
Can You Change Dark Cabinets to a Significantly Lighter Color?
Yes, you can change dark cabinets to a considerably lighter color, but you’ll need thorough preparation. Remove the existing finish, clean away grease, and sand the surfaces until they’re smooth.
Apply a high-quality stain-blocking primer before painting, especially over dark wood or stained finishes. Your color transformation depends on the wood and desired shade, while careful finish selection guarantees durability.
Test samples first, and apply several thin, even coats for consistent coverage and lasting results.
Conclusion
Restaining your kitchen cabinets can feel like a major project, but the process is surprisingly manageable. You’ll trade worn, dated surfaces for a fresh finish by choosing the right stain, cleaning thoroughly, sanding carefully, and applying thin coats.
While patience may slow you down, it prevents costly mistakes. Once you seal the cabinets and let them cure fully, you’ll reinstall each piece with confidence. A little effort today can give your kitchen an entirely new character tomorrow, making restaining kitchen cabinets a worthwhile project.