How to Draw a Kitchen in 10 Steps
Struggling to make your kitchen drawings look realistic and well-proportioned? You’re not alone—many people find perspective, layout, and small details challenging.
This guide to how to draw a kitchen in 10 steps makes the process easier to follow.
To draw a kitchen in 10 steps, choose a view and establish the horizon and vanishing points. Outline the walls, floor, ceiling, doors, and windows.
Block in cabinets, countertops, and an island. Check proportions and perspective before adding more detail.
Add the sink and appliances, then draw openings and light fixtures. Include handles, faucets, and other small details.
Suggest wood, tile, and metal textures. Finally, shade consistently, add color, and refine the focal areas for a polished result. Continue for helpful step-by-step guidance.
Key Takeaways
- Choose a viewpoint, perspective, horizon line, and vanishing points before lightly outlining the kitchen’s walls, floor, ceiling, doors, and windows.
- Measure and block in cabinets, countertops, appliances, sink, island, and furniture using simple geometric shapes and consistent proportions.
- Add openings, fixtures, lighting, furniture supports, hardware, faucets, handles, and decorative elements while maintaining perspective accuracy.
- Suggest materials with controlled wood grain, tile and grout lines, smooth appliance surfaces, and subtle metal textures without overpowering the structure.
- Establish a consistent light source, then add shadows, highlights, colors, and blended tones to create depth, atmosphere, and visual focus.
Pick Your Kitchen View and Perspective

Before you draw, decide how much of the kitchen you want viewers to see. Choose a wide view to present the room’s overall character, or select a closer view that highlights a focal area, such as an island, range, or window. Your choice should support your purpose and guide the viewer’s attention.
Choose a wide or close view to define the kitchen’s character, emphasize a focal area, and guide the viewer’s attention.
Next, pick a perspective. A one-point perspective keeps cabinet runs and counters moving toward one vanishing point, creating a straightforward, orderly scene.
Use two-point perspective when you want to show two walls and give the kitchen a more natural, dimensional appearance. For a relaxed presentation, try a slightly elevated viewpoint so viewers can see the countertop surfaces without looking directly overhead.
Consider how your perspective supports kitchen design and interior styling. A balanced angle can emphasize symmetry, while an off-center view can create energy.
Keep the horizon consistent, and avoid changing viewpoints mid-drawing. Decide whether your composition should feel spacious, intimate, formal, or casual before you begin.
Outline the Kitchen Room
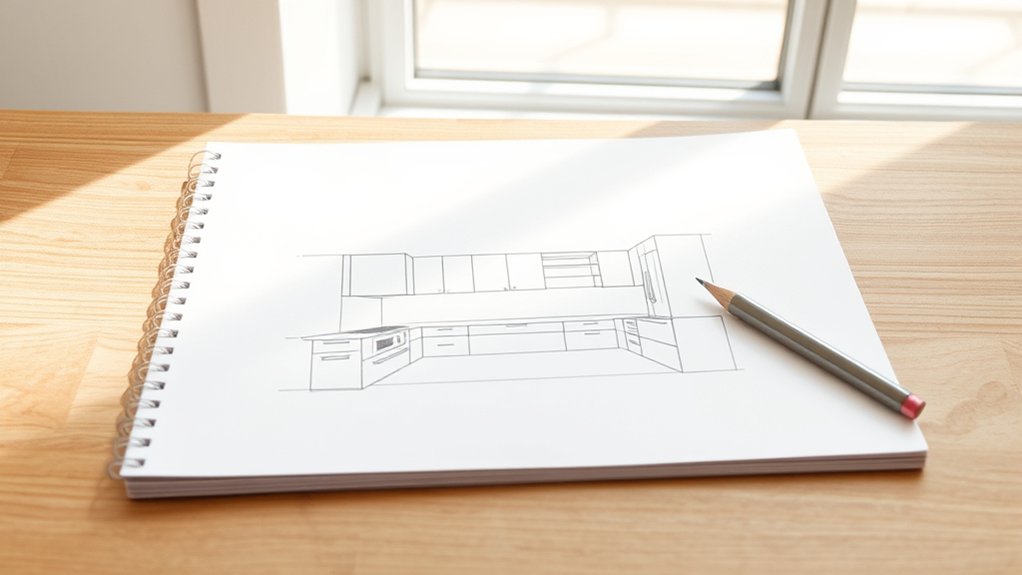
Start by outlining the kitchen’s walls, floor, ceiling, and openings to establish clear room boundaries. Add key dimensions, such as wall lengths, ceiling height, and the locations of major fixtures. Then, draw basic perspective lines to give the room accurate depth and proportions.
Define Room Boundaries
Outline the kitchen’s walls with light, confident lines, marking where the floor, ceiling, doors, windows, and adjoining rooms meet. Keep your perspective consistent, and show each boundary as a clear plane rather than a heavy outline.
Indicate openings with simple gaps, then add door swings and window recesses only to clarify how the room connects to adjacent spaces.
Consider how Room acoustics might change at hard corners, enclosed sections, or open passages, and leave those relationships visible in your sketch.
Note where Ventilation systems enter, exit, or cross the ceiling and walls, using thin dashed lines for hidden routes.
Keep fixtures, furniture, and finishes secondary for now. You’re defining the kitchen’s enclosure, not detailing its contents or recording exact measurements yet.
Maintain clean, flexible lines for later refinement.
Mark Key Dimensions
With the room boundaries in place, mark the kitchen’s key dimensions with light, consistent lines. Measure each wall, then note the ceiling height, door widths, window positions, and openings.
Keep measurements proportional so your outline remains easy to adjust as you refine the drawing. You don’t need perspective yet; focus on accurate, readable planning marks.
- Label the longest wall and record its total length.
- Mark doors and windows, including their distances from nearby corners.
- Note fixed features, such as radiators, pipes, outlets, or vents.
Use a simple scale, such as one square for every foot, to keep spacing consistent. Leave room for later cabinets and appliances without drawing them now.
Your color palette and material selection can wait. First, establish dependable dimensions for the layout. Check every measurement twice before continuing.
Add Basic Perspective
Now add a simple perspective by drawing the floor, wall, and ceiling planes from your dimensioned room outline. Choose a horizon line at eye level, then place vanishing points beyond the page if needed.
From each corner, draw light construction lines toward the appropriate point. Keep parallel edges consistent so cabinets, counters, and windows will fit naturally later.
Block in the back wall first, using your measurements to establish its width and height. Add the floor and ceiling boundaries, checking that they converge evenly.
Don’t darken lines yet. You’ll refine them after placing appliances and fixtures. Mark openings for doors and windows, and note how lighting schemes might affect visible surfaces.
Reserve space for your color palette by labeling materials, such as tile, wood, or painted drywall, beside the outline.
Block In Cabinets and Countertops

Start by sketching the cabinet layout with simple boxes that follow the room’s perspective. Then add the countertop edges, keeping them aligned with the cabinet faces. This gives you a clear foundation to refine the details later.
Sketch Cabinet Layout
Block in the cabinet layout by lightly drawing the base cabinets, wall cabinets, and countertops as simple boxes. Use straight, faint lines so you can adjust proportions without muddying your sketch.
Show each cabinet run, appliance opening, and corner connection while keeping the floor plan’s perspective consistent. Leave clear gaps for the sink, range, refrigerator, and dishwasher.
- Mark base cabinets as sturdy, rectangular blocks resting on the floor.
- Place wall cabinets above them, aligning their widths and heights.
- Connect countertop boxes across the base units, following the room’s angles.
Compare your drawing with the reference plan before adding details. Consider how different cabinet styles change door spacing and silhouettes.
Note material choices with small labels, but don’t shade or texture them yet. Keep this stage simple. Your goal is a balanced, readable arrangement that supports later details.
Add Countertop Edges
Once the cabinet boxes are in place, add the countertop edges with light, continuous lines that slightly overhang the base units. Follow the cabinet perspective so each edge recedes toward the same vanishing point.
Keep the overhang consistent along the front, then show a small return at corners and exposed ends. Use a second line beneath the front edge to suggest thickness, but don’t make it too dark yet.
Consider your countertop edge design before adding details. A square profile needs crisp, straight lines, while a rounded profile requires a softer contour.
Study common countertop edge styles, such as eased, beveled, or bullnose edges, and choose one that suits your kitchen. Leave openings for sinks and appliances, checking that their positions align with the cabinet layout.
Lightly erase overlaps and refine the visible edges.
Check Perspective and Proportions
Check your kitchen drawing from the intended eye level and vanishing points before adding details. Confirm that cabinet tops, countertop edges, and floor lines recede consistently toward the same points. If a line drifts, correct it now; later details will only hide the mistake.
Verify eye level, vanishing points, and receding edges first; correcting perspective early prevents hidden errors later.
Use this quick proportion check:
- Compare cabinet height with the room’s doors, windows, and ceiling. Keep repeated units consistent, but vary visible depth as perspective requires.
- Measure the island or table against the surrounding floor space. Leave believable walking clearance, and align its edges with your established guides.
- Inspect verticals, horizontals, and diagonals from a distance. They should feel stable rather than tilted or accidentally convergent.
Step back or flip the drawing to spot distortions. Check spacing between shelves, wall sections, and lighting fixtures without adding appliance details.
Keep color schemes in mind only as future accents; value and perspective matter first. Erase weak guides, reinforce accurate contours, and compare both sides for balance.
Your kitchen will look convincing when every element shares one viewpoint and scale.
Draw the Sink and Appliances
Sketch the sink within the counter, making sure its shape follows the perspective lines. Then, add the kitchen appliances, such as the stove, refrigerator, and dishwasher. Match their sizes and positions to the surrounding cabinets to create a convincing layout.
Sketch the Sink
Place the sink beneath a window or along the main counter, then outline its basin as a wide rectangle with slightly rounded corners. Add a narrow rim around the opening, keeping the perspective consistent with your countertop.
Sketch the faucet behind the basin with a curved neck and two small handles, or choose one simple lever for a modern look. Use these details to guide your drawing:
- Center the drain inside the basin as a small circle.
- Show depth with a darker inner edge and a subtle shadow.
- Align the sink with nearby cabinet lines for balanced furniture arrangement.
Keep your strokes light at first, so you can adjust proportions easily. Refine the outline, then consider how color schemes might emphasize the sink’s material, such as cool steel or warm porcelain, without adding unnecessary clutter.
Add Kitchen Appliances
Add the refrigerator, oven, and cooktop beside the sink, using simple geometric shapes that follow the kitchen’s perspective. Keep each appliance aligned with the counter’s edges, and leave narrow gaps between units. For accurate appliance placement, match their heights to the cabinets and floor lines you’ve already drawn.
Give the refrigerator a tall rectangular body, then divide its front into doors with slim handles. Place the oven beneath the cooktop, adding a dark window and small control knobs.
Sketch the cooktop as a thin rectangle with four simple burners. Use perspective lines to show depth, and keep parallel edges consistent.
Refine your appliance design with subtle shadows under counters and along sides. Don’t add heavy details yet; focus on clean shapes, balanced spacing, and clear proportions throughout the kitchen.
Place the Island or Kitchen Table
Decide where the island or kitchen table will sit before drawing it. Check its relationship to the counters and appliances you’ve already added.
Leave enough space for comfortable movement, open cabinet doors, and natural working zones. Sketch the piece lightly, using simple geometric shapes before adding details.
- For placing the island, center a long rectangle in the room, then leave clear pathways on every side. Add stools only if the design has room for them.
- When choosing a kitchen table, select a round, square, or rectangular shape that suits the room’s proportions. Position it where it won’t crowd the work area.
- Show height with parallel lines and a visible underside. Draw sturdy legs, a base, or storage compartments to make the furniture feel practical.
Keep the perspective consistent with your existing cabinets and appliances. Erase overlapping guide marks, then strengthen the tabletop, edges, and supports.
Your placement should make the kitchen feel balanced, usable, and inviting.
Draw Windows, Doors, and Light Fixtures
Next, sketch the windows, doors, and light fixtures to complete the kitchen’s structure and atmosphere. Begin with window placement, checking the perspective lines so each frame aligns with the walls.
Choose window styles that suit your design, such as wide casements, a horizontal slider, or a compact over-sink window. Add panes, sills, and simple reflections without crowding the drawing.
Draw the doors next. Show their openings, swing direction, and relationship to nearby cabinets or the island.
Keep proportions consistent with the room’s scale, and use darker lines inside the frames to suggest depth.
Finally, plan the lighting fixtures. Mark a central ceiling fixture, pendant lights above the island, or recessed lights across the work area.
Use ovals, cylinders, and clean geometric shapes to represent each fixture. Add short shadow lines beneath them, then indicate the light’s direction with subtle tonal areas on the counters and floor.
Review your perspective before refining every outline.
Add Handles, Hardware, and Small Details
Once the main forms are in place, sketch the handles, knobs, hinges, faucets, and other hardware that give the kitchen a finished look. Keep each item aligned with cabinet edges and perspective lines. Use varied sizes to show distance, but keep the design consistent.
Add aligned hardware details with consistent sizing to bring the kitchen’s main forms together and create a polished, functional look.
- Draw slim pulls on lower drawers, placing them at a comfortable, believable height.
- Add round knobs to upper doors, with tiny highlights that make their shapes readable.
- Sketch the faucet, sink controls, shelf brackets, and visible hinges with simple, confident strokes.
Next, refine the hardware details around the cooking area. Add burner controls, an oven handle, outlet covers, and a towel ring without overcrowding the scene.
Small decorative elements, such as a clock, utensil holder, cutting board, or framed note, can suggest daily activity. Place them where you’d naturally use them, and overlap a few objects to create depth.
Check that every detail supports the kitchen’s function. Erase stray construction marks, then strengthen only the clearest edges so the drawing stays clean and inviting. Avoid adding surface patterns or material effects yet.
Show Wood, Tile, and Metal Textures
Use light, purposeful marks to show the different materials in your kitchen. For cabinet doors, draw narrow, varied lines that follow the boards, creating a convincing wood grain without outlining every knot. Keep the marks aligned with each surface so the cabinetry feels solid and neatly constructed.
Show tile with simple, repeated shapes. Trace the edges of backsplash or floor tiles, then add thin grout lines with consistent spacing. Vary the tile sizes or directions when your reference calls for it, but keep the perspective guides steady.
For appliances, faucets, and handles, use smooth, controlled strokes. Follow their curves and add a few crisp highlights to suggest metal sheen. Leave small areas untouched so the surfaces appear reflective rather than flat.
You can also use short, broken lines on brushed metal, while clean contours define polished parts. Keep every texture subordinate to the kitchen’s structure, and erase marks that compete with the details.
Shade and Color the Kitchen Drawing
With the textures in place, add shading and color to give the kitchen depth and atmosphere. Choose a light source first, such as a window on the left, then keep highlights and shadows consistent.
Use gentle shading beneath cabinets, along countertops, and inside corners to create convincing depth. Darken areas where objects meet, but leave broad surfaces lighter so they don’t look flat.
- Paint cabinets with a warm base color, then add darker tones beneath doors and around handles.
- Layer cool grays on metal appliances, leaving thin white highlights for polished edges.
- Blend muted browns, creams, or blues across walls, floors, and tiles to establish a cohesive palette.
Practice color blending by applying related hues gradually rather than adding harsh patches. Add reflected light from nearby surfaces to soften shadows and unify the scene.
Keep your brightest accents on focal details, such as a sink, vase, or backsplash. Finally, review the drawing at a distance and strengthen only the areas that need extra contrast.
Frequently Asked Questions
What Drawing Tools and Materials Are Best for Sketching a Kitchen?
You’ll need a sharp graphite pencil set, an eraser, a ruler, and smooth sketch paper for accurate kitchen layouts. Add a fine-liner for crisp cabinet edges and a perspective grid for depth.
Use colored pencils, markers, or watercolor pencils to establish finishes and appliances. Practice color blending and shading techniques with blending stumps or cotton swabs.
A lightbox can help you refine drawings without damaging your original sketch.
How Long Does It Typically Take to Complete a Kitchen Drawing?
You’ll typically finish a kitchen drawing in 30 minutes to several hours, depending on its complexity and your experience. A simple layout may take about 30–60 minutes, while a detailed perspective drawing with cabinets, appliances, color schemes, and lighting effects can require three to six hours.
Think of the process as building a room brick by brick: sketch the structure first, then gradually refine details, textures, and shading.
Can Beginners Draw a Kitchen Without Professional Artistic Experience?
Yes, you can draw a kitchen without professional artistic experience. Start with simple shapes for cabinets, counters, appliances, and furniture, then build accuracy through observation and practice.
Don’t worry about perfection; focus on proportion, perspective, and clear outlines first. Add personality with color blending and texture details, such as wood grain, metal surfaces, and tile patterns.
Use reference photos, work slowly, and revise your sketch as you learn.
Which Kitchen Design Software Can Help Create Accurate Drawings?
SketchUp, IKEA Kitchen Planner, and RoomSketcher can help you create accurate kitchen drawings without professional experience. You’ll find easy drag-and-drop tools, measured dimensions, and realistic 3D views that clarify your Kitchen layout.
AutoCAD offers greater precision if you’re comfortable with technical software, while Planner 5D provides accessible customization and Design inspiration. Start by measuring your room carefully, then compare cabinet sizes, appliance placements, and walking clearances before finalizing your design.
How Can I Revise or Erase Mistakes Without Damaging My Drawing?
Treat mistakes like loose threads: pull them gently, and your drawing won’t unravel. Use eraser techniques that match the mark: lift graphite with a kneaded eraser, or remove darker lines carefully with a precision eraser.
Choose softer pencil grades for adjustable guidelines and harder grades for light construction lines. Don’t scrub repeatedly, because friction can roughen paper. Instead, erase in small strokes, then redraw lightly and confidently.
Conclusion
You’ve now learned how to draw a kitchen in 10 practical steps, from choosing a viewpoint to adding texture, color, and shadows.
Keep checking perspective as you refine each detail. It’s what makes cabinets, appliances, and windows feel believable. Kitchen worktops are often about 36 inches high, so small measurements can guide your proportions.
Don’t chase perfection. Observe, adjust, and enjoy the process. With practice, you’ll create kitchen drawings that feel both accurate and inviting.