How to Repaint Kitchen Cabinets in 10 Steps
Worn, dated cabinets can make your entire kitchen feel tired, even when the rest of the space looks great. You’re not alone—many homeowners struggle to get a smooth, durable finish without professional help. The right products and preparation can make repainting kitchen cabinets much easier.
Repainting kitchen cabinets takes careful preparation. Choose durable satin or semi-gloss cabinet paint, then remove doors, drawers, and hardware. Label every piece and protect floors, counters, and appliances.
Clean away grease, repair damage, and sand surfaces smooth. Apply bonding primer, lightly sand rough spots, and remove dust.
Roll or brush on two thin paint coats, allowing proper drying time. Let everything cure fully before reinstalling hardware and doors.
Continue for detailed tips that help guarantee a smooth, lasting finish.
Key Takeaways
- Choose durable cabinet paint and finish, then gather cleaner, sandpaper, primer, brushes, rollers, tape, drop cloths, and safety equipment.
- Remove and label every door, drawer, hinge, and hardware piece to ensure accurate reassembly.
- Clean, repair, sand, and thoroughly dust all surfaces so the paint adheres smoothly.
- Apply bonding primer, then two thin, even paint coats, sanding lightly between coats when necessary.
- Let the finish cure fully before reinstalling hardware and doors, then check alignment and movement.
Choose Cabinet Paint and Gather Supplies

Choose a durable cabinet or furniture paint designed to withstand frequent cleaning and daily use. Compare Color options under your kitchen’s lighting, and order sample containers if you’re unsure.
Choose durable cabinet paint, compare samples in your kitchen’s lighting, and select a color that complements your space.
Select a shade that complements your counters, flooring, and appliances without overwhelming the room. Review Finish types, such as satin, semi-gloss, or gloss.
Satin hides minor imperfections, while semi-gloss offers easier cleaning and stronger moisture resistance. Gloss creates a bright, polished appearance but highlights surface flaws.
Gather your supplies before you begin. You’ll need degreasing cleaner, clean cloths, sanding sponges, a tack cloth, painter’s tape, drop cloths, quality brushes, a small roller, paint trays, primer, and protective gloves.
Choose tools labeled for smooth surfaces to minimize brush marks and lint. Keep a screwdriver, labeled containers, and a notepad nearby for organization during preparation.
Check the paint label for coverage, drying time, and recommended primer. Buy enough product to complete every visible surface with consistent color, plus a small amount for future touch-ups.
Ventilate the workspace and protect surrounding floors and counters.
Remove Doors, Drawers, and Hardware
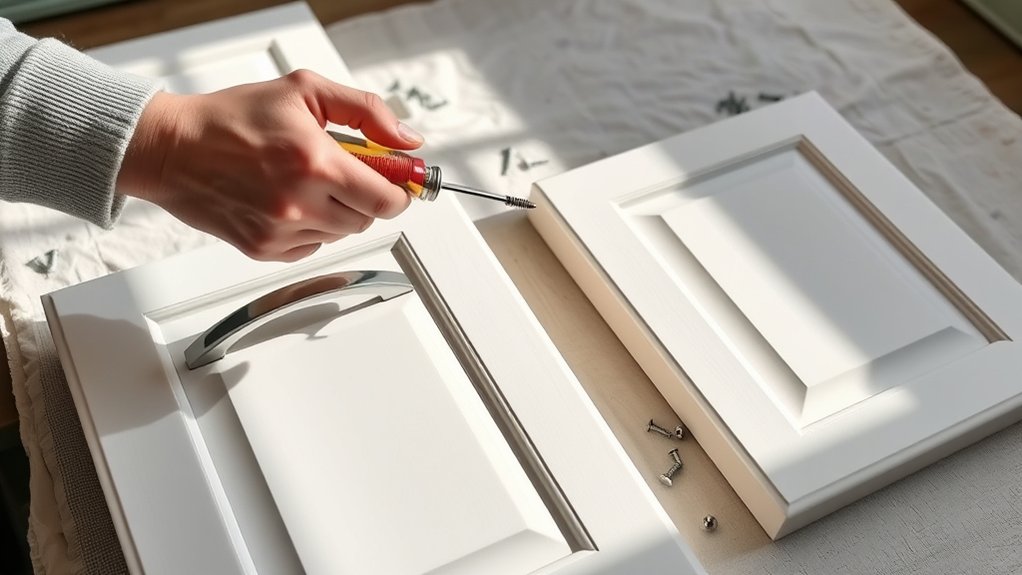
Before you remove anything, label each door and drawer so you know exactly where it belongs. Carefully remove the doors to protect their edges and hinges. Store the hardware safely in labeled bags or containers.
Label Each Piece
As you remove each cabinet door, drawer, and piece of hardware, label it and its corresponding cabinet opening with matching numbers or letters. Use painter’s tape and a permanent marker to create labels that will stay readable throughout your project.
Place the label inside the cabinet opening, where it won’t show after reassembly, and attach the matching label to the door or drawer’s back surface. For hardware, use small bags labeled with the same identifier, then keep each bag with its matching piece.
Label each piece before setting it aside so nothing gets mixed up. Color coordination can make the system even easier: use one tape color for doors, another for drawers, and a third for hardware.
Keep a written list of every identifier as a backup.
Remove Doors Carefully
Start by removing the screws that secure each hinge to the cabinet frame, supporting the door with one hand so it doesn’t drop or strain the hinge. Place the door on a padded, level surface as soon as you free it.
Work slowly during door removal, especially if the doors are heavy or awkward to grip. Remove each drawer by pulling it fully open, then lifting or pressing its release levers according to the slide design.
Keep your screwdriver firmly seated to prevent stripped screw heads. For hinge detachment, remove the hinge screws from the cabinet frame rather than forcing the hinge or prying against the wood.
Take off knobs, pulls, and other attached hardware before sanding, but don’t mix pieces between doors. Inspect every opening for loose screws or damaged wood.
Store Hardware Safely
Store each door’s screws, hinges, knobs, and pulls in a labeled bag or container, keeping hardware sets together so every piece returns to its original location. As you remove each item, note its cabinet number on painter’s tape and photograph unusual hinge positions.
These steps help you store hardware securely and simplify reassembly.
- Place labeled bags in a sturdy box.
- Keep tiny screws inside sealed, transparent pouches.
- Set the box on a high, dry shelf.
Don’t mix hardware from neighboring doors, even if pieces look identical. Use safety precautions while handling sharp screws, loose metal parts, and cleaning products.
Wear gloves if grime or degreaser irritates your skin, and keep small pieces away from children and pets. Before painting, wipe every part clean, then let it dry completely.
Protect the organized box from dust, moisture, and accidental spills throughout the project.
Label Every Cabinet Part

Label each door, drawer, and cabinet opening with matching numbers or letters. Keep the hardware in labeled bags, too, so you’ll know exactly where each piece belongs. This simple system helps prevent mix-ups when you’re ready to reinstall everything.
Assign Matching Labels
Before removing anything, assign a matching label to every cabinet door, drawer, hinge, and hardware piece so you’ll know exactly where each part belongs during reassembly.
Use painter’s tape and a fine-tip marker, placing the label on an inconspicuous surface or a removable bag.
Create a simple code that identifies the cabinet’s location, such as A1 for the first upper cabinet and B2 for the second base cabinet.
This system helps preserve color matching and works across different cabinet styles.
- Picture neat labels lining each door’s top edge.
- Imagine numbered bags resting beside their matching drawers.
- Envision a clear map guiding every part home.
Write each code on a quick sketch of your kitchen, too.
Keep labels legible throughout sanding and painting, replacing damaged tape immediately.
Don’t rely on memory, even if your kitchen seems straightforward.
Track Hardware Placement
Track each hinge, screw, knob, and pull with its matching cabinet part as you remove it. Place the hardware and fasteners in a labeled bag, then write the cabinet or drawer number on the bag.
Add notes about the original hardware alignment, especially if hinges sit at slightly different heights. For drawers, record drawer positioning by noting which opening each drawer fits and marking the left, center, or right side when sizes match.
Use painter’s tape and a marker to label cabinet doors, drawer fronts, and boxes discreetly. Keep labels on hidden edges or backs so you won’t see them after repainting.
Photograph unusual installations before disassembly, including hinge orientation and screw locations. Store all labeled bags in one container, and don’t mix parts until the finish cures fully.
Protect the Work Area and Cabinets
Cover countertops, floors, and nearby appliances with drop cloths or plastic sheeting, securing the edges with painter’s tape. This surface protection keeps sanding dust, drips, and stray brush marks from damaging your kitchen.
Extend coverings beneath cabinet boxes, and weigh loose corners so they won’t shift while you work.
Remove doors, drawers, and shelves before painting, then place them on a level, protected surface. Keep each piece supported without stacking, since fresh paint can stick or show pressure marks.
Use painter’s tape to shield hinges, wall edges, trim, and any areas that must remain unpainted.
- Picture countertops wrapped tightly, like a clean, sealed workbench.
- Imagine doors resting flat on padded sawhorses, ready for an even finish.
- Keep tools grouped in one tray, creating calm workspace organization.
Leave pathways clear, and open a window or set up a fan for comfortable airflow. Check your coverings throughout the project, because shifted plastic can expose surfaces and create a frustrating cleanup.
This preparation helps you paint confidently and protect every surrounding area.
Clean Cabinets to Remove Grease
Choose a cleaner that cuts through grease without damaging the cabinet finish. Apply it with a soft cloth or sponge, then gently scrub away any stubborn buildup. Rinse off the residue and let the cabinets dry completely before painting.
Choose the Right Cleaner
The right cleaner cuts through cooking grease without damaging your cabinet finish. For effective surface preparation, choose mild cleaning solutions suited to your cabinet material.
A pH-neutral degreaser or diluted dish soap usually works well. Harsh solvents, abrasive powders, and ammonia may dull paint or soften finishes.
Read the product label, test a hidden spot, and follow the recommended dilution before cleaning every door.
Look for a cleaner that leaves no oily film, since residue can interfere with primer and paint adhesion. Keep these options in mind:
- Painted wood: diluted dish soap for a gentle, clean sheen
- Laminate: a nonabrasive, water-based degreaser
- Varnished wood: a finish-safe cleaner with minimal moisture
You’ll also need clean water and fresh microfiber cloths for controlled application. Choose carefully now; thorough scrubbing comes next.
Scrub Away Grease
Start with the cabinet doors and work in small sections, wiping away grease with a microfiber cloth dampened in your chosen cleaner. Let the cleaner sit briefly on stubborn spots, but don’t allow it to dry.
Use a soft toothbrush or nonabrasive sponge to loosen grease buildup around handles, corners, and raised panels. Wipe each area with a clean, damp cloth to remove cleaner residue, then dry the surface thoroughly with a lint-free towel.
Turn on your kitchen ventilation before you begin, especially when using a strong degreaser. Check the cabinet tops, undersides, and drawer fronts, where cooking oils often collect unnoticed.
Replace dirty cloths frequently so you don’t spread grime. If residue remains, repeat the process rather than scrubbing aggressively, which can damage the finish.
Let every cabinet dry completely before sanding or priming.
Repair Holes, Cracks, and Dents
Before you sand or prime, inspect each cabinet door and drawer for holes, cracks, and dents, then fill the damage with wood filler or putty suited to the cabinet material. Choose filler compounds that match the cabinet’s wood, laminate, or medium-density fiberboard.
Inspect cabinets for damage and fill holes, cracks, and dents with material-appropriate filler before sanding or priming.
Press the product firmly into each defect, slightly overfilling it so the repair won’t shrink below the surrounding surface.
- Picture a small dent disappearing beneath a smooth, even patch.
- Imagine a split seam sealed before moisture can reach the cabinet core.
- Visualize old handle holes closed, leaving a clean canvas for new hardware.
Use a putty knife to scrape away excess filler while it’s still workable, and keep the blade nearly flat to avoid creating ridges.
For narrow cracks, force putty into the opening with your fingertip, then wipe the area clean. Let every repair cure completely according to the label.
This careful surface preparation prevents imperfections from showing through your fresh paint and creates a consistent foundation for later steps. Don’t rush drying time, or soft filler may pull away.
Sand Cabinets for Better Adhesion
Once the filler has cured, sand the cabinets to create a lightly rough surface that paint can grip. Remove doors, drawers, and hardware, then label each piece so you can replace everything correctly. Place the parts on a protected, stable work area.
Use 120- to 150-grit sandpaper to dull existing gloss and smooth repaired areas. Follow the wood grain, and apply even, moderate pressure rather than scrubbing aggressively. For detailed profiles and corners, use a sanding sponge or folded paper.
These sanding techniques help you reach edges without gouging the material. Wipe the cabinet surface with a clean, dry cloth between passes to remove dust and reveal uneven spots.
Run your hand across each area. It should feel consistently dull and smooth, not slippery or ridged. Lightly sand any remaining rough patches.
Then vacuum the workspace and remove lingering dust with a slightly damp, lint-free cloth. Let every surface dry completely before continuing.
Apply Primer to Cabinets and Doors
With the cabinets clean and fully dry, apply a thin, even coat of bonding primer to the frames, doors, and drawer fronts. Use a quality angled brush for corners and a small foam roller for broad, flat areas.
Keep your strokes light, and don’t let primer pool along edges, profiles, or hardware holes. This primer application creates a firm surface and supports cabinet sealing against stains, grease, and moisture.
- Picture a smooth, pale film wrapping each door like clean canvas.
- Imagine crisp primer settling into grooves without burying their detail.
- See the cabinet frames gaining an even, sealed foundation.
Work methodically from the inside edges outward, checking for drips as you go. Prime both sides of removable doors, then rest them on painter’s pyramids or clean blocks so air can circulate underneath.
Follow the product’s drying instructions before lightly inspecting the surface. If you see raised fibers, dust, or rough spots, sand them gently with fine-grit paper and remove every trace of residue.
Keep the area ventilated while the primer cures.
Paint Cabinets With Two Even Coats
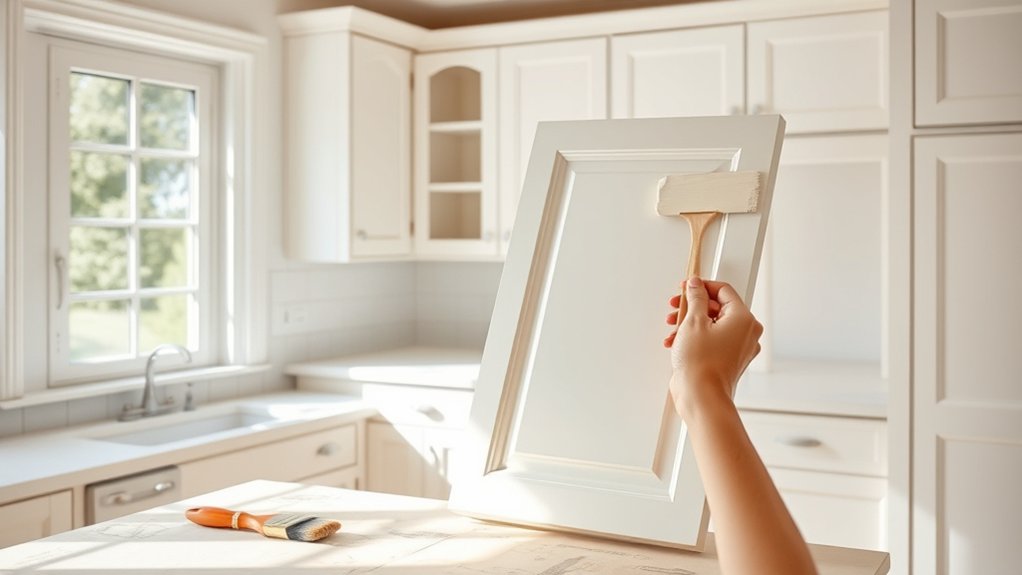
After the primer has cured and any rough spots are smooth, apply the cabinet paint in a thin, even coat using a quality angled brush for edges and a small foam roller for flat surfaces. Work in the direction of the wood grain, and keep each pass light to prevent drips, ridges, and visible roller marks.
Check corners and recessed panels as you go, brushing out pooled paint before it dries. Choose color schemes that complement your walls, counters, flooring, and appliances, while considering how natural and artificial light will affect the shade.
Select durable paint finishes, such as satin or semi-gloss, for easier cleaning and better moisture resistance. Let the first coat dry according to the manufacturer’s instructions, then inspect it under bright light.
Lightly smooth any raised fibers or imperfections, remove dust, and apply a second thin, even coat. Maintain consistent coverage, but don’t overwork the surface. Repeated brushing can leave texture and uneven sheen across your cabinet doors and drawer fronts.
Let the Paint Cure and Reinstall Hardware
Give the final coat enough time to cure fully before reinstalling the doors, drawers, and hardware, even if the surface feels dry to the touch. Paint drying happens in stages, and rushing can leave fingerprints, dents, or stuck doors.
> Let the final coat cure completely before reinstalling doors and hardware to prevent fingerprints, dents, and stuck cabinet surfaces.
Check the paint label for its recommended cure time, then add extra time if your kitchen feels cool or humid.
While you wait, gather clean screws, hinges, pulls, and a screwdriver. Organize each piece so hardware reinstallation goes smoothly:
- Picture smooth doors resting on padded sawhorses, untouched and dust-free.
- Imagine drawers lined up in order, ready to slide into place.
- See polished knobs and pulls waiting beside their matching screws.
When the finish feels hard, reinstall the hinges and doors carefully. Don’t overtighten screws, since pressure can chip fresh paint.
Reattach drawer fronts, then test every door and drawer for even gaps and easy movement. If anything sticks, adjust the hinges instead of forcing it.
Handle the cabinets gently for several more days while the finish reaches full durability.
Frequently Asked Questions
How Long Does Repainting Kitchen Cabinets Typically Take From Start to Finish?
You’ll typically need three to seven days to repaint kitchen cabinets from start to finish. Cabinet surface preparation, including cleaning, sanding, repairs, and priming, usually takes one to two days.
Painting may require another day or two, depending on the number of coats. Allow adequate paint drying times between coats, often 12–24 hours.
Reassembly and hardware installation take several hours. Larger kitchens, intricate doors, humidity, and drying conditions can extend the schedule.
Can You Repaint Laminate or Thermofoil Kitchen Cabinets Successfully?
Yes, you can repaint laminate or thermofoil cabinets successfully, but you’ll need careful preparation. Clean and degrease every surface, lightly sand it, and apply a high-adhesion bonding primer before painting.
Laminate durability depends on intact edges and quality products, while thermofoil adhesion requires extra attention because the slick coating can resist paint. Repair peeling areas first, use thin coats of durable cabinet paint, and let each coat cure fully before reinstalling doors and hardware.
Should You Repaint Cabinets or Replace Them Entirely?
You should repaint cabinets when their boxes remain sturdy, the layout works, and the surfaces can accept paint. Choose replacement when damage, poor storage, or outdated cabinet materials limit your kitchen.
Your cost comparison usually favors repainting because it saves on labor, demolition, and disposal. Replacement offers new doors, hardware, and improved functionality.
Inspect laminate or thermofoil carefully because peeling edges may require replacement. Repaint for savings; replace for structural problems or major upgrades.
How Often Should Kitchen Cabinets Be Repainted?
You should repaint kitchen cabinets every 7–10 years, unless daily wear demands it sooner, because your “permanent” finish quietly ages like everything else. Repaint when you notice peeling, fading, chips, or stubborn stains that cleaning won’t remove.
Strong cabinet durability can extend that timeline, while humidity, heavy use, and poor application can shorten it. Don’t rush the refresh: thorough paint preparation, including cleaning, sanding, and priming, helps your next finish last longer.
What Paint Colors Make a Small Kitchen Look Larger?
Choose light, cool paint colors to make your small kitchen look larger. Soft white, pale gray, light blue, and gentle green reflect more light and create an airy atmosphere.
Color psychology suggests these shades can feel calm and open, while visual illusions help walls appear farther apart. You can also paint cabinets and walls similar colors to reduce visual breaks.
Avoid dark, high-contrast combinations, which may make the room feel smaller.
Conclusion
With your cabinets cleaned, sanded, primed, and painted, you’re nearly finished. Let every surface cure fully before reinstalling the doors, drawers, and hardware, then step back and admire your refreshed kitchen.
“Measure twice, cut once” applies here too: careful preparation and patience create the best results. Don’t rush the final stage, because proper curing helps prevent chips and fingerprints.
Once everything’s back in place, you’ll enjoy a durable, budget-friendly transformation you completed yourself. These final steps complete your kitchen cabinet repainting project with confidence.