How to Decorate Kitchen Counters
A cluttered kitchen counter can make even simple tasks feel stressful. If you want a stylish, functional space but struggle to know where to begin, you’re not alone. These kitchen counter decorating ideas will help you organize everyday essentials while adding personality and visual appeal.
Decorate kitchen counters by clearing clutter first, then define your style and preserve space for food preparation. Group everyday items by task on attractive trays, such as oils near the stove or coffee supplies by the machine.
Add canisters, a fruit bowl, cutting boards, or cookbooks for useful visual interest. Vary heights, colors, and textures, and include a small herb or flower arrangement. Keep accents washable, accessible, and easy to move.
The ideas below will help you refine your setup.
Key Takeaways
- Clear and clean counters first, then measure available space and plan zones for prep, storage, appliances, and decoration.
- Choose practical accents such as canisters, trays, fruit bowls, plants, and cutting boards that match your kitchen’s style.
- Group items by task, keeping frequently used cooking, baking, coffee, and serving essentials conveniently accessible.
- Create visual interest by combining varied heights, complementary colors, and balanced textures like wood, ceramic, glass, and metal.
- Maintain an inviting, uncluttered counter by using trays, refreshing greenery, and regularly removing unnecessary or rarely used items.
Clear Your Counters Before Decorating
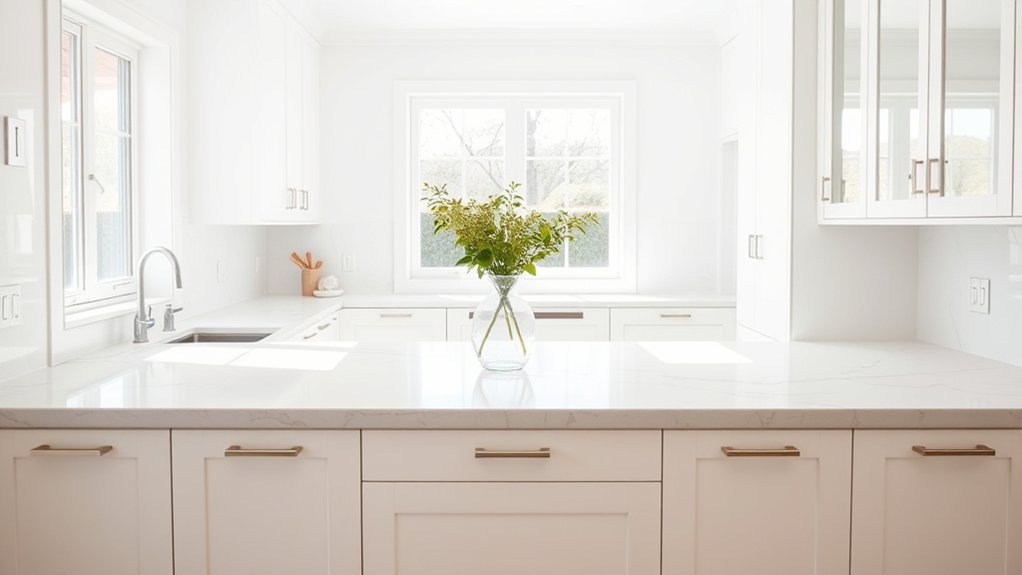
Before decorating, clear your kitchen counters of appliances, dishes, mail, and other loose items. Removing counter clutter gives you a clean starting point and helps you see which surfaces need attention.
Clear kitchen counters of clutter to create a clean foundation and reveal which surfaces need attention before decorating.
Work in sections so the task doesn’t feel overwhelming. Gather everything into simple categories: keep, relocate, recycle, donate, and discard.
Return useful items to their proper homes instead of shifting them to another counter. Place mail in an organized spot, load dirty dishes into the dishwasher, and store appliances you rarely use.
Wipe each cleared surface to remove crumbs, grease, and dust. During clutter removal, question every item that remains.
If you haven’t used something recently or it doesn’t serve a clear purpose, move it out of the kitchen. Check corners, spaces beside appliances, and areas near the sink, where small objects often accumulate.
Finish by emptying trash and recycling, leaving your counters completely open for the next step.
Plan Your Kitchen Counter Decor
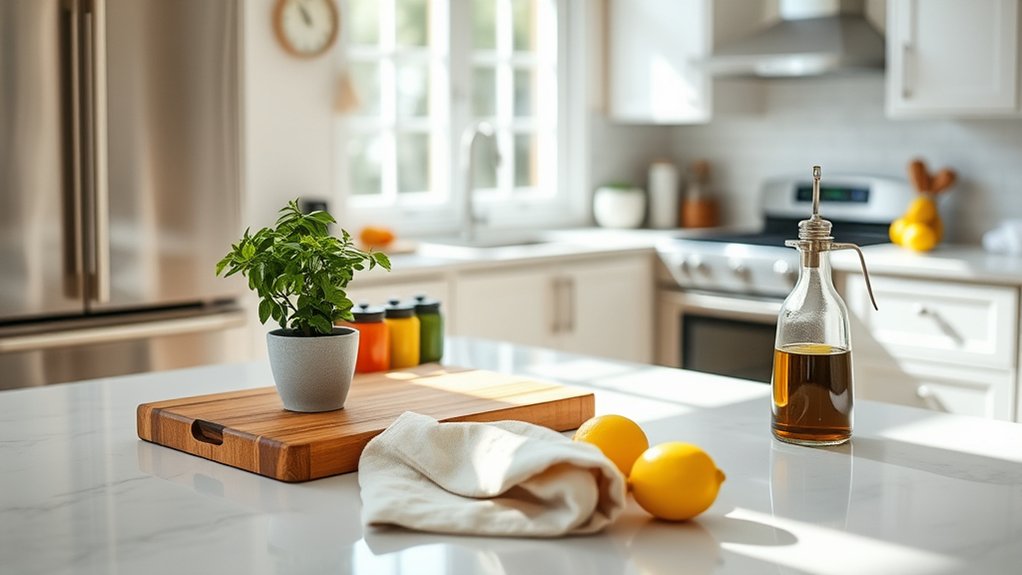
Plan your kitchen counter decor by first defining your style and choosing a cohesive look. Then, measure the available space to ensure each item fits comfortably without making the counter feel cluttered. Choose practical accents that add personality while still supporting your kitchen’s everyday use.
Define Your Decorating Style
Your kitchen counter decor should reflect the style that makes you feel at home, whether that’s modern, farmhouse, traditional, or eclectic. Choose a clear direction before selecting decorative pieces, so your counter looks intentional rather than crowded.
- Modern: Choose sleek containers, simple finishes, and a limited color palette. A minimalist approach keeps the space polished and calm.
- Farmhouse: Add woven textures, ceramic crocks, wooden boards, or vintage accents to create warmth and character.
- Traditional or eclectic: Combine classic materials with meaningful objects, artwork, or collected pieces that show your personality.
Let your cabinets, backsplash, and favorite kitchen tools guide your choices. You don’t need to follow one style perfectly; blending compatible details can make the room feel personal.
Focus on repetition, such as similar colors or materials, to keep varied decorations visually connected and balanced.
Measure Available Counter Space
Once you’ve chosen a decorating style, measure the counter space available for displays, storage, and daily prep. Clear each section first, then measure its length and depth with a tape measure.
Record fixed features, including walls, corners, sinks, cooktops, outlets, and appliance clearances, because they reduce usable room. Note traffic paths and door swings, too, so your layout remains comfortable.
For accurate measurement techniques, sketch the counters on graph paper or create a simple digital plan, marking every dimension in inches. Separate continuous work areas from narrow gaps and irregular corners.
Then calculate the open surface area and identify zones that must remain accessible. This information supports counter space optimization and helps you plan balanced arrangements without overcrowding your kitchen or disrupting essential preparation space during busy routines.
Choose Practical Decorative Accents
Choose decorative accents that make your kitchen more useful, such as a lidded canister for staples, a tray for oils, or a compact vase for fresh greenery. Select pieces that support your routine instead of crowding your workspace.
Before buying decorative accessories, consider how often you’ll move them during cooking and countertop cleaning.
- Contain essentials: Use a tray to group oils, salt, and pepper, keeping spills manageable and supplies easy to grab.
- Add warmth: Display a small plant, fruit bowl, or wooden board to introduce color and texture without overwhelming the counter.
- Protect space: Choose washable, durable materials and leave clear areas for preparation.
Keep accents proportional to your counter and repeat one finish, such as wood or metal, for a coordinated look. You’ll create a polished surface that remains practical every day.
Group Items by Kitchen Task
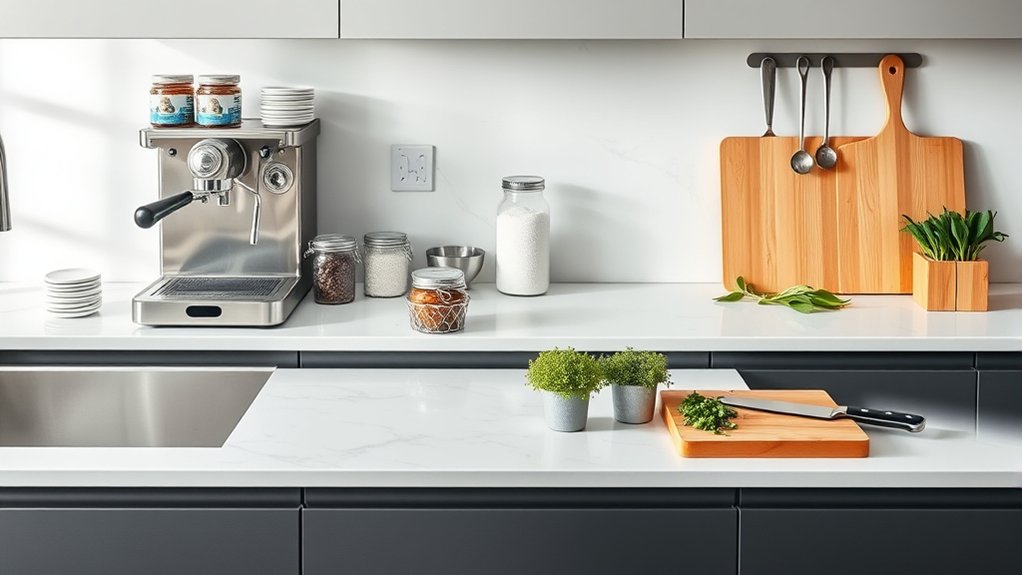
Group countertop items by kitchen task to keep the space practical and visually tidy. Create a dedicated prep zone near your cutting board, knives, mixing bowls, and measuring tools.
Keep frequently used cooking oils, spices, and utensils beside the stove so you can reach them without crossing the kitchen. Arrange coffee supplies together, placing mugs, beans, filters, and your brewer in one convenient station.
If you bake often, gather flour, sugar, baking tools, and a mixer near your primary workspace. Use small trays, containers, or drawer organizers to define each group and prevent supplies from spreading.
Reserve one area for serving essentials, such as napkins, trivets, and frequently used platters. Consider your preferred Cooking techniques when deciding which tools deserve prime counter space.
Store occasional gadgets elsewhere to protect your work area from clutter. Finally, leave room around appliances for safe use and easy Appliance maintenance.
Wipe beneath them regularly, check cords, and keep vents unobstructed.
Mix Heights, Colors, and Textures
Create visual interest by varying the heights of your counter décor. Layer complementary colors, and mix textures like wood, ceramic, glass, and metal to create a balanced, inviting look.
Vary Decorative Heights
Varying the heights of your counter decor keeps the display from looking flat or crowded. Vary heights by pairing a tall vase with a medium canister and a low tray.
This arrangement guides your eye across the counter while leaving enough breathing room between pieces. Use decorative layers to create depth without blocking useful workspace or making everyday items difficult to reach.
- Place your tallest object toward the back or beside a wall, where it can anchor the arrangement.
- Add medium-height pieces in front, such as a utensil crock, cookbook stand, or lidded jar.
- Finish with low accents, including a small bowl, cutting board, or folded towel.
Varying silhouettes also prevents a predictable look. Step back occasionally and remove anything that overwhelms the grouping.
Your counter should feel balanced, practical, and intentionally styled, not cluttered.
Layer Complementary Colors
Once your display has a balanced range of heights, bring it in harmony with complementary colors and varied textures. Start with your kitchen’s existing palette, then choose two or three accent shades that echo nearby cabinets, backsplash tiles, or artwork.
Use a colorful bowl, a muted canister, and a small plant pot to distribute color without making the counter feel busy. Repeat one shade in different objects to create color coordination, while a contrasting tone adds visual energy.
Let neutral pieces give brighter accents room to stand out. Consider how each item contributes to aesthetic harmony, especially when viewed from across the room.
Keep the strongest color at eye level, and place softer hues around it. Step back occasionally; you’ll quickly see whether the arrangement feels balanced and intentional.
Combine Diverse Textures
Combine smooth, rough, glossy, and woven surfaces to give your counter display depth and character. Pair a polished ceramic canister with a grainy wooden board, a linen runner, and a matte stone bowl.
This material pairing creates inviting textural contrast while keeping your arrangement practical. Vary heights, too: place tall jars behind shorter bowls, then add a low tray to anchor everything.
Choose related colors so diverse finishes look intentional rather than chaotic.
- Balance: Mix one dominant texture with two supporting finishes.
- Function: Let frequently used items remain easy to reach.
- Harmony: Repeat a color or material across separate pieces.
You don’t need many accessories. Three or four contrasting elements can transform a plain counter.
Rotate seasonal fabrics or natural accents when you want a fresh look without replacing your entire display.
Use Trays to Organize Countertop Items
Use a tray to gather frequently used items, such as oils, spices, or coffee supplies, into one tidy zone. Choose a style that complements your counters, whether you prefer wood, metal, stone, or woven material.
A tray creates visual boundaries, so loose bottles and containers look intentional instead of scattered. For effective tray organization, group items by purpose and keep daily essentials within easy reach.
Leave enough space between containers to remove anything without knocking over neighboring items. Select a tray with raised edges to contain spills, especially near cooking oils or drink ingredients.
Clean the tray regularly, and return each item after use to preserve countertop harmony. Avoid overcrowding; if the tray feels cramped, store less frequently used supplies elsewhere.
You can also use separate trays for distinct tasks, such as breakfast drinks or baking ingredients. Keep each arrangement practical, attractive, and easy to maintain, so your counters stay orderly without sacrificing convenience.
Display Cutting Boards and Cookbooks
Layer cutting boards in different sizes against your backsplash to add texture and make them easy to grab. Place your favorite cookbooks beside them, keeping the ones you use most within reach. Finish the vignette with a small plant or utensil holder, but leave enough counter space to keep the arrangement from feeling crowded.
Layer Cutting Boards
Lean a large cutting board against the backsplash, then place a smaller board and a few favorite cookbooks in front of it to create height and dimension. Choose complementary cutting board materials, such as warm wood, cool marble, or durable bamboo, to add texture without making the counter look busy.
Practice stacking cutting boards by varying their shapes and sizes, leaving each edge visible. Keep the arrangement practical, so you can quickly grab a board when preparing meals.
- Build height: Position taller pieces behind shorter ones to create a balanced, layered display.
- Mix shapes: Pair round, rectangular, and paddle-style boards for visual interest.
- Leave space: Maintain a small gap around the grouping so your counter still feels open.
Place the display near the backsplash, away from water splashes and heat. Rotate boards occasionally to prevent uneven wear and refresh the arrangement.
Showcase Favorite Cookbooks
Turn your layered cutting boards into a practical cookbook display by propping a few favorite titles in front of them. Choose books with colorful spines, inviting covers, or meaningful recipes that reflect your cooking style.
Lean two or three volumes at different heights so each title remains visible without making the counter feel crowded. Keep the arrangement close to your prep area, but leave enough workspace for chopping and mixing.
You can add personality with Vintage accents, such as a weathered recipe box or an old culinary print tucked behind the books. Let statement lighting highlight the display after sunset, making the covers easy to spot.
Rotate your selection seasonally, featuring grilling guides in summer, baking books in winter, or family cookbooks whenever you want a personal reminder nearby.
Create Stylish Vignettes
Create a stylish kitchen vignette by pairing layered cutting boards with a few favorite cookbooks. Lean boards against the backsplash, then stack books horizontally to add height and create an inviting focal point. Keep the arrangement useful, balanced, and easy to refresh.
- Vary textures: Combine wood grain, woven covers, and ceramic details for visual interest.
- Add personality: Include Vintage accents, such as a small brass timer, antique crock, or weathered utensil.
- Reflect the moment: Use Seasonal themes by displaying a citrus bowl in summer or a small evergreen arrangement in winter.
Choose boards in complementary tones, and place the tallest piece behind the others. Leave breathing room around your vignette so the counter doesn’t feel crowded.
Rotate cookbooks and accessories occasionally to keep your kitchen looking fresh.
Add Canisters for Stylish Storage
Add canisters to your kitchen counters to keep coffee, flour, sugar, or snacks within easy reach while maintaining a polished look. Choose canister types that complement your kitchen’s colors, hardware, and overall style.
Glass containers suit modern spaces and let you see contents quickly, while ceramic or metal options create a warmer, more traditional appearance. Select matching pieces for a streamlined arrangement, or combine sizes and textures for visual interest without creating clutter.
Use airtight lids to preserve freshness and protect dry goods from moisture. Label each container clearly, especially when similar ingredients look alike.
Group frequently used items near your coffee maker, mixer, or prep area, but leave enough counter space for daily tasks. For compact kitchens, choose stackable designs or narrow vessels that maximize vertical space.
Keep only your most-used staples on display and store backups elsewhere. With thoughtful storage solutions, your canisters can organize essentials, reduce packaging noise, and turn practical counter space into a polished feature.
Add Plants, Flowers, and Fresh Herbs
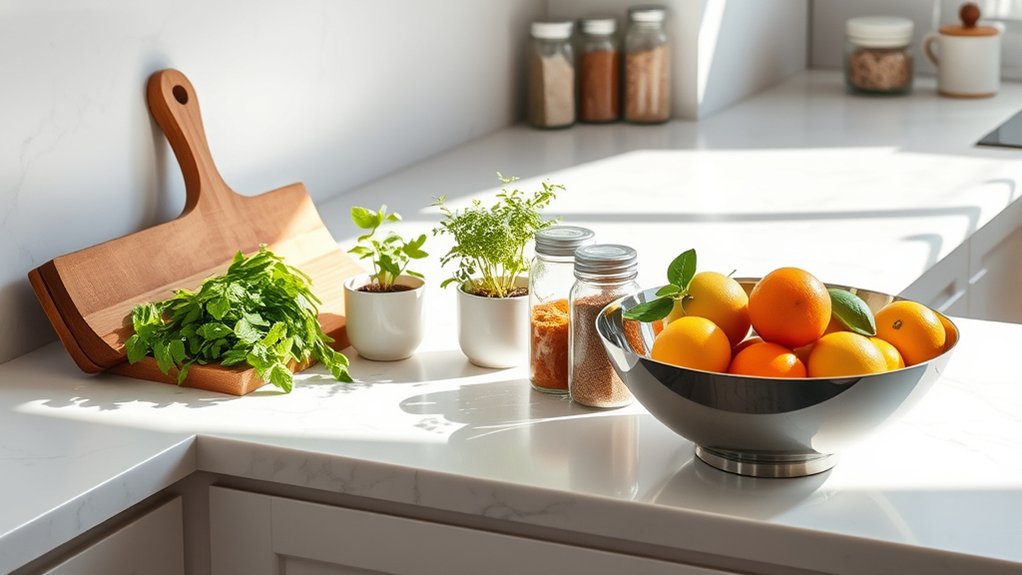
Plants, flowers, and fresh herbs bring color, texture, and a natural touch to kitchen counters. Choose containers that complement your canisters while keeping the display practical and fresh. A small potted basil plant adds fragrance and makes cooking more convenient.
Bring color and natural charm to kitchen counters with coordinated containers, fresh herbs, and fragrant potted plants.
Cut flowers can brighten your routine, while leafy plants soften hard surfaces.
Use these ideas to create a display that feels intentional:
- Match your style: Select ceramic, glass, or woven pots that echo your kitchen’s colors and finishes.
- Group thoughtfully: Combine different heights and textures, leaving enough space to clean around each container.
- Refresh regularly: Remove wilted leaves, trim herbs, and replace water before it becomes cloudy.
Indoor gardening lets you enjoy useful greenery throughout the year, even when you don’t have a yard. Rotate seasonal arrangements to reflect changing weather, holidays, or available blooms.
Place plants where they’ll receive suitable light, and use saucers to protect your counter from moisture. Keep edible herbs away from cleaning sprays and heat-producing appliances.
Decorate Small Kitchen Counters
Small kitchen counters can look stylish without feeling crowded when every item serves a purpose. Choose one visual theme, such as warm wood, bright ceramics, or sleek metal, then repeat it through a few carefully selected accents.
Display Kitchen gadgets with attractive shapes, like a colorful mixer or sculptural kettle, rather than hiding every appliance. Add decorative tiles behind the counter to create a bold focal point without consuming workspace.
Keep colors light and coordinated so the area feels open, and use vertical space for personality.
| Style choice | Space-saving effect | Emotional appeal |
|---|---|---|
| Open shelving | Draws eyes upward | Feels airy |
| Matching containers | Reduces visual noise | Creates calm |
| Statement backsplash | Adds character | Sparks joy |
A narrow tray can group small decorative pieces into one intentional arrangement, while a framed print or compact clock adds warmth.
Choose rounded forms and reflective finishes to soften tight corners. Let one standout detail lead the design, and leave surrounding surfaces visually quiet.
Your counter will feel inviting, personal, and thoughtfully styled.
Keep Your Counter Decor Functional
When you decorate kitchen counters, choose items that support your daily routine as well as your style. Functional decor keeps surfaces attractive without creating extra work.
Start with countertop organization that gives frequently used tools a designated home, such as a crock for spatulas or a tray for oils. Choose pieces you can grab quickly, clean easily, and move when preparing meals.
Use this simple test before adding anything:
- Useful: Does the item serve a purpose you’ll appreciate every day?
- Accessible: Can you reach it without moving several other objects?
- Maintainable: Can you wipe around it and keep it free of grease and crumbs?
Select decorative accessories that complement your kitchen while earning their space. A fruit bowl can add color and hold snacks, while a stylish cutting board can double as a serving surface.
Limit small accents that collect dust, and group similar items on one tray. You’ll create a polished counter that works as beautifully as it looks.
Frequently Asked Questions
How Often Should Kitchen Counter Decorations Be Cleaned?
Clean kitchen counter decorations weekly, and wipe them immediately after spills, cooking, or handling raw food. For effective Countertop organization, remove each item, clean beneath it, and disinfect frequently touched pieces, such as trays or canisters.
Wash fabric accents weekly and dust decorative objects every few days. During holidays, apply the same routine to Seasonal decor ideas, checking materials for moisture, grease, crumbs, and damage before replacing everything neatly.
Which Materials Are Safest for Kitchen Counter Decor?
For safest countertop safety, choose nonporous decorative materials: glass, glazed ceramic, stainless steel, silicone, or sealed stone. About 70% of household kitchen surfaces can harbor bacteria when moisture lingers, so choose items that resist absorption and clean easily.
Avoid unfinished wood, porous clay, chipped ceramics, and flaking paint near food-preparation areas. Pick decorative materials with smooth surfaces, stable bases, and food-safe finishes, and wash them regularly with mild soap.
How Can Renters Decorate Counters Without Making Permanent Changes?
Use temporary decor and nonpermanent accessories to refresh your counters without risking your security deposit. Add a removable tray for oils, a freestanding spice rack, or a small potted herb garden.
Choose washable mats and peel-and-stick liners only if your lease permits them. Group items in baskets so you can move everything easily.
Avoid drilling, gluing, or installing hardware. When you’re ready to move, simply remove the accessories, clean the surfaces, and restore the counters.
What Decorations Work Best With Different Countertop Materials?
Choose decorations that complement your countertop’s finish and durability. For granite or quartz, use wood trays, ceramic vases, and metallic decorative accents that highlight natural veining.
Pair butcher block with stoneware, woven baskets, and greenery for warmth. On laminate, choose lightweight trays and colorful canisters that won’t scratch.
For marble, use glass, polished metal, and soft textiles while avoiding acidic containers. Effective countertop styling balances color, texture, and practical clearance around work areas.
How Can I Protect Counter Decor From Heat and Moisture?
Protect your counter decor before heat and moisture turn small risks into big headaches. Place hot cookware on heat resistant placemats, and choose moisture proof decor accessories near sinks, kettles, or dish racks.
Keep decorative items slightly raised with trays or risers so water can’t pool beneath them. Wipe spills promptly, improve ventilation, and rotate vulnerable pieces away from splash zones.
You’ll preserve both your decorations and countertop’s finish.
Conclusion
With a little planning, you can turn cluttered kitchen counters into a welcoming stage for everyday life. Clear away what you don’t use, then arrange useful pieces in balanced groups, like actors ready for their cues.
Trays, canisters, herbs, and flowers add order, color, and texture without stealing workspace. Even a small counter can shine when every item earns its place.
Keep convenience at the center, and your kitchen will feel both beautiful and ready to work. With these kitchen counter decorating ideas, you can create a space that looks inviting and functions beautifully.