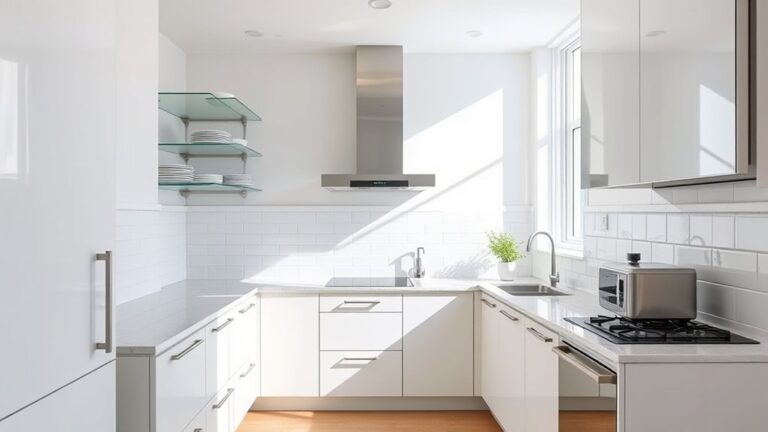
How to Decorate a Kitchen Island Countertop
A kitchen island can quickly go from stylish centerpiece to cluttered catchall, especially when you’re balancing meal prep, dining, and entertaining. You’re not alone—many people struggle to decorate a kitchen island countertop without sacrificing valuable workspace.
To decorate a kitchen island countertop, first clear and measure the space. Then decide whether you’ll use it for meal prep, dining, or entertaining. Choose decor that complements your cabinets, finishes, and lighting.
Create a balanced arrangement with a tray, bowl, vase, or low plant, varying heights while preserving workspace and sightlines. Group everyday essentials neatly, add natural texture, and avoid clutter.
For small islands, use one functional centerpiece. Keep refining the display as your needs change.
Key Takeaways
- Clear and clean the countertop, then reserve enough open space for meal preparation and everyday activities.
- Choose decor that complements your kitchen’s style, cabinetry, colors, and materials for a cohesive appearance.
- Create balance with a small grouping of varied heights, such as a tray, bowl, and vase.
- Organize essentials like oils, salt, and pepper on an attractive tray for convenient access.
- Add low-maintenance plants, fresh herbs, fruit, or seasonal accents while avoiding clutter and obstructed sightlines.
Clear the Countertop and Measure the Space

Before you decorate, clear everything from the kitchen island countertop and wipe it clean. Remove appliances, mail, dishes, and decorative items so you can assess the entire surface without distractions.
> Clear the kitchen island completely, then wipe the surface clean to evaluate its condition and available space.
Check for crumbs, stains, scratches, or damage, and address those issues before continuing.
Next, measure the island’s length and width with a tape measure. Record the dimensions, including any overhangs, raised sections, or built-in features.
Measure the height if you’re considering decor that could affect sightlines or fit beneath cabinets. Note nearby outlets, pendant lights, and cabinet doors, since these details can influence placement later.
Use your measurements to define the usable countertop area and avoid overcrowding. During Material selection, consider how the surface’s stone, wood, laminate, or tile finish will interact with potential accessories.
Color coordination matters too: identify the countertop’s dominant tones and surrounding cabinet colors before choosing decorative accents. Keep your notes handy as you plan the arrangement.
Decide How You’ll Use the Island

Decide whether your island will primarily support meal preparation, dining, entertaining, storage, or a combination of uses. Your answer should guide every countertop decision, from the amount of open workspace you preserve to the accessories you place nearby.
If you prepare meals there, keep the surface mostly clear and position a cutting board, knife block, or utensil crock within easy reach. For dining, leave comfortable elbow room and avoid tall items that obstruct conversation.
If you entertain often, create a flexible landing zone for drinks, serving boards, and appetizers while keeping cleanup supplies accessible. For storage, use trays, baskets, or compact containers that organize essentials without crowding the worktop.
Consider how frequently each activity occurs, then assign dedicated zones. Color schemes can distinguish preparation, dining, and serving areas subtly.
Material choices should match the island’s demands, including heat, moisture, spills, and frequent cleaning. Choose practical decorations that support your routine instead of interfering with it.
Choose a Kitchen Island Decorating Style
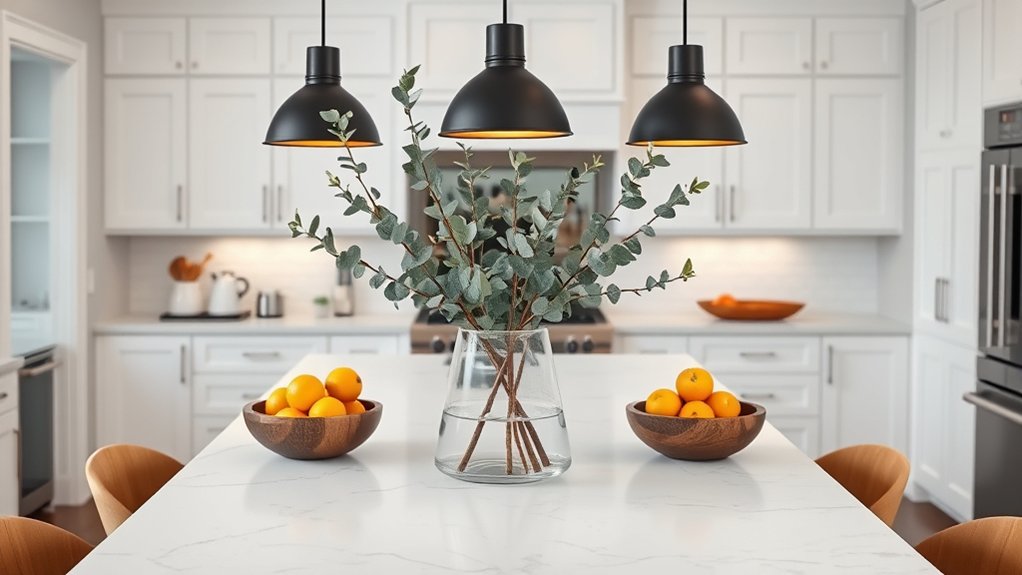
Choose a decorating style that complements your kitchen’s cabinets, finishes, and overall mood. Start by identifying the look you want to reinforce, whether it’s modern, farmhouse, traditional, coastal, or eclectic.
Let your island countertop feel connected to the room rather than treated as a separate display.
For a modern kitchen, choose streamlined accessories, simple silhouettes, and restrained Color palettes. A farmhouse space may suit natural textures, vintage-inspired accents, and warm neutrals.
In a traditional kitchen, consider classic forms, polished details, and coordinated tones. Coastal designs benefit from airy colors and organic finishes, while eclectic kitchens can handle carefully selected contrast.
Match your accessories to existing Material choices, such as wood, marble, quartz, metal, or tile. Repeat one or two finishes to create visual continuity without making the countertop look overly coordinated.
Your decorating style should also support the island’s purpose, so select pieces that reflect how you cook, serve, or gather there. Let the overall kitchen guide every style decision.
Build a Balanced Countertop Arrangement
Create a balanced countertop arrangement by varying the heights and textures of your decor. Pair taller pieces with shorter accents, and mix materials to add visual interest. Group related items together so the display feels intentional while keeping your workspace clear.
Vary Heights and Textures
Varying heights and textures keeps your kitchen island countertop from looking flat or cluttered. Start with one taller element, such as a vase, pitcher, or sculptural lamp, then add shorter pieces around it.
A raised cutting board, stacked cookbooks, or a compact stand can create another level without overwhelming your workspace. Balance smooth surfaces with tactile finishes: pair polished ceramic with woven fibers, veined stone with warm wood, or glossy glass with brushed metal.
These material contrasts add visual interest while reinforcing your kitchen’s style. Consider color combinations, too, using complementary shades or varying tones from the same palette.
Keep each item easy to see and use, and leave enough open counter space for food preparation. This layered approach gives your island dimension while keeping the arrangement practical, inviting, and visually calm.
Group Items Thoughtfully
Group countertop items into small, purposeful clusters instead of spreading them across the island. Create a coffee station with a tray, canister, and mugs, or arrange a cutting board beside a bowl and olive oil for a practical prep zone.
Keep each grouping visually connected, leaving clear space between clusters for balance and daily use. Repeat complementary Color schemes so the island feels intentional, not chaotic.
Coordinate Material choices, such as wood, ceramic, and metal, to add interest without creating visual noise.
| Cluster | Items | Purpose |
|---|---|---|
| Coffee | Tray, mugs, canister | Morning routine |
| Prep | Board, bowl, oil | Cooking access |
| Display | Vase, fruit, book | Decorative focus |
Anchor larger pieces first, then add smaller accents. You’ll achieve a polished arrangement when every object supports the island’s function or style.
Add a Focal Point With Varied Heights
Create a focal point by combining decor at different heights, such as a tall vase, a medium bowl, and a low tray. This layered arrangement draws the eye across your island and keeps the surface from looking flat.
Place the tallest piece slightly off center, then balance it with a medium-height object and a lower accent nearby.
Choose color schemes that complement your cabinets, backsplash, and surrounding finishes. For a calm look, pair soft neutrals; for more energy, add one bold hue through flowers, ceramics, or fruit.
Vary material combinations to create subtle contrast, such as glass beside wood or metal beside stone. Keep each piece visually distinct, but repeat one color or texture to connect the display.
Check the arrangement from every side of the island, since you’ll view it from multiple angles. Leave enough open space around the focal point so its height feels intentional rather than crowded.
Refresh seasonal accents to maintain interest.
Group Decor With a Functional Tray
A functional tray keeps your island decor organized while keeping everyday essentials within easy reach. Choose one that complements your kitchen’s style and fits comfortably on the countertop. Then, arrange items like oils, salt, or utensils inside it to create a tidy, practical display.
Choose the Right Tray
Choose a tray that fits your kitchen island while giving your decor a defined home. Measure the available surface first, then select a size that leaves breathing room around the arrangement.
A low-profile tray keeps the sightline open, while a deeper design adds visual weight to a spacious island. Match its shape to your countertop: rectangular trays suit long islands, and round trays soften square or angular surfaces.
Consider materials, too. Wood brings warmth, metal adds polish, and stone or ceramic creates a substantial, refined look.
Choose a finish that complements your cabinets, hardware, or lighting without matching everything exactly. For flexible tray styling, select handles or a lightweight construction.
Decorative trays can also introduce texture or color, helping your grouped decor look intentional, balanced, and easy to move.
Arrange Everyday Essentials
Once you have the tray in place, arrange the items you use most within easy reach. Place a salt cellar, pepper mill, olive oil, or favorite cooking utensil inside it, keeping daily essentials together instead of scattered across the counter.
Add a small bowl for keys, clips, or produce to give loose items a clear home. Balance function with style by choosing containers that complement your kitchen’s colors and materials.
Vintage accents, such as an antique crock or brass spoon, can add character without creating clutter. Refresh the arrangement with seasonal themes: tuck in a small pumpkin during autumn, or add a vase of fresh herbs in spring.
Leave enough open space around the tray for meal preparation, and remove anything you don’t use regularly to keep the island practical and polished.
Add Plants, Flowers, and Natural Texture
Bring life to your kitchen island with a potted herb, a vase of seasonal flowers, or a bowl filled with fresh fruit. Choose pieces that add color, scent, and texture without overwhelming your workspace.
Refresh your kitchen island with herbs, seasonal flowers, or fresh fruit that bring color, fragrance, and texture without sacrificing workspace.
Indoor greenery, such as basil, rosemary, or a compact fern, softens hard surfaces and keeps useful herbs within reach. Place plants in simple ceramic, terracotta, or woven containers that complement your kitchen’s finishes.
Use floral accents to introduce seasonal character. A small bouquet of tulips brightens spring, while eucalyptus or dried grasses offer texture and last longer.
Keep stems trimmed and select a low arrangement so you can still see across the island. Natural materials, including a wooden tray, woven basket, or stone vessel, create warmth and visual balance.
Group items in odd numbers, then leave breathing room around them. Rotate flowers, fruit, and greenery regularly to refresh the display and prevent the countertop from feeling crowded.
Protect the surface with coasters or mats beneath containers to catch moisture and soil.
Style Everyday Essentials Without Clutter
Keep the items you use daily—such as a cutting board, salt cellar, or fruit bowl—within easy reach, but give each one a defined place. Group related essentials on a tray to create visual order and make cleanup faster.
Choose attractive, hardworking pieces so your countertop feels intentional rather than crowded. A wooden board can lean against the backsplash, while a lidded container keeps frequently used utensils contained.
Limit duplicates and store anything you use less than once a day in a cabinet or drawer.
Use color coordination to connect these practical items with your kitchen’s palette. For example, select a ceramic crock that echoes your cabinets or add a bowl in a complementary shade.
Refresh the display with seasonal accents, such as a small bowl of apples in autumn or lemons during summer, but rotate rather than layer additions.
Leave generous open space around each group. That breathing room keeps your island functional, polished, and easy to wipe clean.
Coordinate Decor With Island Lighting
Your island lighting should guide the scale and placement of countertop decor. If you have oversized pendants, balance their visual weight with a substantial bowl, cutting board, or low vase.
Keep taller accessories away from the fixtures’ strongest sightlines so they don’t compete with the shades or block their glow. Under-cabinet strips and recessed fixtures create ambient lighting, so use decor with finishes that respond well to softer illumination.
Matte ceramics, warm wood, and brushed metal can add depth without producing distracting glare.
Use color coordination to connect your island display with the lighting and surrounding finishes. Repeat a pendant’s black, brass, or nickel detail in a tray, vessel, or utensil holder for a deliberate look.
If the fixtures make a bold statement, choose quieter countertop colors. If they’re simple, let one decorative piece introduce contrast.
Consider how light changes throughout the day, and select materials that maintain their appeal in both natural and artificial light. You’ll create a cohesive focal point that feels purposeful and inviting.
Adapt the Look for Small Islands and Edit Regularly
Small islands benefit from a lighter touch, so choose one functional centerpiece, such as a shallow tray, compact bowl, or small vase, and leave enough open space for food preparation. Follow minimalist design principles by limiting decorative pieces to essentials you can move quickly when cooking or serving.
Select items that support your routine, such as a lidded container for utensils or a small cutting board displayed on edge.
Use color coordination to create a polished look without adding clutter. Repeat one shade from your backsplash, cabinetry, or textiles in a bowl, vase, or tray. Keep heights low enough to preserve sightlines and conversation across the island.
If you need extra character, add one seasonal accent rather than several unrelated objects.
Edit your arrangement regularly. Remove anything you no longer use, replace wilted flowers, and return stray items to their proper homes.
After each update, assess the island’s function. You should have room to chop, eat, and gather comfortably. Your countertop should look intentional, never crowded.
Frequently Asked Questions
How Do You Protect a Kitchen Island Countertop From Heat Damage?
Protect your kitchen island countertop from heat damage by using heat-resistant pads beneath hot pots, pans, baking sheets, and small appliances. Don’t place heated cookware directly on stone, wood, laminate, or quartz surfaces.
Add protective covers when cooking, serving, or storing hot items, and choose thick, heat-rated materials for reliable insulation. Keep trivets within easy reach, wipe spills promptly, and follow your countertop manufacturer’s temperature guidelines to prevent discoloration, cracking, or warping.
What Countertop Materials Are Easiest to Clean and Maintain?
Quartz and solid-surface countertops are easiest for you to clean and maintain because they resist stains, need no sealing, and wipe clean with mild soap. Laminate offers cost effective choices, with many styles and simple upkeep, though it can scratch or scorch.
Stainless steel cleans quickly and handles heat well, while recycled glass and bamboo provide Eco friendly options. You’ll keep every surface looking fresh by avoiding abrasive cleaners, standing water, and harsh chemicals.
How Often Should Kitchen Island Decor Be Changed Seasonally?
How often should you refresh your kitchen island decor seasonally? Change your seasonal accessories about four times a year, aligning updates with spring, summer, fall, and winter.
You don’t need a complete redesign. Simply rotate decorative accents, such as flowers, candles, bowls, or linens.
Refresh items sooner if they look worn, clash with your kitchen’s style, or interfere with meal preparation. Keep everyday essentials practical, then add small seasonal touches for an easy, polished update.
Can Countertop Decor Damage Quartz, Marble, or Wood Surfaces?
Yes, countertop decor can damage quartz, marble, or wood surfaces if you place abrasive, wet, hot, or heavy items directly on them. Use decorative accessories with felt pads, trays, coasters, and trivets to prevent scratches, stains, heat marks, and dents.
Protect surfaces by wiping spills promptly, avoiding acidic cleaners on marble, and keeping wood dry. Lift items instead of dragging them, and regularly check pads for trapped grit or moisture underneath.
What Safety Considerations Matter When Decorating an Island With Children?
Your island’s cutest decoration shouldn’t become your child’s newest climbing challenge. Choose Childproof decor: secure heavy objects, avoid breakables, and keep small items away from curious hands and mouths.
Practice Sharp edge prevention by selecting rounded accessories, covering countertop corners, and removing knives, candles, and hot appliances after use. Don’t place stools beside the island unsupervised, and anchor anything tall that could topple.
Check decorations regularly for loose parts, damage, or hazards.
Conclusion
Decorating a kitchen island countertop should make life easier, not turn breakfast into an obstacle course. Clear the surface, measure your space, and choose pieces that match how you use the island.
Vary heights with a bowl, vase, or plant, then add texture without inviting clutter. Keep essentials within reach, coordinate with lighting, and edit often.
The best kitchen island countertop arrangement welcomes real life, mess and all. It can look beautifully styled without pretending nobody ever eats there.