How to Plan a Kitchen Remodel in 7 Steps
Planning a kitchen remodel can feel overwhelming, especially when you’re balancing design ideas, costs, and construction details. You’re not alone—many homeowners struggle to know where to begin.
This guide to how to plan a kitchen remodel in 7 steps will help you move forward with confidence.
Plan your kitchen remodel in seven steps: define the project scope, set a realistic budget with a 10–20% contingency, and map an efficient layout and workflow.
Choose durable appliances, materials, and coordinated finishes, then hire a qualified, insured contractor with strong references.
Approve final plans, permits, payment milestones, and the project schedule.
Finally, prepare your home by protecting nearby areas and creating a temporary kitchen.
The following guidance will help you manage each step confidently.
Key Takeaways
- Define your remodel scope, assess problems, measure the space, and determine whether you need cosmetic updates or a complete redesign.
- Plan an efficient layout by mapping work zones, improving traffic flow, and accounting for clearances, doors, windows, utilities, and seating.
- Establish a detailed budget for materials, appliances, labor, permits, and a 10–20% contingency reserve.
- Select durable, coordinated materials and finishes by comparing samples under natural and artificial lighting.
- Hire a qualified, insured contractor, finalize permits and schedules, organize documentation, and prepare your home for construction.
Define Your Kitchen Remodel Scope

Start by defining the scope of your kitchen remodel: decide whether you’re making cosmetic updates, replacing key features, or redesigning the entire layout. Then list what works, what fails, and what you want to change.
Define your kitchen remodel’s scope by identifying what works, what fails, and which changes matter most.
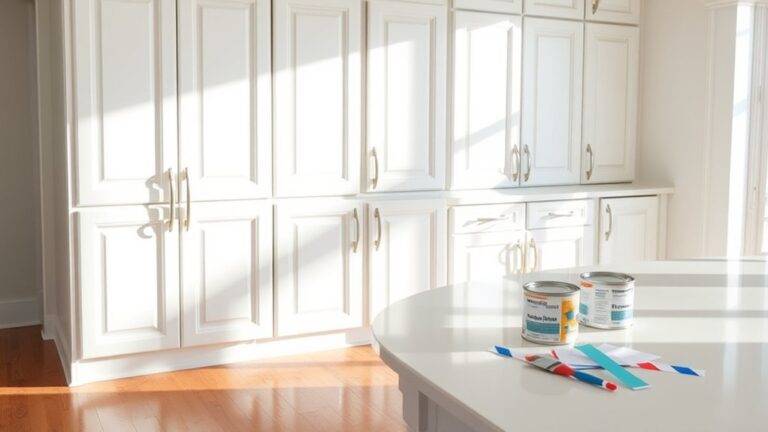
Cosmetic updates might include paint, hardware, cabinet styles, backsplash materials, countertops, or lighting options. Replacing key features could involve new appliances, cabinets, flooring, plumbing fixtures, or a sink.
A full redesign may require changing the kitchen’s footprint, moving walls, relocating utilities, or improving traffic flow. Measure the existing space and note doors, windows, outlets, vents, and plumbing connections.
Identify your must-have functions, such as a larger work surface, better storage, or space for seating. Separate essential changes from preferences so your plan stays focused.
Consider how you cook, entertain, and move through the room each day. Create a written project description and collect reference images that reflect your goals.
This clear scope will guide design decisions, contractor conversations, and future planning.
Set Your Kitchen Remodel Budget

With your remodel scope defined, set a realistic budget before choosing materials or requesting contractor bids.
Begin with cost estimation for every major expense, including cabinets, countertops, appliances, flooring, lighting, plumbing, permits, labor, delivery, and disposal.
Request preliminary prices from local professionals and compare them with current material costs. Then create a budget allocation that reflects your priorities.
Reserve the largest shares for essential work and items you’ll use daily, while limiting spending on cosmetic upgrades that don’t improve function.
Add 10% to 20% for unexpected repairs, price changes, or scope adjustments.
Review your available cash, financing options, and monthly payment comfort before committing. Don’t rely on a contractor’s rough total without checking what it includes and excludes.
Track each estimate in a spreadsheet, update totals as decisions change, and keep a separate contingency fund.
A written budget helps you make confident choices and prevents attractive upgrades from derailing the project.
Plan Your Kitchen Layout and Workflow

Before you choose cabinets or appliances, take a close look at your available space and any limitations it presents. Then, map out zones for prepping, cooking, cleaning, and storage. Finally, plan the traffic flow so you can move easily and efficiently around the kitchen.
Assess Your Space
Assess your kitchen’s current layout by noting how people move between the refrigerator, sink, cooktop, and main work surfaces. Watch for bottlenecks, awkward turns, and doors or drawers that collide.
Measure the room’s length, width, ceiling height, and fixed features, including windows, doors, vents, outlets, plumbing, and structural walls. Record appliance dimensions and clearances so you’ll know what can stay, shift, or require professional changes.
Evaluate space utilization by identifying underused corners, crowded counters, and storage that’s difficult to reach. Observe natural lighting throughout the day, noting where shadows or glare affect food preparation and cleanup.
Photograph each wall and create a simple scaled sketch. Check flooring, cabinets, and walls for damage or unevenness, since repairs could affect your remodeling budget and timeline.
Map Work Zones
Map your kitchen’s main work zones around the tasks you perform most: storing food, preparing ingredients, cooking, and cleaning. Group related tools and appliances so each task feels natural, efficient, and easy to complete.
- Storage: Place the refrigerator, pantry, and everyday dishes near your main entry point for quick unloading and access.
- Preparation: Position cutting boards, knives, mixing bowls, and counter space beside the refrigerator and sink.
- Cooking: Keep the range, oven, cookware, spices, and utensils together while maintaining safe clearances.
- Cleaning: Locate the sink, dishwasher, trash, and recycling within a practical reach of preparation areas.
Use work zone separation to prevent one task from crowding another. Include safety planning around hot appliances, sharp tools, and wet surfaces.
Your layout should support each activity without combining incompatible functions.
Optimize Traffic Flow
Plan clear paths between the refrigerator, sink, range, pantry, and main entry points so people can move through the kitchen without interrupting meal prep. Observe your household’s traffic patterns before finalizing cabinet locations, islands, and appliance placement.
Keep frequently used routes wide enough for two people to pass safely, especially near the refrigerator and sink. Position the island so it won’t block cabinet doors, appliance handles, or walkways.
If children or guests regularly enter the kitchen, create a route that keeps them away from hot surfaces and sharp tools. Group related tasks to improve movement efficiency: store cookware near the range, dishes near the dishwasher, and snacks near an accessible counter.
Consider door swings, seating, and delivery access, too. A thoughtful layout reduces congestion, supports safer work, and makes everyday cooking feel easier.
Choose Kitchen Appliances, Materials, and Finishes
Compare appliance features with your cooking habits, budget, and energy goals in mind. Then, choose durable materials that can stand up to daily use. Coordinate your finishes and colors to create a cohesive kitchen design.
Compare Appliance Features
Once you’ve set your budget and cooking priorities, evaluate appliances by the features that matter most to your household. Compare models side by side, and consider how each option fits your routines, space, and maintenance preferences.
- Check energy efficiency ratings to estimate operating costs and reduce wasted power.
- Consider capacity and layout, ensuring the refrigerator, oven, or dishwasher suits your household size and cooking habits.
- Investigate smart technology, such as remote monitoring, recipe guidance, alerts, and voice controls, but choose only tools you’ll actually use.
- Compare convenience features, including adjustable racks, induction controls, self-cleaning cycles, quiet operation, and temperature settings.
Read reviews, verify warranty coverage, and test controls in a showroom when possible. Don’t pay extra for impressive-sounding functions that won’t simplify your daily cooking. Prioritize practical value over novelty.
Select Durable Materials
Choose materials and finishes that can withstand daily spills, heat, moisture, and cleaning without demanding constant upkeep. Evaluate each option for strength, maintenance, and expected lifespan before you commit.
For work surfaces, granite countertops resist heat, scratches, and everyday stains when you seal them as recommended. Quartz offers similar durability with minimal maintenance, while sealed solid-surface materials provide seamless repairs.
For flooring, choose hardwood flooring with a durable factory finish, or consider porcelain tile for excellent moisture and impact resistance. Select cabinet boxes and doors made from quality plywood or sturdy engineered wood, especially around sinks and dishwashers.
Check product warranties and care instructions, and order samples to test texture and resistance. Account for your household’s cooking habits, pets, and traffic so your choices continue performing well for years without frequent replacement or refinishing.
Coordinate Finishes and Colors
Coordinate appliance finishes, cabinet colors, countertops, backsplashes, and hardware so each element contributes to a cohesive kitchen design. Start by choosing one dominant tone, then build supporting shades around it. Your color coordination should feel intentional without making every surface identical.
- Match stainless steel, black, or brass appliances with complementary cabinet hardware.
- Compare countertop samples beside cabinet doors to check undertones in natural and artificial light.
- Choose a backsplash that connects your main colors while adding subtle texture or contrast.
- Limit your palette to three primary finishes for a polished, manageable look.
During finish selection, consider durability, cleaning needs, and how materials will age. You’ll create more visual harmony by repeating a finish strategically, such as using brass on pulls, lighting, and faucets.
Order samples before committing, because screens and showroom lighting can distort colors. This approach helps you avoid costly mismatches and keeps your remodeled kitchen welcoming.
Choose a Qualified Remodeling Contractor
A qualified remodeling contractor can turn your kitchen plans into a safe, durable, and well-executed renovation. Look for someone with proven kitchen experience, strong references, and a portfolio that reflects your style and project scale.
Ask friends, neighbors, or local trade associations for recommendations, then interview several candidates before choosing one.
Verify each contractor’s licensing requirements, including current registration, trade credentials, and any required local qualifications. Request proof of insurance coverage, including general liability and workers’ compensation, and confirm that policies remain active throughout the work.
A reputable professional will provide these documents without hesitation.
Ask for recent client references and contact them about communication, workmanship, reliability, and how the contractor handled unexpected issues. Read reviews, but weigh detailed feedback more heavily than star ratings.
You should also compare written estimates that clearly separate labor, materials, allowances, and payment expectations. Finally, choose a contractor who listens carefully, answers directly, and communicates consistently.
Trust your judgment if anything feels unclear, rushed, or evasive.
Approve Plans, Permits, and the Project Schedule
Before work begins, review and approve the final kitchen plans with your contractor. Check the layout, materials, fixtures, electrical work, plumbing, and finishes.
Confirm every detail reflects your needs and budget before giving written Design approval.
- Verify scope: Check dimensions, appliance locations, cabinet details, lighting, outlets, ventilation, and finish selections. Ask questions about anything unclear.
- Confirm permit acquisition: Ensure your contractor identifies required building, electrical, plumbing, or mechanical permits. Confirm they handle submissions, fees, inspections, and approvals.
- Set payment milestones: Match deposits and progress payments to measurable stages, such as ordering materials, completing rough-ins, and finishing installation.
- Approve the schedule: Review start and completion dates, ordering deadlines, inspection points, and potential delays. Request updates when conditions change.
Keep approved drawings, specifications, permits, and the schedule together for reference.
Clarify who’ll make decisions, document revisions, and communicate with inspectors.
Don’t authorize construction until responsibilities, costs, allowances, change-order procedures, and the final timeline appear in writing.
Get Your Home Ready for Construction
Once your plans, permits, and schedule are approved, prepare your home for construction by clearing the kitchen and nearby areas, protecting adjacent floors and furniture, and setting up a temporary space for cooking, food storage, and cleanup.
Pack dishes, pantry items, and small appliances in labeled boxes, then store them away from dust and traffic. Remove wall art, curtains, and fragile decorations near the work zone.
Use plastic sheeting and floor coverings to separate construction areas from living spaces. Confirm where workers can enter, park, and dispose of debris.
Discuss noise mitigation with your contractor, especially if you work from home, have young children, or own pets. Establish quiet hours and consider earplugs or a temporary relocation during demolition.
Your temporary kitchen might include a microwave, electric skillet, coffee maker, refrigerator, and washable prep surface.
Treat this preparation like Home staging: organized, uncluttered spaces help crews work efficiently and reduce damage, delays, and daily disruption.
Frequently Asked Questions
How Long Will I Be Without a Functional Kitchen During Remodeling?
You’ll typically be without a functional kitchen for two to eight weeks, depending on your project’s size, permits, material availability, and contractor schedule. Small updates may take less time, while structural changes can extend the disruption.
Discuss timeline expectations before work begins, and identify renovation milestones, such as demolition, cabinet installation, and appliance hookups. Set up a temporary kitchen elsewhere with a microwave, refrigerator, coffee maker, and basic dishes to maintain convenient meal preparation.
Where Can I Prepare Meals While My Kitchen Is Under Construction?
You can prepare meals in a dining room, garage, laundry area, or outdoor space; 60% of homeowners create a temporary kitchen during renovations.
Set up a microwave, toaster oven, electric skillet, and refrigerator near an outlet and water source. Build dedicated meal prep stations on a sturdy table, and keep dishes nearby.
For comfortable temporary dining, use your dining room or patio. Choose easy recipes, protect surfaces, and store supplies in labeled bins.
How Should I Protect Nearby Rooms From Construction Dust and Debris?
Install plastic dust barriers from floor to ceiling around the work area, sealing edges with painter’s tape and using a zippered entry. Add protective flooring, such as adhesive film or heavy-duty paper, through nearby rooms and hallways.
Keep doors closed, cover vents, and shut off HVAC circulation when possible. Use debris containment bags or bins, and ask contractors to clean daily.
You’ll reduce dust migration by maintaining negative air pressure with a filtered exhaust fan.
What Should I Do With My Pets During the Remodeling Project?
For pet safety, give your animals a quiet temporary shelter away from noise, dust, tools, and open doors. Like a calm harbor in a storm, this space should include familiar bedding, food, water, toys, and identification tags.
Ask a trusted friend, boarding facility, or sitter for help if construction becomes stressful. Keep pets separated from workers, inspect barriers daily, and maintain their routine.
Watch for anxiety, escape attempts, or breathing problems, and contact your veterinarian if needed.
How Can I Minimize Stress and Disruptions During the Renovation?
Minimize stress and disruptions by setting a realistic timeline, creating a temporary kitchen, and communicating regularly with your contractor. Protect nearby rooms with plastic sheeting, seal off dust, and schedule noisy work when you’re away.
Keep essential appliances accessible, and store meals or supplies elsewhere. Your design budget should include contingency funds for surprises, while careful contractor selection helps prevent delays, confusion, and costly mistakes.
Review progress weekly and adjust plans promptly.
Conclusion
Planning a kitchen remodel in seven clear steps helps you control costs, avoid delays, and create a space that fits your life. Remember, the average kitchen remodel can take several weeks or longer, so thoughtful preparation matters.
Define your scope, budget carefully, map your workflow, select durable finishes, hire the right contractor, finalize approvals, and prepare your home. With a realistic plan and open communication, you’ll turn construction challenges into a kitchen remodel you’ll enjoy for years.