How to Install Kitchen Countertops in 5 Steps
Installing kitchen countertops can feel intimidating, especially when you’re worried about uneven cabinets, inaccurate cuts, or damaging an expensive surface. You’re not alone—many people struggle to get every measurement and detail right.
The good news is that learning how to install kitchen countertops becomes much easier when you break the project into clear, manageable steps.
Install kitchen countertops in five steps. First, level and secure the cabinets, using shims and a long level.
Next, measure and mark overhangs, seams, and sink placement, confirming every dimension.
Then, trace the sink template, drill starter holes, and cut safely with proper support and protective gear.
Align the countertop, clamp sections, and fasten it from underneath.
Finally, finish exposed edges and seal only compatible materials.
Follow these steps closely for results you’ll appreciate as you investigate each detail.
Key Takeaways
- Level and secure the cabinets, checking alignment with a long level and using shims where necessary.
- Measure countertop overhangs, seams, corners, and sink placement, confirming all dimensions before cutting.
- Mark and cut the sink opening with the correct template, blade, support, and protective equipment.
- Position, align, shim, clamp, and fasten the countertop to the cabinets without penetrating its surface.
- Finish exposed edges appropriately, seal compatible materials, and allow adhesives or sealers to cure fully.
Level the Cabinets and Gather Your Tools

Before installing the countertop, make sure the cabinets are level, secure, and properly aligned. Place a long level across each cabinet run, then check it from front to back.
Adjust the cabinet legs or insert shims beneath the bases until every unit sits evenly. Fasten cabinets to adjacent units and wall studs, tightening screws without pulling the boxes out of alignment.
Confirm that doors and drawers open freely, since movement can reveal shifting or uneven support. Good Cabinet stability prevents cracks, gaps, and countertop movement after installation.
Gather the tools you’ll need before you begin: a level, tape measure, drill, driver bits, screws, shims, pencil, clamps, and safety glasses.
Inspect each tool for damage, and verify Tool calibration before relying on precision readings. Replace worn bits, charge batteries, and keep fasteners within reach.
Protect finished cabinet surfaces with padding, and clear the work area of debris. Wear eye protection when drilling, and enlist help when handling heavy materials.
Keep the installation area organized so you can work safely and efficiently.
Measure for Overhangs, Seams, and Sink Placement
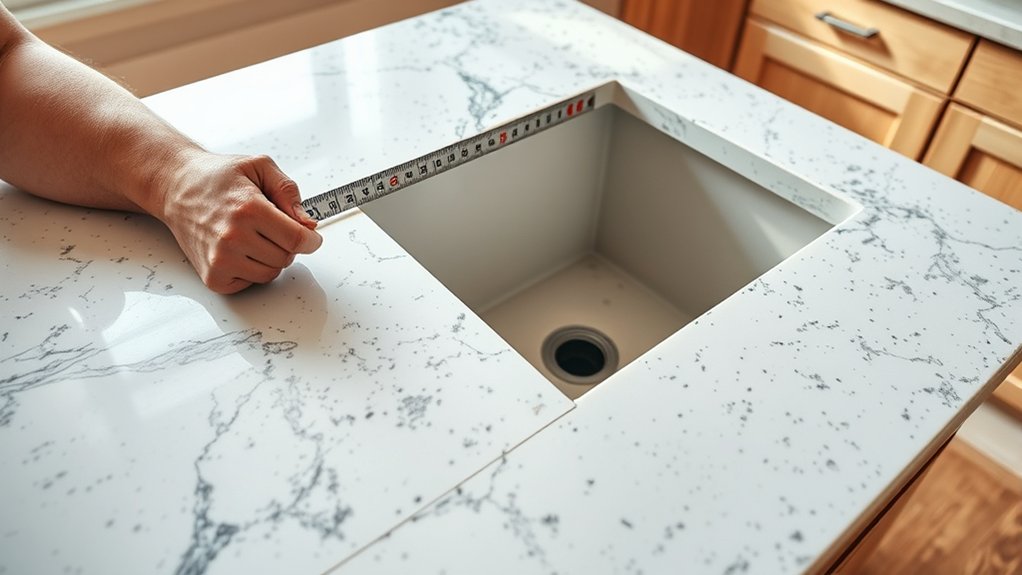
Measure the cabinet run carefully to establish the countertop’s total length, then mark the intended overhang, seam locations, and sink position. Extend the front edge beyond the cabinet faces consistently, typically enough to protect doors and drawers, and confirm clearance at corners, appliances, and walkways. Use a straightedge and tape measure, recording each dimension twice.
- Plan overhangs: Check your countertop material selection for manufacturer limits, especially with stone or solid surfaces. Identify where brackets or support legs may be required.
- Map seams: Keep seams away from sink cutouts, corners, and high-use areas when possible. Verify that adjoining cabinets sit level and provide stable support.
- Locate the sink: Center it within the cabinet unless your layout requires an offset. Confirm the sink’s dimensions, reveal preference, faucet clearance, and plumbing access before finalizing the template.
Label every measurement and photograph the layout for reference. Don’t cut yet. Later, you’ll apply precise adhesive application techniques after dry-fitting and confirming all pieces align.
Mark and Cut the Sink Opening Safely

With the countertop supported on a stable work surface, transfer the sink template and verify its position against the cabinet, faucet, and plumbing clearances. Tape the template securely, then trace its outline with a sharp pencil.
> Secure the countertop, confirm sink clearances, and trace the template precisely before cutting.
Check the dimensions twice, including the required reveal or lip, because marking accuracy determines the sink’s fit. Drill starter holes inside each corner, keeping them large enough for your jigsaw blade but outside the finished line.
Put on safety glasses, hearing protection, and a dust mask. Support the cutout so it won’t fall and damage the countertop as you finish the cut.
Clamp a straightedge or guide where helpful, and use a blade designed for your countertop material. Cut slowly from the underside when the manufacturer recommends it, minimizing chips on the visible surface.
Keep both hands clear of the blade, unplug the tool before adjustments, and don’t force it through tight turns. Vacuum dust promptly and smooth the edge without enlarging the opening.
These cutting safety steps help produce a clean, controlled result.
Align and Secure the Countertop
Once the sink opening is cut and its edges are smooth, set the countertop on the cabinets to check its fit. Center it from side to side, then align the front edge with the cabinet faces. Leave the manufacturer’s recommended clearance at walls and appliances.
Check the surface with a level and adjust low spots with shims, not force.
Use these installation techniques to create a stable, even base:
- Place shims beneath support rails or cabinet corners until the countertop sits level without rocking.
- Clamp adjoining sections carefully, keeping their edges flush while you verify alignment.
- Drive screws through cabinet brackets into the countertop’s underside, stopping before they can penetrate the surface.
Choose fasteners suited to your countertop materials. For stone or solid surfaces, use manufacturer-approved clips or brackets rather than drilling blindly.
Tighten each fastener gradually and alternate locations to distribute pressure. Recheck the level, wall clearance, and seams before moving on to edge finishing. Don’t shift the countertop after securing it.
Finish the Edges and Seal Compatible Materials
After the countertop is firmly secured, finish exposed edges according to the material’s requirements. For laminate, use a matching edge strip, apply contact cement, and trim excess material with a file or router.
For solid-surface countertops, sand the edge progressively until it matches the desired sheen. With wood, smooth the edge, soften sharp corners, and apply several coats of food-safe finish, sanding lightly between coats.
Stone edges usually require professional fabrication, but you can polish minor roughness with manufacturer-approved pads and equipment. Wear eye protection and keep dust controlled throughout edge finishing.
Complete material sealing only when the surface and product are compatible. Apply the recommended sealer evenly to natural stone, concrete, or other porous materials, then remove excess before it dries.
Don’t seal nonporous quartz or surfaces that require a different treatment. Let the sealer cure for the specified time before installing the backsplash or using the counter, and follow the product instructions carefully.
Frequently Asked Questions
How Much Does Professional Countertop Installation Typically Cost?
Professional countertop installation typically costs $40–$100 per square foot, including labor, though your total depends on material, layout, edge details, and local rates. You’ll often pay more for quartz, granite, complex seams, or demolition and disposal.
Ask contractors for itemized estimates covering fabrication, plumbing reconnection, and installation tools. Your countertop design also affects pricing, so compare several quotes and confirm warranties, timelines, and any required permits before hiring a professional for your project.
Which Countertop Materials Are Easiest for Beginners to Install?
Laminate and butcher block countertops offer the gentlest learning curve for beginners. You’ll find laminate lightweight, affordable, and simple to cut, while butcher block welcomes sanding and straightforward fastening.
Tile can also suit patient DIY installation, though grout adds extra steps. In your Material comparison, consider tools, weight, seams, and finish requirements.
Soapstone and solid-surface slabs look inviting, but their weight and precision needs may call for professional help.
How Long Should Countertop Adhesive Cure Before Using the Kitchen?
You should usually wait 24 hours before using your kitchen after applying countertop adhesive. Check the product label, because some adhesives require 48 hours, especially in cool or humid conditions.
During adhesive curing, don’t place appliances, cookware, or heavy items on the countertop, and avoid water near seams. Allowing the adhesive to cure fully improves Countertop longevity.
If seams still feel soft or shift, wait longer before regular use.
Can Existing Countertops Be Installed Over Without Removing Them?
Sometimes, you can give your kitchen’s old surface a fresh disguise by installing new countertops over it. You’ll need a flat, solid base, adequate support, and enough clearance for sinks, appliances, and edges.
Thorough Surface preparation matters: clean, sand, and repair imperfections so the new material bonds securely. However, Countertop removal remains the safer choice when damage, moisture, unevenness, or outdated construction could compromise the installation or finish.
How Should Countertops Be Maintained After Installation?
Maintain your countertops by cleaning spills promptly, using cutting boards, and avoiding hot pans directly on the surface. Your Cleaning tips should include mild soap, warm water, and a soft cloth; skip abrasive cleaners and harsh chemicals.
Inspect seams and edges regularly for moisture damage. For minor scratches or chips, follow manufacturer-approved Repair techniques, such as polishing or color-matched filler.
Reseal porous materials as recommended, and address leaks immediately to prevent lasting damage.
Conclusion
With your cabinets level, measurements accurate, sink opening safely cut, countertop aligned, and edges finished, you’re ready to enjoy a professional-looking kitchen upgrade. Take your time, check each fit, and follow the manufacturer’s instructions for sealing and support.
By working methodically and protecting compatible materials, you’ll create a durable surface that looks great and serves your kitchen well for years. Follow these steps for installing kitchen countertops, and finish your project with confidence.