How to Style Open Kitchen Shelves
Open kitchen shelves can look beautiful, but keeping them organized and clutter-free is a common challenge. You’re not alone—many people struggle to balance everyday function with a polished, welcoming style. The right products and simple styling ideas can make all the difference.
Style open kitchen shelves by planning placement around daily use, outlets, windows, and counter clearance. Choose shelf colors and materials that complement your kitchen. Keep mugs, bowls, plates, and oils within easy reach, then add decorative accents for personality.
Layer tall, medium, and low items, grouping pieces in threes and leaving breathing room. Include hardy plants, varied textures, and seasonal touches. Edit clutter regularly, and continue for more practical styling ideas and inspiration.
Key Takeaways
- Organize shelves by function, keeping everyday mugs, bowls, plates, oils, and glassware within easy reach.
- Coordinate shelf materials and colors with your cabinets, countertops, backsplash, and overall kitchen style.
- Create visual balance by varying item heights, layering pieces, and leaving space between groupings.
- Mix practical essentials with limited decorative accents, using natural textures such as wood, ceramics, rattan, and linen.
- Add suitable plants or seasonal accessories. Regularly remove clutter, dust items, and refresh arrangements.
Plan Your Open Shelf Layout First
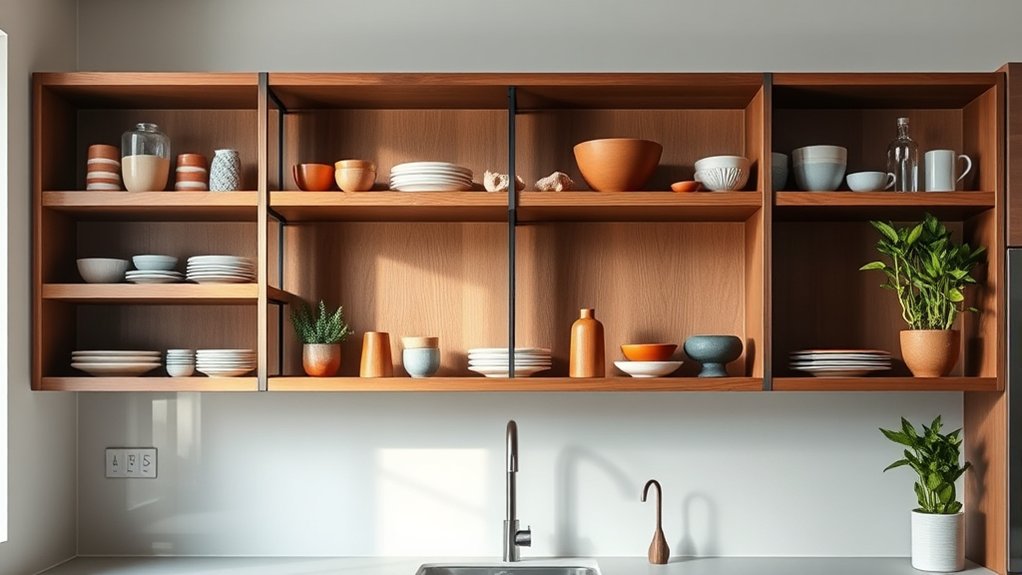
Before you install anything, plan your open shelf layout around how you use the kitchen. Identify the items you reach for daily, then position shelves where you can grab them without crossing busy prep areas.
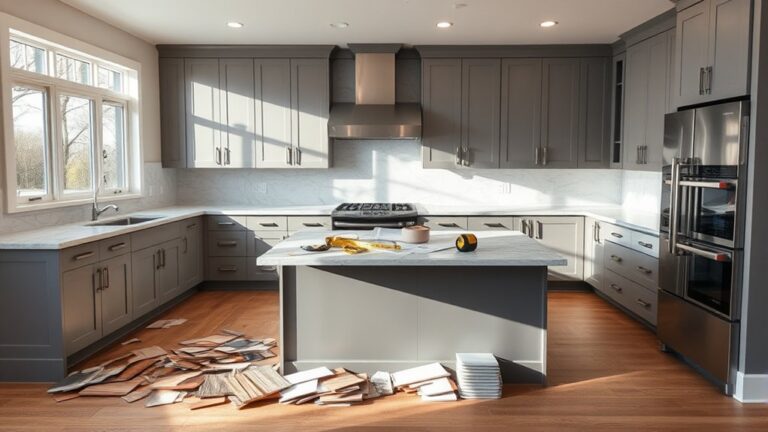
Keep frequently used plates, mugs, and glasses at a comfortable height, while reserving higher shelves for occasional serving pieces. Measure your wall carefully, noting outlets, switches, windows, cabinets, and appliances that could limit placement.
Place everyday dishware within easy reach, and account for wall features that may restrict shelf placement.
Consider wall placement in relation to your work triangle, and leave enough clearance above counters for safe food preparation. Test your proposed arrangement with painter’s tape before drilling; you’ll quickly spot awkward spacing or blocked sightlines.
Think about shelf depth, too. Shallow shelves keep walkways open, while deeper shelves provide room for larger cookware.
Finally, review your lighting options. Verify shelves won’t cast shadows over counters, and add under-shelf lighting if your workspace needs brighter, more focused illumination.
This planning makes installation smoother and daily routines easier.
Choose a Simple Shelf Color Palette
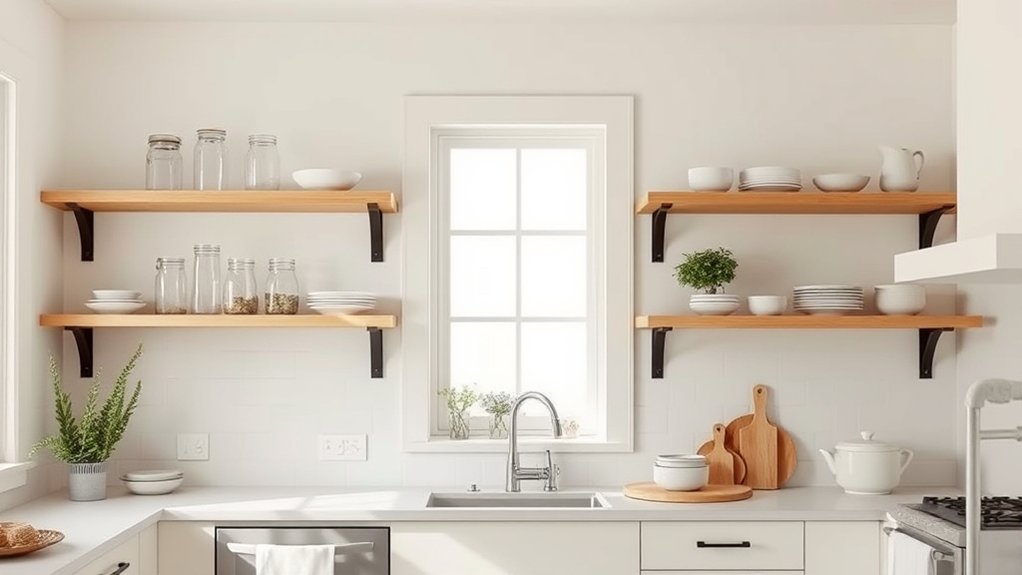
Choose a shelf color palette that complements your cabinets, countertops, and backsplash without competing with them. Start with one dominant tone, then add one supporting shade for a calm, connected look.
Natural wood works well with white, gray, or muted green kitchens, while painted shelves can echo a cabinet color or create gentle contrast.
Consider how lighting changes each color throughout the day. Warm bulbs can make creamy whites appear yellow, while cool light may emphasize blue or gray undertones.
Test samples beside your backsplash before committing, and view them in morning and evening light.
Keep hardware and brackets within the same visual family to strengthen color coordination. A restrained palette also simplifies shelf maintenance because dust, spills, and wear remain easier to spot and address.
Choose durable finishes that wipe clean without losing their color. When the surrounding finishes already make a statement, let your shelves stay quiet, consistent, and visually supportive.
Mix Kitchen Essentials With Decorative Accents
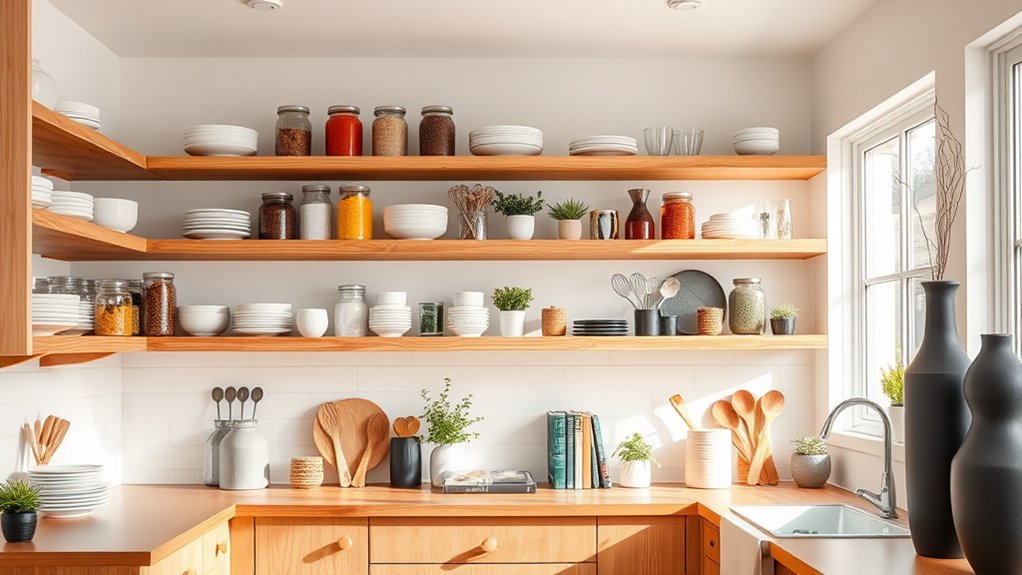
Once your shelf colors feel settled, combine everyday kitchen essentials with a few decorative accents to keep the display useful and inviting. Start with items you reach for often, such as mugs, bowls, plates, and glassware.
Blend everyday kitchenware with thoughtful accents to create shelves that feel both practical and inviting.
Then add personality through a small vase, framed print, patterned pitcher, or natural wood cutting board. Keep decorative pieces purposeful, so they improve the kitchen without crowding your storage.
Use color coordination to connect practical pieces with accents. For example, pair blue bowls with blue-toned artwork, or repeat warm metals through canisters and a small sculpture.
Vary finishes, but avoid introducing too many unrelated colors. Lighting techniques can also highlight your arrangement. Install under-shelf lights or aim nearby fixtures toward favorite pieces.
Choose accents that reflect your style and fit your routine. If an item rarely serves a purpose or attracts dust, replace it with something useful.
Your shelves should look personal, feel accessible, and support daily cooking without sacrificing visual charm.
Layer Items to Add Height and Depth
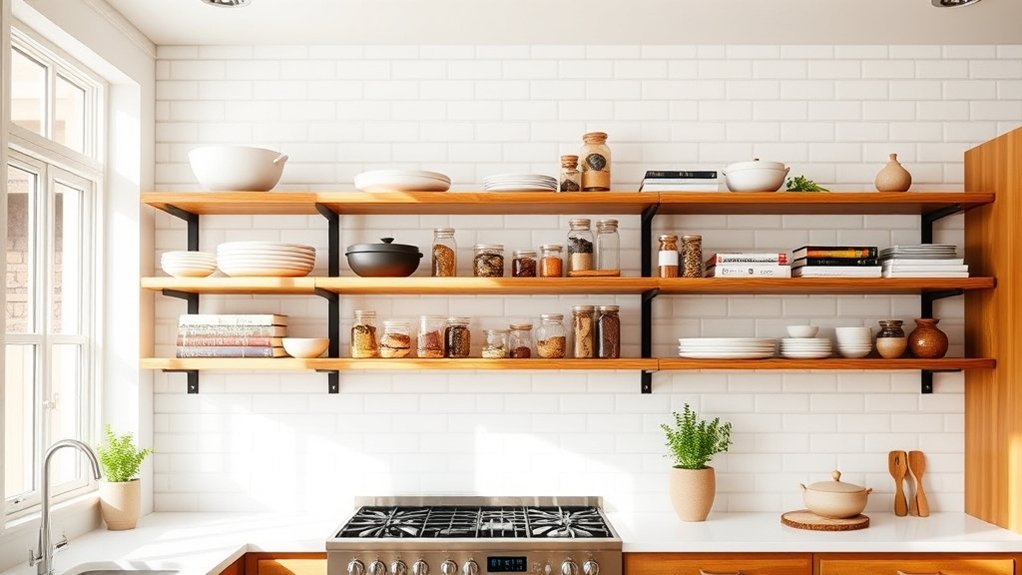
Layer items at different heights to keep your open shelves visually interesting. Place taller pieces behind shorter ones to create depth while keeping essentials visible. This creates a balanced display that feels thoughtfully arranged.
Vary Item Heights
Give your open shelves a more dynamic look by mixing tall, medium, and low items instead of lining everything up at one height. Vary item heights with a pitcher beside stacked bowls, then place a small jar near the edge.
This simple rhythm keeps each shelf lively without feeling crowded. Incorporate contrasting textures, such as smooth ceramics, woven baskets, and ribbed glass, to make each height stand out.
| Height | Useful item | Placement |
|---|---|---|
| Tall | Pitcher | Back corner |
| Medium | Canister | Center |
| Low | Bowl | Front edge |
| Mixed | Cookbooks | Horizontal stack |
Repeat the pattern across your shelves, but don’t match every arrangement. Let one tall piece anchor each section, while shorter pieces balance it.
Keep frequently used items within easy reach, and edit anything that makes the display feel uneven or cramped.
Create Visual Depth
Varying item heights creates rhythm, while layering items adds visual depth and makes each shelf feel more intentional. Place larger pieces behind smaller ones, such as a cutting board behind a bowl or framed print behind a vase.
Let a few objects overlap, but keep each item partly visible so the display remains practical and balanced.
Use these techniques to build depth without creating clutter:
- Lean boards, trays, or artwork against the wall.
- Set jars or canisters in front of taller pieces.
- Stack two or three books beneath a decorative object.
- Leave small gaps between layers for breathing room.
Repeat shapes or tones for Color coordination, then mix finishes to add interest.
Incorporate baskets and covered containers as attractive storage solutions. Keep frequently used essentials within easy reach while concealing less attractive kitchen supplies.
Arrange Shelf Decor in Groups of Three
Group shelf decor in threes to create a balanced, visually engaging arrangement without making the shelves feel crowded. Choose three items with different heights, such as a low bowl, a medium container, and a taller vase. This variation guides your eye across the display and keeps each grouping lively.
Use center shelf arrangements to establish a focal point, then repeat the grouping approach on nearby shelves for consistency. You don’t need identical objects; instead, connect pieces through color, shape, or function.
Color coordination techniques, such as repeating one accent shade in each trio, help the shelves look intentional without seeming overly matched.
Leave a little space between groups so every trio remains distinct. If a grouping feels heavy, replace one large piece with a smaller option or shift the tallest item toward the back.
Step away periodically and assess the full arrangement. You’ll quickly spot uneven spacing, distracting repetition, or a trio that needs editing.
Add Texture With Natural Materials
Natural materials add warmth and tactile contrast to open kitchen shelves. Use them to soften hard ceramics, glass, and metal while creating a relaxed, collected look.
Choose pieces with visible grain, woven detail, or gently irregular surfaces so your display feels layered without becoming cluttered.
- Add a small wooden bowl or turned utensil holder for warmth and practical storage.
- Drape textured textiles, such as linen towels, over a shelf edge to introduce softness.
- Place a rattan basket nearby to conceal rarely used tools while adding pattern and depth.
- Display stoneware, marble, or terracotta pieces to bring earthy color and subtle variation.
Natural fibers, including cotton, jute, and seagrass, work especially well in baskets, runners, and napkin bundles.
Keep the palette cohesive by repeating one or two finishes across shelves. Balance rough textures with smooth dishes, and leave breathing room around each material.
You’ll create visual interest that feels intentional, functional, and inviting rather than overly styled. Rotate a few pieces seasonally to keep the arrangement fresh without buying unnecessary decor.
Use Plants to Bring Shelves to Life
Plants add color, height, and a fresh sense of life to open kitchen shelves. Choose hardy varieties that tolerate indirect light, such as pothos, herbs, or compact succulents.
Let trailing stems soften straight lines, while upright plants add useful height without crowding dishes.
| Plant choice | Best shelf role |
|---|---|
| Pothos | Trailing accent |
| Basil or thyme | Fresh, practical greenery |
| Small succulent | Low-profile detail |
Build plant arrangements with varied sizes, but leave breathing room around every pot. Place heavier containers on lower shelves for stability, and reserve upper shelves for lightweight planters.
Your greenery placement should balance the shelf rather than hide it, so keep favorite bowls and serving pieces visible. Rotate pots occasionally to encourage even growth, and check leaves for dust during regular cleaning.
Use saucers beneath containers to protect the wood or metal from moisture. If natural light is limited, choose low-light plants or add a small grow light nearby.
Group two or three plants in a loose triangle, then repeat a color or texture through nearby accessories for a cohesive display.
Don’t overfill; a few healthy plants will look fresher than a crowded collection.
Match Shelves to Your Kitchen Style
Choose shelves that echo your kitchen’s existing style, whether that means warm wood for a farmhouse room, sleek metal for an industrial space, or painted surfaces for a colorful modern design.
Let your architecture guide the finish, shape, and hardware so the shelves feel intentional rather than added on.
- Pair reclaimed wood with shaker cabinets, linen textures, and Vintage accents for a welcoming farmhouse look.
- Choose black brackets and raw timber to reinforce an industrial kitchen’s bold, practical character.
- Select slim shelves, concealed supports, and pale finishes when you prefer Modern minimalism.
- Coordinate painted shelves with cabinet or wall colors to create a cheerful, collected appearance.
You can also echo existing materials, such as matching walnut shelves to a butcher-block counter or metal supports to your faucet.
Keep the visual language consistent, but don’t make every element identical. A subtle contrast adds personality while preserving harmony.
When you match shelves to your kitchen’s style, they’ll look like part of the original design.
Keep Open Shelves Useful and Clutter-Free
Keep your open shelves practical by grouping similar items together, like plates, glasses, or mugs. Keep decorative pieces to a minimum so the space doesn’t feel crowded, and make sure to feature the essentials you use every day.
Group Similar Items
Group similar items, such as plates, mugs, bowls, or serving pieces, so each shelf has a clear purpose and a more orderly appearance. You’ll find what you need faster, and your kitchen will feel easier to maintain.
Assign one category to each section, then stack or line up pieces by size. For a balanced arrangement, use these four organizing checks:
- Place everyday plates together.
- Keep mugs near coffee supplies.
- Arrange bowls by diameter.
- Store serving pieces in one group.
Color coordination can strengthen each category without making the shelves feel rigid. Repeat one or two tones across neighboring groups to connect the arrangement.
You can also vary heights within a category while keeping shelf symmetry overall. Leave enough space to remove items comfortably, and return each piece to its assigned group after use.
Your shelves will stay practical, cohesive, and easy to reset.
Limit Decorative Pieces
Once your functional items are grouped, limit decorative pieces so the shelves remain useful and uncluttered. Choose only accents that add color, texture, or personality without competing with the kitchen’s purpose.
A small vase, framed print, or sculptural bowl can create interest, but you don’t need one on every shelf. Leave breathing room around each piece so the arrangement feels intentional rather than crowded.
For decorative balance, vary heights and shapes while keeping the overall palette restrained. You can repeat one material or color to connect separate shelves and prevent visual noise.
Practice clutter control by removing anything that collects dust, blocks access, or no longer feels meaningful. Step back regularly and edit the display; if an accent doesn’t serve the room, store it elsewhere.
Keep each shelf easy to clean and visually calm.
Use Everyday Essentials
Place the items you use most often, such as mugs, bowls, plates, or cooking oils, on open shelves where you can reach them easily. This approach keeps your kitchen practical while giving frequently used pieces a natural, lived-in look.
Group similar items together, and leave enough space between stacks so you can grab what you need without disturbing everything else.
To keep your shelves useful and clutter-free, prioritize:
- Everyday dishes you reach for daily
- Matching glasses or favorite mugs
- Cooking oils, salt, and frequently used spices
- A small basket for napkins or utensils
Rotate seasonal accessories into storage when their season ends, and display only a few vintage finds that complement your working essentials.
Edit regularly: if you don’t use something, relocate it. Your shelves should support your routine, not create extra work.
Refresh Shelves With Small Swaps
Refresh open kitchen shelves with a few small swaps rather than a full redesign. You’ll create a fresh look by changing color, texture, or height while keeping useful pieces within reach.
Try these seasonal swaps and organizational hacks:
| Swap | Fresh effect |
|---|---|
| Linen napkins | Adds soft color |
| Ceramic mugs | Introduces personality |
| Small plant | Brings natural texture |
| Wooden board | Warms neutral shelves |
Replace dark accessories with lighter ones in spring, then add richer tones for fall.
Group similar items, but leave breathing room between stacks so your shelves don’t look crowded. Trade one large object for two smaller pieces to create balance.
Move everyday dishes forward when guests arrive. You can also rotate artwork, cookbooks, and vases from other rooms for a no-cost update.
Before adding anything new, remove pieces you no longer use. These quick changes keep your kitchen functional, inviting, and easy to refresh whenever your taste or the season shifts.
Take a photo after styling so you can repeat your favorite arrangement later.
Frequently Asked Questions
How Much Weight Can Open Kitchen Shelves Safely Hold?
Open kitchen shelves typically hold 20–50 pounds per shelf, but your exact limit depends on the material, thickness, brackets, span, and wall anchors. Check the manufacturer’s rating before loading them.
You’ll improve safety by attaching brackets to studs, spacing supports closely, and distributing weight evenly. Keep heavy cookware low and reserve lighter items for decorative display.
Good shelf organization reduces strain, prevents sagging, and helps you spot damage before failure.
What Tools Are Needed to Install Open Kitchen Shelves?
You’ll need a tape measure, pencil, level, drill, drill bits, screwdriver, stud finder, and wrench to install open kitchen shelves. Choose bits that match your wall and hardware, and keep anchors nearby for hollow walls.
Prepare your shelf materials, including brackets, screws, and wall plugs. Your mounting techniques may require a masonry bit for brick or concrete.
Use a clamp or helper to hold each shelf steady while you secure it.
How Do You Clean and Maintain Open Kitchen Shelves?
You’ll keep open kitchen shelves sparkling with a routine that feels almost magical. Remove every item, then dust shelves with a microfiber cloth and wipe them using warm, soapy water. Dry them completely to prevent warping.
Clean dishes before returning them, and check for spills weekly. Refresh your decorative display while maintaining smart shelf organization.
Rotate rarely used pieces, avoid overcrowding, and promptly treat stains, grease, and moisture to preserve your shelves’ finish.
Are Open Shelves Suitable for Kitchens With Children or Pets?
Yes, open shelves can suit kitchens with children or pets if you plan carefully. Use sturdy brackets, secure shelves to wall studs, and store breakables, knives, medications, and cleaning products elsewhere.
Follow practical childproofing tips, such as placing heavy items low and fragile pieces high. For pet-safe storage, keep food, toxic ingredients, and small objects out of reach.
Choose washable bins, avoid dangling cords, and inspect hardware regularly for damage or loosening.
How Can Renters Install Shelves Without Damaging Walls?
You can install renter-friendly shelves by choosing freestanding units, tension shelves, or adhesive-mounted ledges rated for your items’ weight. For heavier storage, use removable hooks or brackets designed for damage-free removal, and follow every manufacturer instruction.
Keep shelf organization practical by placing lightweight dishes below eye level. Add a decorative display with plants, framed prints, or attractive containers.
Before moving out, remove hardware carefully, patch tiny holes, and touch up paint.
Conclusion
With a little planning, you can style open kitchen shelves that feel both beautiful and practical. Choose a simple palette, mix essentials with meaningful accents, and layer items for depth.
Group similar pieces, add plants, and match your kitchen’s style to create a cohesive look. Keep everyday items within reach, then make small seasonal swaps whenever you want a refresh.
Think of your open kitchen shelves as a stage where useful pieces shine like stars without overwhelming the room.